The Ultimate Kitchen Deep Clean Checklist

Kitchens get a lot of use, and with all the activity, it's no wonder that they can quickly become a mess. A deep clean is necessary to tackle all the built-up dirt and grime, but it can be daunting to know where to start. This comprehensive checklist will help you make sure your kitchen is sparkling from top to bottom!
Cleaning appliances:
Refrigerator
Deep cleaning a refrigerator can be a time-consuming process, but the results are worth it! Begin by unplugging the refrigerator, and removing all items from the shelves. Depending on what type of spill or mess you’re trying to clean up, use warm soap and water or household cleaners to address any tough stains. For more general cleaning, a simple solution of vinegar and water is an effective way to remove residue and keep your fridge smelling fresh.
Be sure to thoroughly rinse all surfaces with warm water before replacing any food items in the fridge. To get into tight crevices, use Q-tips or a soft toothbrush to help reach those hard-to-clean areas. Lastly, don’t forget to restock purified water for filtering purposes if you have access to such a device! A deep clean makes for healthy meals and safe storage of food in the kitchen over time - so take the time to make it happen!
Microwave
Deep cleaning a kitchen microwave doesn't have to be a daunting task. All it takes is some simple ingredients, a sponge, and a bit of elbow grease! To begin, mix two tablespoons of bicarbonate of soda and two tablespoons of white vinegar with one cup of hot water. Dip the sponge into the mixture and use it to scrub any sticky residue off the walls. Be sure not to leave any streak marks!
Once done, wipe down the interior with a damp cloth to remove any remaining dirt. Lastly, if your microwave has an odour, add a slice of lemon or lime and two cups of water into the cavity. Run it on full power for six minutes to be rid of bad smells altogether! Cleaning your microwave can now be as easy as pie – no more mess or stress!
Oven
Deep cleaning an oven can be a daunting task, especially when you consider all the time and effort involved. Fortunately, it's not as difficult as it seems! Start by taking out any racks and cleaning them separately with warm soapy water. Next, vacuum the inside of your oven to remove any loose particles or crumbs that might be lingering inside. You can then begin to deep clean by applying some baking soda to the bottom of your oven and mixing it with warm water until it creates a paste-like consistency. Apply this paste liberally over the entire inside and let it sit for up to an hour before scrubbing away with a notable bristle brush.
Afterwards, use a soapy cloth to completely remove the paste from the surfaces and give your kitchen oven one last wipe down before putting it in the racks and turning on your oven for about 30 minutes at 200 degrees Fahrenheit. This should finish off your deep cleaning with no further effort necessary!
Stovetop
Deep cleaning of your stovetop is an important part of kitchen maintenance. Often, food spills and kitchen grease can easily become stuck to the surface of your stovetop over time, making it difficult to keep clean. Fortunately, with the right steps and materials, you can restore your kitchen stovetop to a sparkling state in next to no time.
Start by taking off all grates and burner plates from the oven and use a damp cloth or sponge with dish soap to wipe away any residue or food spills. Next, sprinkle baking soda over the burners before using a mixture of water and white vinegar to create a paste that will help remove more stubborn marks. Leave it on for several minutes before wiping it off with a clean cloth. As a finishing touch, consider spraying on some all-purpose kitchen cleaners for additional shine.
Toaster & kettle
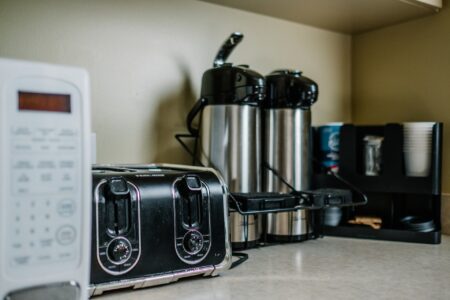
Cleaning kitchen appliances, such as a toaster and kettle can be an intimidating task given the small crevices and hard-to-reach places. However, with some time, elbow grease, and basic supplies like baking soda and vinegar, it doesn't have to be nerve-wracking! Begin by unplugging both appliances and wiping down their exterior surfaces with a damp cloth or rag. Next, tackle the interior of the toaster: remove the removable parts (crumb tray inside for example) to get at all the hidden areas. Place it in your sink and sprinkle on some baking soda followed by a splash of white vinegar. Allow this solution to sit for two minutes before rinsing it off.
Finally, take out the kettle from its base, fill it up with equal parts vinegar and water, boil it, and then let it sit for 30 minutes. Once that is done take an old toothbrush or scrub brush to knock off any remaining build-up. Then rinse thoroughly with clean water before replacing its base. With these steps, you can get your kitchen appliances squeaky clean again!
Washing machine
Keeping kitchen appliances clean is an important part of kitchen maintenance, and the washing machine is no exception. Deep cleaning a washing machine is an easy task that helps maintain your laundry appliance and ensure it runs smoothly. To start, remove all of the items from inside and around the machine. Check the lint trap for buildup, and vacuum the nozzle using an attachment if needed. Place something underneath your washing machine to prevent water damage when cleaning.
In a bucket, combine hot water with an appropriate non-toxic cleaner, then use a sponge or cloth to gently scrub down all of the exterior surfaces of your washing machine, paying special attention to any stubborn dirt spots. Then pour clean water over the front panel and open up the detergent drawer to properly rinse it out.
Finally, dry off all surfaces with a soft cloth or towel. Deep cleaning your washing machine will keep it hygienic and help it generate quality results by removing any built-up residue or gunk that could deteriorate performance in the long run.
Dishwasher
Deep cleaning a dishwasher is an often overlooked kitchen chore that should be part of any regular kitchen cleaning routine. Cleaning a dishwasher can be quite tricky, as most of us never think to look inside the unit itself. Many people forget about deep cleaning their dishwashers until it's too late and the buildup of debris has caused a foul odour or clogs. That is why it is important to deep clean your dishwasher once every three months - even if you run it regularly!
To deep clean a dishwasher, start by using warm water and mild detergent to wipe down the interior parts. For tougher dirt and gunk, use a mixture of vinegar and baking soda to scrub off any discolourations or residues that might have built up over time. After scrubbing, leave the door open for thirty minutes and allow air circulation from outside to help remove any remaining dirt.
Lastly, run through an empty wash cycle with standard detergent to finish off the cleaning process. With regular maintenance like this, you can make sure your dishwasher stays in optimal condition for years to come!
Cleaning surfaces:
Worktops
Deep cleaning of your kitchen worktop is essential as it prevents bacteria and germs from lingering on surfaces, leaving your space sparkling clean. The best way to deep clean kitchen worktops is to start with some warm water and a mild soap or detergent. Gently scrub the surface with a soft brush following the grain of the material before wiping it off with a damp cloth. You can use all-purpose spray cleaners for removing stubborn greasy stains, but make sure you rinse afterwards as the remaining chemicals could impact the worktop's finish.
For tougher marks, baking soda can be sprinkled on and then scrubbed off for an extra cleaning boost. Finally, finish off with a streak-free cloth and a residue-free solution to add lustre and shine and leave you feeling satisfied with a perfectly spotless kitchen worktop!
Kitchen cupboards
Kitchen cupboards are used frequently and can easily collect dirt, grime, and germs that can lead to illness or allergy flare-ups. Deep cleaning of these cupboards can help ensure a healthier kitchen environment. To deep clean kitchen cupboards, first, remove all items from the cupboards and put them in another location. Next, wipe the shelves with a warm damp cloth or sponge, adding an all-purpose cleaner if needed. If there are any tough stains or areas of build-up, use a scrubbing brush with a more concentrated cleaner to tackle them.
After wiping down the shelves, use a toothbrush to get into the hard-to-reach crevices of handles, knobs and other hardware. Once all surfaces have been cleaned thoroughly, dry everything off with a towel then vacuum out any remaining dirt in the cupboard using an attachment nozzle.
Finally, return all the items to their designated cupboard space - making sure you dispose of any expired food - for a sparkling and hygienic kitchen!
Splashback
Deep cleaning of the kitchen splashback is an essential household activity as it will significantly improve the look and feel of the kitchen. It also has health and safety benefits, as a deep clean will help to prevent bacteria and grime from building up on surfaces and potentially causing harm.
To deep clean your kitchen splashback you first need to remove extra items such as cups and crockery and clear away any loose dirt or dust. Then apply a cleaning solution specifically designed for kitchen surfaces, one that cuts through grease without damaging the surface itself, before scrubbing with a sponge or soft brush to ensure all dirt is removed. To finish, rinse off with warm water and then dry with a soft cloth or paper towel. Following these simple steps will ensure your splashback is looking as good as new!
Windows
Deep cleaning kitchen windows can be a time-consuming yet necessary task, as it helps keep all windows looking spotless. There are several easy steps that anyone can follow to get the job done effectively.
Firstly, gather your cleaning materials – a bucket of warm water mixed with a mild detergent, a non-abrasive sponge and window spray. Spray the window and wipe down with the sponge lightly if dirt or grease has built up over time. Rinse off with clean water, before drying completely with a cloth or lint-free paper towel. Finally, use glass cleaner sprayed onto newspaper to give an extra shine and sparkle to your sparklingly clean kitchen windows. Taking these steps will ensure that your windows remain clean for longer and look great at the same time!
Cleaning your kitchen sink & tap
Deep cleaning your kitchen sink and tap is an important part of hygiene at home. The best way to do it is by using a combination of warm water and lemon juice; the acidic nature of the lemon will help kill bacteria and leave your sink looking crisp and clean. It’s also important to scrub away any debris or residue that is stuck to the sink or tap, especially around the edges of the bowl or spout.
When finished, you should rinse off both surfaces with cold water and make sure that all chemicals are washed away properly. To prevent future build-up, you can also add a thin layer of vegetable oil on everything you finish cleaning as this helps repel dirt from sticking in the first place. With these easy steps, you’ll have a sparkling clean kitchen sink and kitchen tap in no time.
Mistakes to avoid when deep cleaning your kitchen
Don't forget to empty your fridge and freezer
This may seem like a no-brainer, but you'd be surprised how many people forget to do this simple step. Emptying your fridge and freezer will not only make it easier to clean, but it will also help you get rid of any food that's past its expiration date. So before you start scrubbing away, be sure to clear out your fridge and freezer. You'll be glad you did!
Don't use harsh chemicals on your countertops
Your countertops are one of the most important surfaces in your kitchen, so you'll want to be extra careful when cleaning them. Harsh chemicals can damage the finish on your countertops, so it's best to stick with gentle, non-abrasive cleaners. If you're not sure what kind of cleaner to use, ask a professional for advice.
Don't neglect your small appliances
Your coffee maker, blender, and toaster oven may not seem like they need to be cleaned very often, but over time they can accumulate dust and grime. To keep them in tip-top shape, be sure to give them a good cleaning at least once a month. And don't forget about those hard-to-reach places! Use a toothbrush or cotton swab to get at those pesky nooks and crannies.
FAQs
How often should you deep clean your kitchen?
Keeping your kitchen clean and tidy is essential for a healthy home and lifestyle. Deep cleaning of the kitchen is an important part of maintaining this cleanliness. How often you deep clean your kitchen will vary depending on many factors, such as the size of your family, the amount of time spent in the kitchen and how much food is cooked at home.
Ideally, you should aim to do a thorough deep clean every four to six weeks. This allows dirt, dust and grime to be eliminated before it builds up too much and affects the level of hygiene in the room. If your family enjoys cooking large meals or has frequent visitors over for dinner, increasing this deep clean frequency may be necessary. Take time to properly assess what fits best for your lifestyle – after all, having a clean kitchen means peace of mind!
Where should you start when you deep clean a kitchen?
Starting a deep clean of a kitchen can be intimidating, especially if you want to make sure everything is sparkling clean. The best place to start is usually with the floors and cupboards, as they are the two areas that tend to accumulate the most dirt and dust. Sweep or mop the floor, paying close attention to corners and hard-to-reach places, then move on to wiping down all surfaces in your kitchen - this includes any cabinets or shelves that may have accumulated food particles or grime.
Don't forget about small appliances too; give them a thorough cleaning and make sure their filters are changed too. After this, you just need to organize your belongings and put away items such as spices, dishes and utensils into designated cupboards or drawers. With this foundation laid down, you can start work on anything else in your kitchen – from polishing countertops to scrubbing walls and windows.
Conclusion
Kitchen deep cleaning can be daunting, but it's worth the effort. Follow our comprehensive kitchen deep clean checklist to make the process a little less overwhelming and more manageable. Tackle one task at a time and before you know it, your kitchen will be sparkling clean! Have you ever done a full kitchen deep clean? If so, what tips would you add to this list?
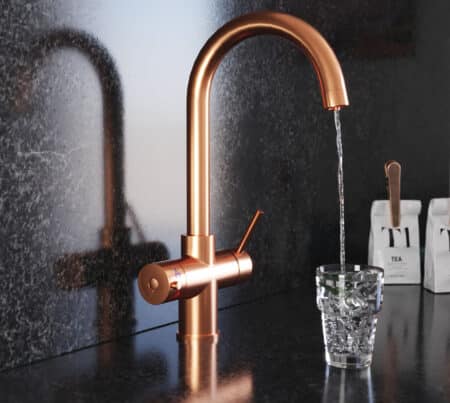
Upgrade your kitchen sink with a boiling water tap. Find out more about how a boiling water tap works here.

