How to Install a Boiling Water Tap
Boiling water taps have revolutionised the modern kitchen, drastically cutting down on the time it takes to complete everyday tasks and chores. If you’re ready to upgrade your kitchen with a boiling water tap, the process to install one is actually much simpler than you might think. Stick with us as we show you how you can do it at home.
Demonstration videos
We've created installation videos for each of our taps so you can see exactly how each piece fits together. I recommend you start by watching the videos before reading the step-by-step instructions and attempting the installation yourself.
Installing 3-in-1 taps
In the video below, we show you how to install the Avista 3-in-1.
You can find a separate video for Astra here. Installation of Avista can be done by following the instructions for Athena.
Installing 4-in-1 taps
In the video below, you can watch us as we install Quantum.
There is a separate video for Platinum here.
You can view all of our installation videos on our YouTube channel here.
Step-by-Step Instructions
Here’s our handy guide on boiling water tap installation, step-by-step:
1) Switch off your water supply
Before you start the installation process, make sure to switch off your water mains supply. This will help prevent any accidents from occurring during the installation; I'm sure we'd all prefer your kitchen floor remains dry and undamaged!
2) Measure out the best space for your boiler
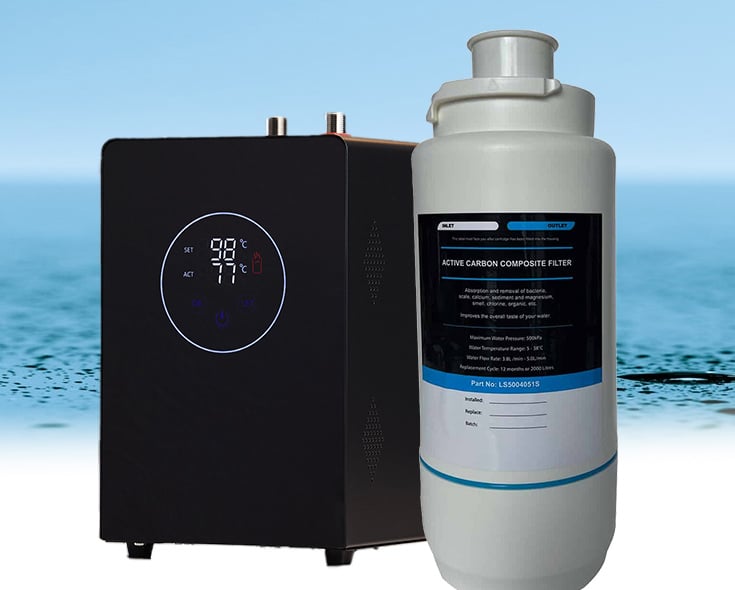
Each boiling water tap comes supplied with a 2.4l boiler tank (a 4-litre upgrade can be selected for an additional cost), which is perfect for under-sink cabinets where space is already limited. The exact dimensions of our 2.4-litre boilers are:
- height: 295mm
- width: 184mm
- depth: 184mm
You should consider how the boiler tank will fit into your cupboard by measuring its interior and creating a dedicated space. It's also a good time to check the plug socket you'll use is undamaged and safe. The boiler's electrical cable we supply is 1.5m.
Each boiling tap also comes with a filter, which will need to be installed beside the water tank. The dimensions for this are:
- height: 295mm
- width: 84mm
- depth: 84mm
3) Clear out your cupboard
Once you've figured out where you'll fix your boiler, completely clear the cupboard and give it a clean down to ensure it's free of debris and dry. Next, remove your old tap and use a bucket or container to catch any water that may be lingering in the hot and cold feeds. Then, place the boiler so it's in reach of the feeds and plug socket, but don't plug it in yet.
4) Fit your boiling water tap
Feed the tap's hot and cold feeds through the tap hole at the back of your sink and follow the instruction manual provided to secure the tap to your sink. If you're unsure about this stage, it may be best to seek the help of a professional plumber who can handle this part (or all) of the installation for you.
5) Connect your boiler
Once your tap is secured to your sink, connect your boiler to the filter and then the tap, following the instructions provided. Ensure screws and bolts are screwed on tightly to prevent leakages and check for any defects or damage. If you spot an issue, we recommend you immediately turn off the boiler and pause the installation until you have spoken with a professional. Our customers can contact us here.
6) Plug in your boiler
Next, you can plug your boiler into the safe plug socket and turn your water supply back on. Once you've turned on your water supply, you should check your water pressure. The operating pressure of our taps is between 0.5 to 5.0 bar.
If your pressure is below or exceeds this, you should turn off your supply and consult a plumber who can advise on ways to increase or decrease your water pressure. Continuing to operate your hot water tap if the pressure is not in this range may void your warranty.
7) Wait until the boiler fills and heats up
Before you can access instant boiling water, you must wait until the boiler fills and heats to 98°C - this may take up to 15 minutes. If you would like your water to heat to a lower temperature, you can use the touch-screen control on the boiler to set a temperature between 75°C and 98°C.
8) Enjoy instant hot water
Now you can enjoy boiling water at the turn of a handle. Our boilers can deliver 6 or 7 cups of piping-hot water at a time, with only a 3-4 minute wait time to reboil, so you can supercharge your everyday cooking and cleaning jobs and do more of the things you love.
Hire a professional if needed
Our boiling taps are easy to install for those with a toolbox and a basic knowledge of DIY, however, for those who are unsure or lack experience, we advise seeking the help of a plumbing or electrical professional. They can make the process straightforward and drastically reduce the chances of a faulty installation.
Alternatively, if you have any trouble installing your tap, you can always drop us a line for free, no-obligation advice.
Stay safe
We believe our boiling water taps are infinitely safer than spluttering kettles, but we understand that parents may be worried about their little ones. Our safety features include a child-safe mechanism that does not allow boiling water to flow unless the spring lock is disabled. This means your child can still access hot and cold water in the same way as before but not boiling water.
Read more about our efforts to make our taps as safe as possible here.
Frequently Asked Questions (FAQs)
Q1: How easy is it to install the boiling water tap?
Installing our boiling water tap is normally straightforward if you have basic DIY skills and a toolbox.
Our step-by-step guide is designed to help you through the process. However, if you are unsure, we recommend hiring a professional plumber to ensure a seamless installation.
Q2: Can I install the tap myself?
Yes, our taps are designed to be user-friendly and come with an easy-to-follow installation guide. However, if you lack DIY experience or feel uncomfortable doing the installation yourself, we recommend hiring a professional.
Q3: What is the size of the boiler tank?
The boiler tank supplied with each boiling water tap has dimensions of 295mm in height, 184mm in width, and 184mm in depth, making it a perfect fit for under-sink cabinets.
Q4: What should I do if I spot an issue during the installation?
If you notice any defect or issue during installation, turn off the boiler immediately and pause the installation. We recommend you consult with a plumbing professional or get in touch with our customer service team.
Q5: Are the boiling water taps safe for homes with children?
Yes, our boiling water taps have built-in safety features that include a child-safe mechanism. This mechanism does not allow boiling water to flow unless the spring lock is disabled, ensuring the safety of your little ones.
Q6: What is the operating pressure of the taps?
The operating pressure of our taps is between 0.5 to 5.0 bar. If your water pressure is outside of this range, consult a plumber for advice before continuing with the installation.
Q7: How quickly will the water heat up in the boiler?
It can take up to 15 minutes for the boiler to heat the water to 98°C. However, you can adjust this to a lower temperature using the touch-screen control on the boiler.
Remember, our team is always on hand to provide free, no-obligation advice should you have any more queries or concerns. Don't hesitate to contact us.
Are you ready to unlock the benefits of an instant hot water tap? Dive into our full range:
3-in-1 Taps: hot, cold, filtered boiling water
- Avista - our most affordable 3-in-1 tap
- Artesano - our streamlined 3-in-1 tap
- Astra - our most affordable 3-in-1 tap with a pull out spout
- Artisan Pro Flex - our premium 3-in-1 tap with flexible spout
4-in-1 Taps: hot, cold, filtered boiling water, filtered drinking water
- Quantum - our best-selling 4-in-1 tap
- Sapphire - our 4-in-1 tap with option of pull out spout or chiller unit
- Sapphire pull out - A refined 4-in-1 tap with pull out hose
- Platinum Plus - our premium 4-in-1 tap with flex spout
Chilled & Boiling Taps: hot, cold, filtered boiling water, filtered chilled water
- Quantum Chilled - our leading 4-in-1 tap with optional chiller unit
- Sapphire chilled - our digital boiling water tap with chiller unit
- Sapphire pull out chilled - our premium 4-in-1 chilled & pull out model
- Platinum Plus Chilled - our premium 4-in-1 tap with pull out spray and chiller
Pull Out Taps: 3-in-1, 4-in-1 taps with pull out spout
- Astra - our most affordable 3-in-1 tap with a pull out spout
- Artisan Pro Flex - our premium 3-in-1 tap with flexible spout
- Sapphire pull out - A refined 4-in-1 tap with pull out hose
- Sapphire pull out chilled - our premium 4-in-1 chilled & pull out model
- Platinum Plus - our premium tap with flex spout
- Platinum Plus Chilled - our premium 4-in-1 tap with pull out spray and chiller