Staring at a glass of foggy water straight from your tap can be a bit disconcerting, can't it? We've all been there, and it's easy to jump to the worst-case scenarios. But before you panic, let us put your mind at ease. In the vast majority of cases, cloudy tap water in the UK isn't a health hazard - it's perfectly safe to knock back.
Our aim with this handy guide is to clear the air (or should we say, water?) on why your tap water might be looking a bit murky and how to tackle it. So take a deep breath, and let's dive into the nitty-gritty of cloudy tap water and its remedies!
Aeration: The Most Common Cause of Cloudy Tap Water
Cloudy tap water is most commonly caused by the presence of tiny air bubbles, which can give the water a greyish or white appearance. This phenomenon is generally harmless and the cloudiness typically dissipates within a minute when the water is left to stand in a glass. This can often be attributed to changes in water pressure or aeration in your supply network and you should see the water clear within a minute or so.
Other Causes of Cloudy Water
If the water doesn't begin to clear over the course of a minute, there may be other causes behind the murky water you're seeing. These might include:
- High mineral content (Hard Water): Areas with hard water have high concentrations of minerals like calcium and magnesium. These minerals can make the water appear cloudy. The solution is to install a water softener or descaler in your home.
- Pipe corrosion: Old, corroded pipes can cause rust to enter your water supply, giving it a cloudy appearance. If this is the case, you may need to replace your home's plumbing. Learn more about pipe corrosion here.
- Water heater issues: If you only notice cloudy water when using hot water, the issue might be with your water heater. Sediment can build up in the tank over time and get stirred up when the hot water is used. Flushing your water heater can resolve this issue.
- Water works: If your local water supply is undergoing maintenance or repairs, it could stir up sediment and cause your water to become cloudy. This should resolve itself once the work is completed - though you can contact your council if you are concerned that it's affecting your water supply.
- Contaminants: Although rare, contaminants such as bacteria, algae, viruses, fungi, minerals, and man-made pollutants can cloud water. If you suspect this, it is best to get your water tested and then treated accordingly.
There are some simple steps you can take to investigate the cause of your cloudy water, if you suspect it's caused by something other than harmless air bubbles. Let's get into it...
Identifying the Cause
Identifying the cause of cloudy tap water can be as simple as making a few careful observations and conducting some easy home-based tests. Here are some tips to help you pinpoint the issue:
- Observe the speed of clearing: If the cloudiness clears from the bottom upwards within a few minutes, it's most likely due to tiny air bubbles. The cloudiness often disappears quickly when the water is left standing in a clear glass.
- Hot or cold?: If the cloudiness only appears in hot water, the issue could be your water heater. If it appears in both hot and cold water, pipe corrosion or high mineral content could be the culprits.
- Check for discolouration: If your water is a reddish-brown or yellow colour, this could indicate rust, suggesting that your pipes might be corroded.
- Does it smell?: Water contaminated with bacteria or algae often has a noticeable smell. If your tap water smells unpleasant, it's best to get it tested.
- Taste the water: Though it's not the most delightful method, tasting the water can also give you some clues. If it has a metallic taste, it could be due to high iron content or rust in your water.
Remember, if you're ever unsure about the safety of your water, it's best to seek professional advice You can contact your local water supplier for further assistance or arrange for a water quality test from a plumber.
What's Involved in a Water Quality Test?
A water quality test conducted by a professional plumber or your local water supplier involves a comprehensive analysis of your tap water. The professional takes a water sample from various points within your home, like the kitchen tap, bathroom tap, and even straight from your water meter. This sample is then sent to a certified laboratory for examination.
The lab analyses the water sample for a variety of criteria, including pH level, hardness, and the presence of bacteria, algae, and other contaminants. You then receive a detailed report outlining any issues detected during the test. Depending on your results, the plumber or water supplier will recommend the best course of action to rectify any issues and ensure you have clean, safe tap water.
Is Tap Water Safe to Drink?
Yes, British tap water is overwhelmingly safe to drink. The DWI (Drinking Water Inspectorate) monitors tap water and regulates suppliers to ensure that it meets the highest quality standards. You can read more about the DWI’s role in keeping drinking water safe here.
Why Would You Filter Tap Water?
Though tap water is safe to drink, many people prefer the taste of filtered water. Installing a tap water filter at home can help reduce unpleasant tastes, smells, and chlorine in your water supply - plus it's a more cost-effective and eco-friendly option than buying bottled water.
Filters also offer extra protection against potential contaminants that may slip through the DWI’s rigorous standards. While these levels are safe for consumption, some people prefer to err on the side of caution and use a filter for their tap water. Read more about ways to filter tap water here, including through the use of a 4-in-1 kitchen tap.
To Conclude...
While cloudiness in your tap water might initially raise concerns, it's important to remember that it is typically harmless and often attributed to air bubbles or changes in water pressure. However, if the cloudiness persists, it could indicate issues such as high mineral content, pipe corrosion, water heater sediment, local water works, or, although rare, contaminants.
Rest assured, UK tap water is heavily regulated and safe to drink, with water filters offering additional peace of mind for those who prefer an extra layer of protection.
Welcome to your guide on mastering the art of kitchen safety! From the simple slice of a knife to the steamy hiss of a boiling water tap, the kitchen is filled with potential hazards. But fear not, this article will transform you from a kitchen novice to a safety guru. We'll delve into each aspect - be it handling knives like a pro, becoming a whizz at fire safety, or getting your head around safe food practices.
And let's not forget about the little ones - their safety is paramount, so we'll cover that too. So, grab a cuppa and read on, because making your kitchen a safe haven is easier than you might think.
The Imperative of Kitchen Safety
Why is kitchen safety so important, you may ask? Well, the kitchen can be a place of creativity and joy, a heart of the home where meals are prepared and memories are made. However, it can quickly turn into a dangerous place if safety rules are not adhered to.
Firstly, kitchen accidents happen more frequently than you might think. According to the Royal Society for the Prevention of Accidents, there are approximately one million visits to A&E due to accidents in the kitchen in the UK alone each year. These incidents range from minor burns to life-threatening injuries.
Secondly, prevention is always better than cure. By educating ourselves about potential hazards and how to prevent them, we can significantly reduce the risk of accidents. Here is a list of common kitchen hazards:
- Misuse of knives
- Fire from unattended cooking
- Scalds from boiling water or steam
- Food contamination
- Trips over clutter
Lastly, children are also at risk. They can easily access low cupboards or drawers storing potentially harmful objects or substances. Moreover, children are naturally curious and may reach out to hot pots or boiling water taps.
In short, a lack of knowledge and carelessness in the kitchen can result in dire consequences. But don't fret - the upcoming sections will equip you with all the necessary knowledge to ensure that your kitchen remains a safe and enjoyable space for everyone.
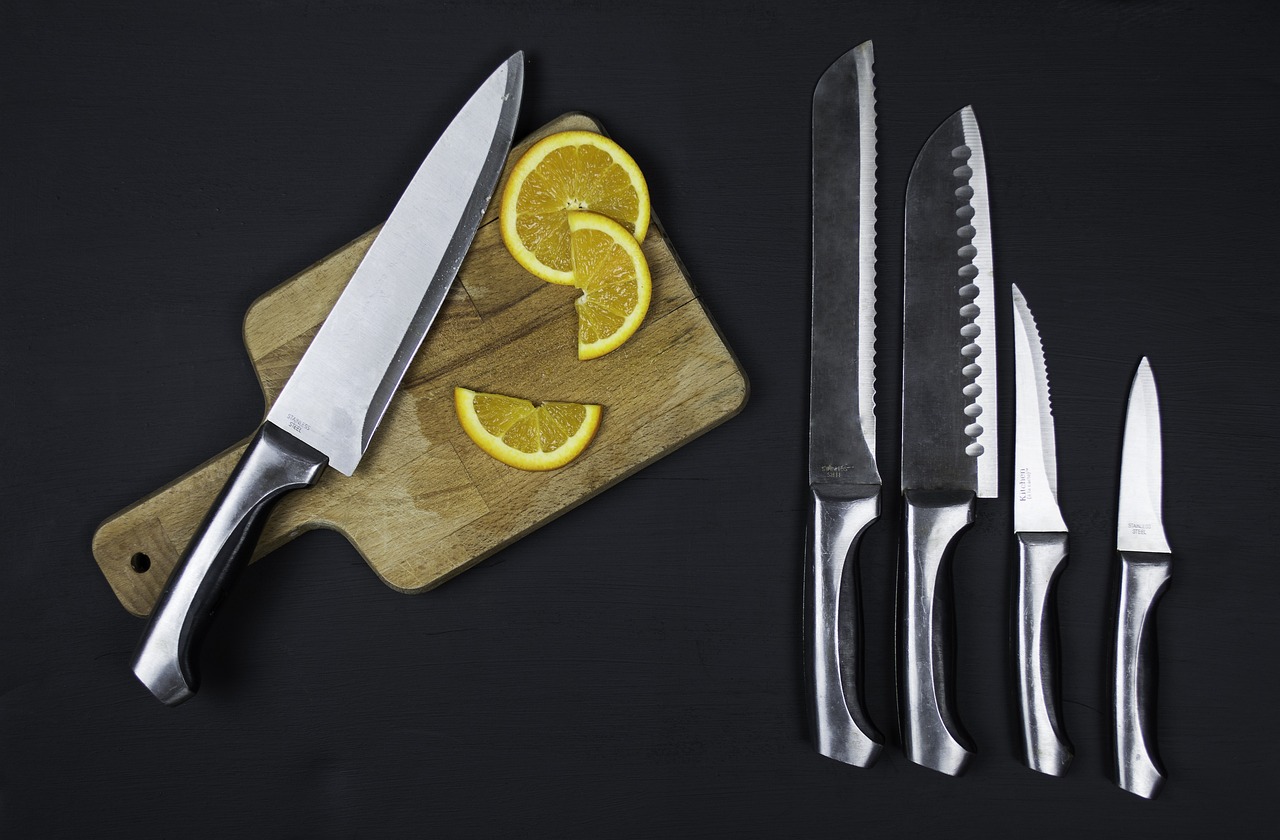
Safe Usage of Knives and Sharp Tools
Knives and other sharp tools are indispensable in any kitchen, aiding us in the essential tasks of chopping, slicing, and dicing. However, these useful utensils can quickly become hazards if not handled properly. The most common risks associated with kitchen knives include accidental cuts and wounds, often due to improper grip, distraction, or lack of knife maintenance.
Techniques for Safely Handling Knives
Here are some handy tips to help you navigate the potentially risky business of handling kitchen knives:
- Hold the knife correctly: Grasp the handle close to the blade and with your thumb and index finger on opposite sides. This gives you better control of the knife.
- Use the right knife for the job: Each knife is designed for a specific purpose. For example, serrated knives are perfect for cutting bread, while chef’s knives are ideal for chopping vegetables and meats.
- Keep your knives sharp: It may seem counterintuitive, but a sharp knife is safer than a blunt one. Blunt knives require more force to cut, increasing the chance of slipping and causing an injury.
- Cut on a flat surface: Always prepare your food on a flat and stable surface. This ensures that whatever you're cutting doesn't move unexpectedly and cause an accident.
- Never leave knives in a filled sink: Leaving knives in a filled sink can lead to accidental cuts when reaching in. Always wash knives separately and immediately after use.
- Store knives properly: Keep them in a knife block or on a magnetic strip, out of reach from children.
Remember, the key to safe knife usage is awareness and care. When handled with respect, your kitchen knife will remain an instrument of culinary creation, far from the danger zone.
Mastering Fire Safety
In a setting where heat and flame are necessary tools, fire safety is of utmost importance. Cooking is the primary cause of home fires and fire injuries, so learning how to prevent them and knowing what to do in case of a fire are crucial. Common fire-related hazards in the kitchen include flammable objects near the cooker, overheated oil, faulty appliances, and unattended cooking.
Fire Prevention: Tips and Techniques
Here are some practical tips to help you stay one step ahead of fire hazards:
- Stay in the kitchen while cooking: Always pay full attention when you're cooking, especially if you're using high temperatures or cooking something that catches fire easily like oil.
- Keep your cooker clean: Built-up grease and fat can ignite and cause a fire, so ensure your cooker and oven are clean and free from grease.
- Keep flammable items away: Tea towels, oven gloves, paper towels, and other flammable items should be kept away from the cooker.
- Install a smoke alarm: This can alert you early to any potential fires, providing you with crucial extra time to respond.
- ,: Regularly check your appliances for any signs of damage to the cables, plugs or the appliance itself.
In case a fire does break out, remember the key safety advice: Get out, stay out, and call the emergency services. Try to close doors behind you as you leave to help hinder the spread of fire and smoke. Never use water for oil or electrical fires; instead, use a fire blanket or a suitable fire extinguisher. If you’re unsure, don’t take any risks – leave it to the professionals.
The Essentials of Food Safety and Hygiene
Food safety and hygiene are fundamental aspects of kitchen safety. Ignoring them can lead to foodborne illnesses, caused by harmful bacteria and viruses. Contamination can occur at any stage, from food preparation to storage, making it essential to understand and follow correct food handling practices. Common food safety hazards include improper cooking temperatures, cross-contamination between raw and cooked foods, and incorrect food storage.
Ensuring Safe and Hygienic Food Handling
Here are some practical tips to maintain high standards of food hygiene in your kitchen:
- Wash your hands: Always wash your hands thoroughly with soap and warm water before and after handling food, especially raw meat, poultry, and fish.
- Avoid cross-contamination: Use different chopping boards and knives for raw and cooked foods to prevent the spread of harmful bacteria.
- Cook at the right temperature: Ensure food is cooked thoroughly to kill any harmful bacteria. Use a food thermometer to check the internal temperature of your dishes.
- Refrigerate promptly: Store leftovers in the fridge within two hours of preparation to slow down the growth of bacteria.
- Follow the 'Use-by' date: Always consume food before its 'Use-by' date. Past this date, it's not safe to eat even if it looks and smells fine.
Remember, food safety is a crucial aspect of kitchen safety. By following these guidelines, you can protect yourself and your family from foodborne illnesses, enjoying your culinary adventures with peace of mind.
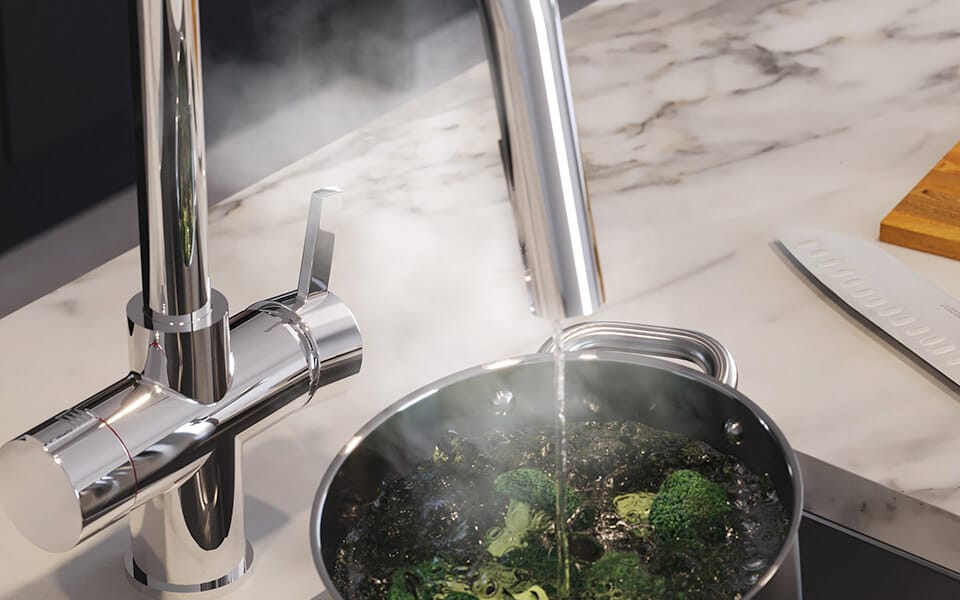
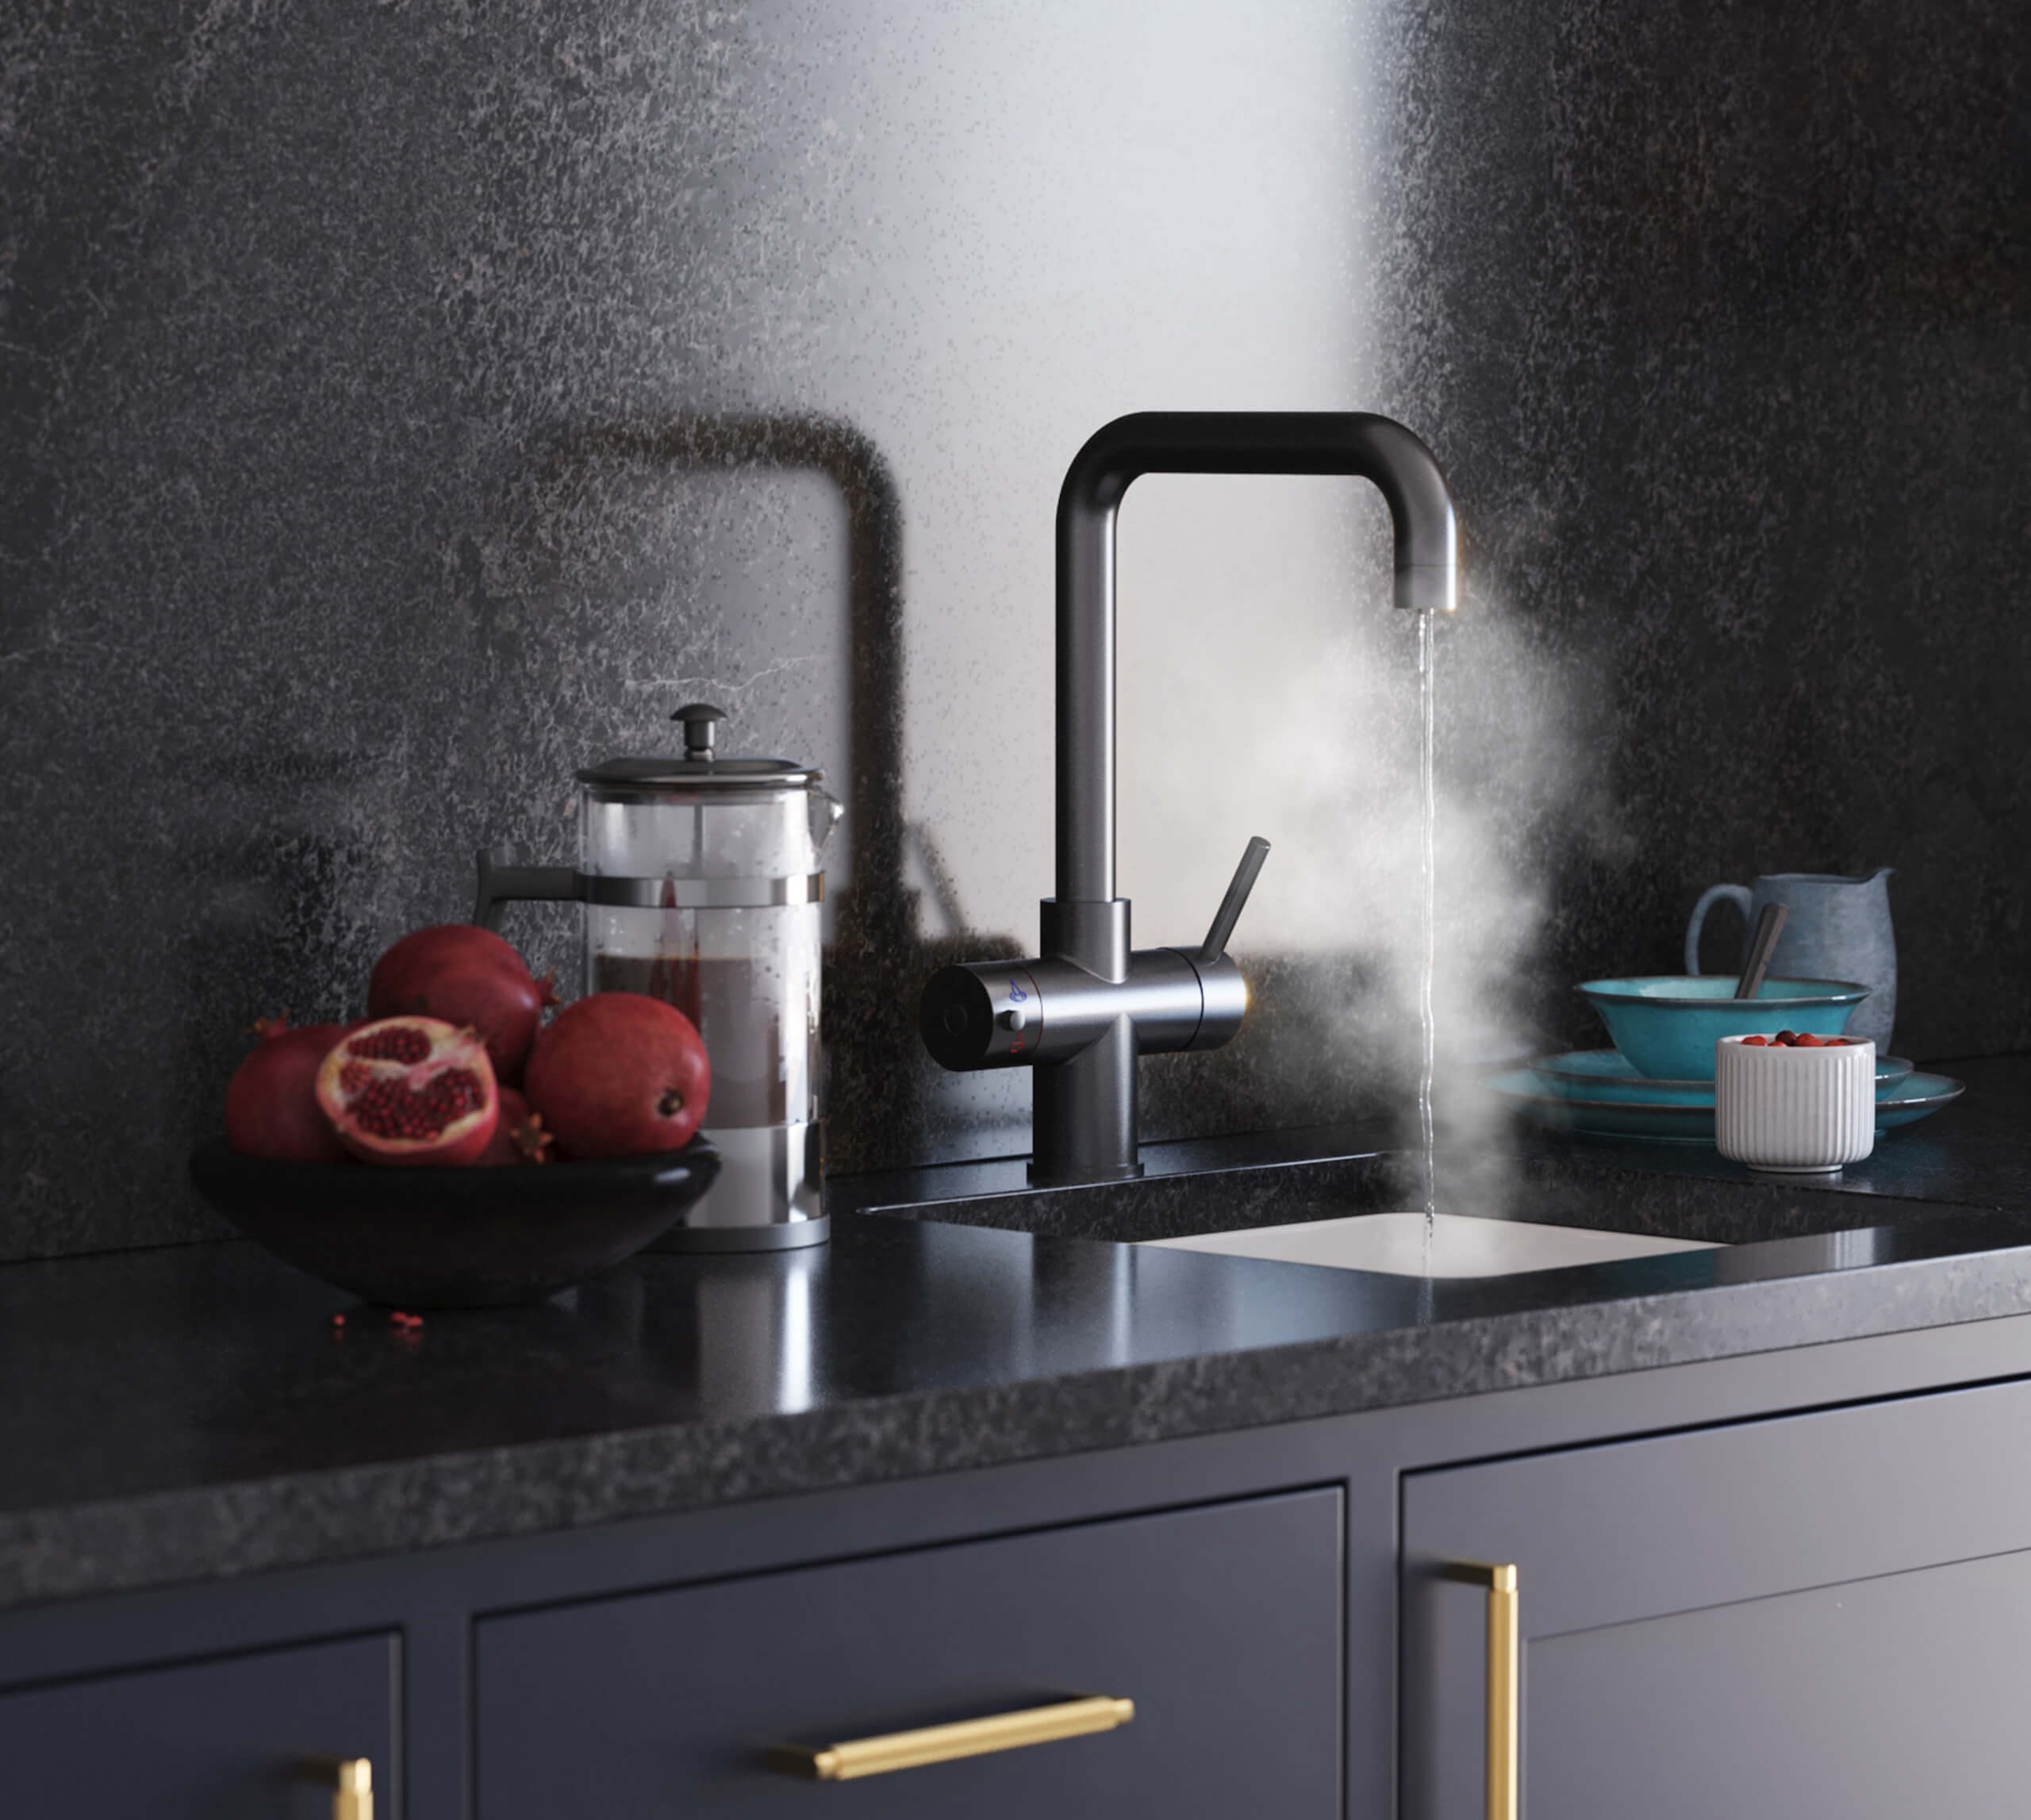
Using Boiling Water Taps Safely
Boiling water taps are becoming increasingly popular in modern kitchens due to their convenience and efficiency. They provide instant boiling water, making them a great tool for speeding up cooking and preparation tasks. However, like any kitchen appliance, it's crucial to use them safely to prevent accidents like burns or scalding.
Staying Safe with Boiling Water Taps
While boiling water taps are incredibly safe, here are some safety measures you can take to ensure accidents don't happen:
- Be aware of the tap’s function: Always remember that the water coming out of this tap can be extremely hot. Make sure all family members, especially children, understand this.
- Install safety features: Many boiling water taps come with safety features like childproof handles and insulated sides. Make sure these are always activated and functional.
- Use carefully: Ensure hands, particularly of children, are kept at a safe distance from the tap when it's in use to avoid burns.
- Respond quickly to spills: If boiling water spills, clean it quickly and carefully to prevent injuries.
- Regular maintenance: Keep the tap and its parts, like the tank and filter, in good working order through regular maintenance.
By adhering to these guidelines, you can enjoy the benefits of your boiling water tap without compromising safety. Remember, the key to kitchen safety is awareness, carefulness, and the correct use of appliances.
Understanding How Boiling Water Taps Work
Boiling water taps are a marvel of modern kitchen technology, providing on-demand hot water with a simple twist of a handle. But how do these ingenious appliances work?
In essence, a boiling water tap is connected to a compact, under-sink tank that stores and rapidly heats water to near-boiling temperatures. When you turn on the tap, hot water is drawn from the tank and replaced with cold water, which is then heated for future use. This continuous cycle ensures a ready supply of hot water at your fingertips, anytime you need it.
For safety, many models include a two-stage safety mechanism to prevent accidental operation, as well as insulated bodies to protect against burns. The tanks are well-insulated too, so they retain heat efficiently without consuming excessive energy. They’re an eco-friendly and convenient addition to any kitchen.
If you'd like to delve deeper into the mechanics of boiling water taps, we've got you covered. Visit our comprehensive guide on how boiling water taps work for a detailed understanding.
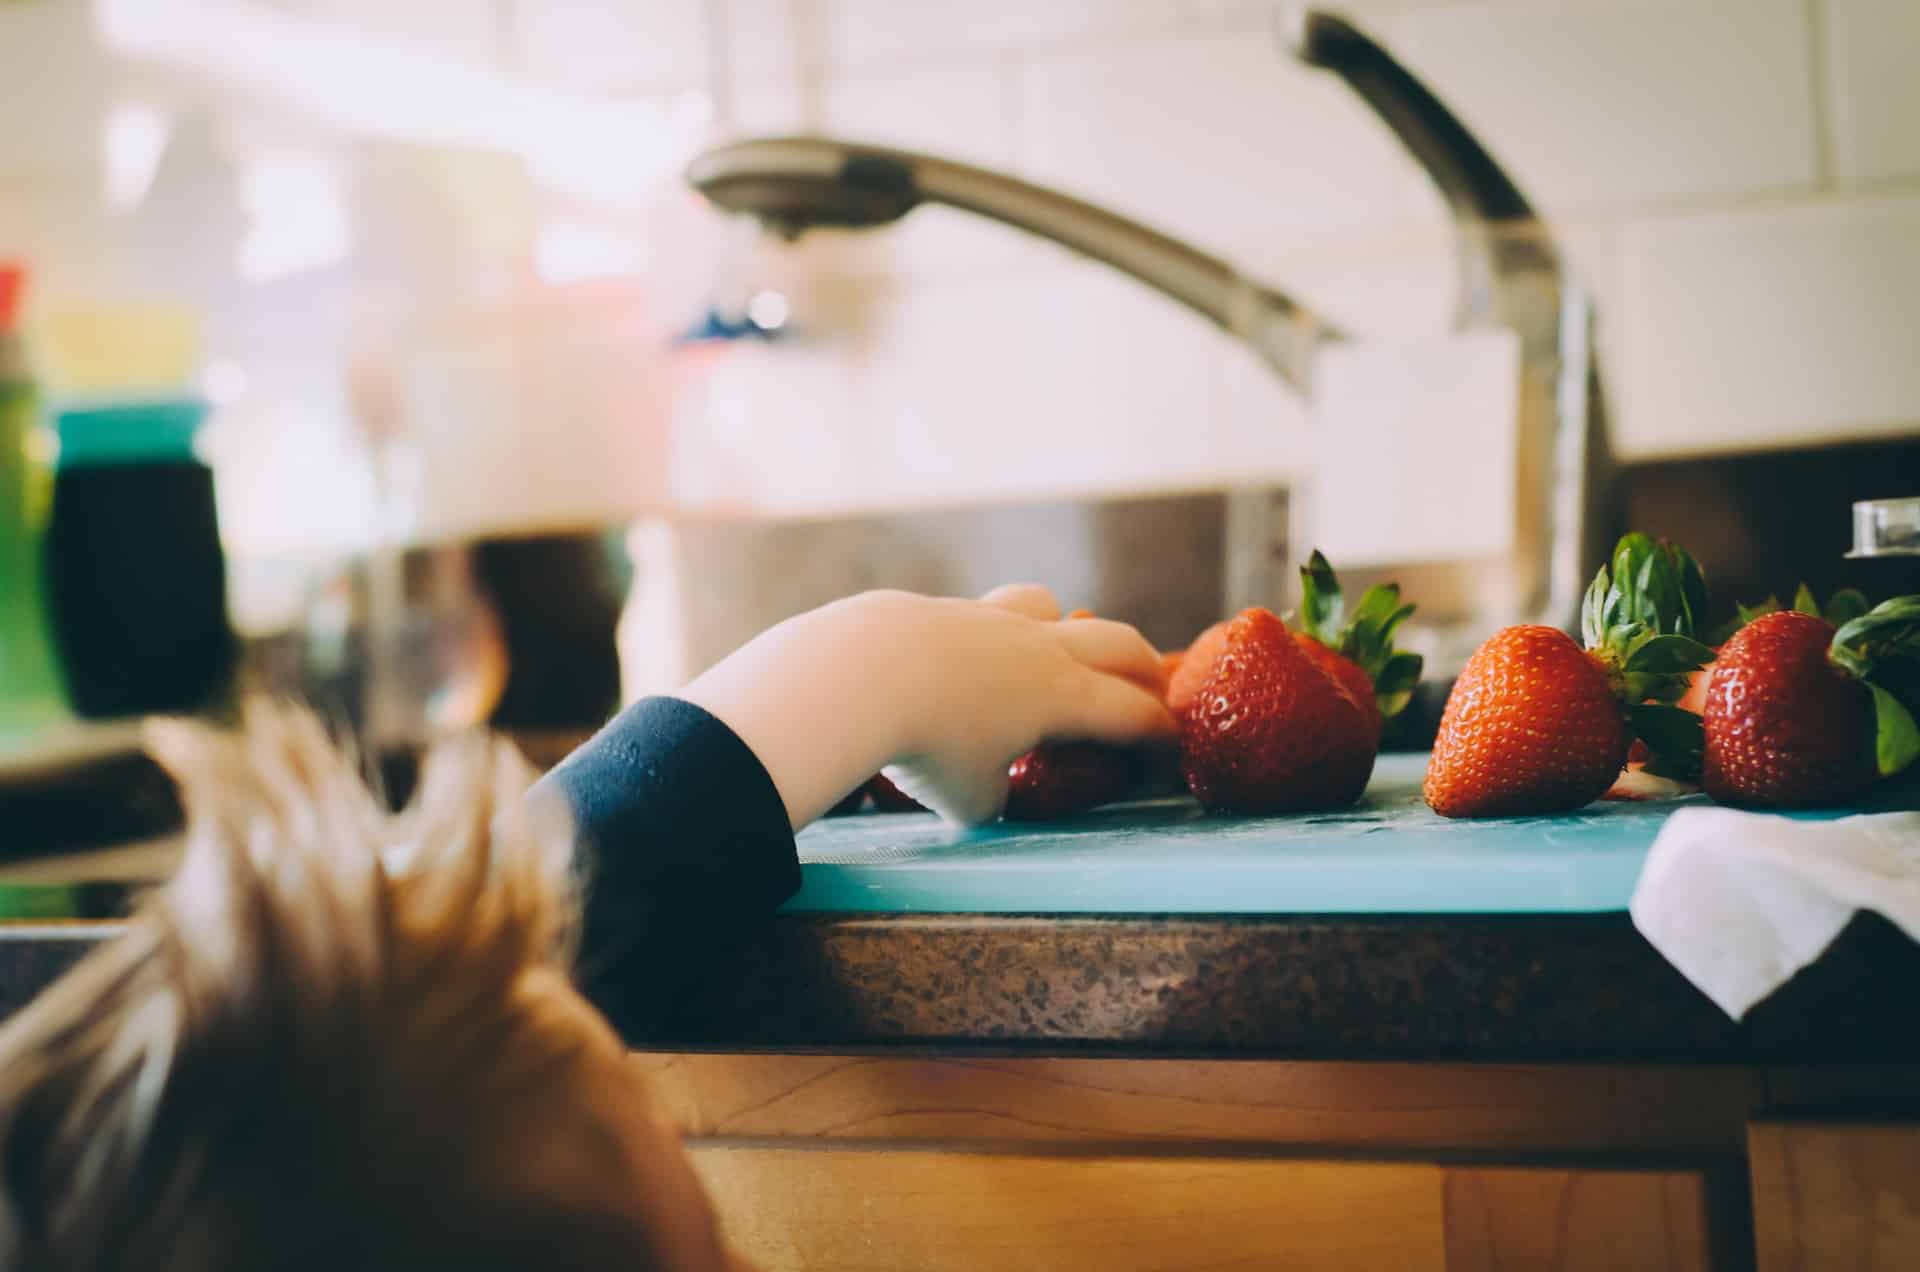
Keeping Kids Safe in the Kitchen
The kitchen can be a fascinating place for children, filled with intriguing gadgets, enticing aromas, and the hustle and bustle of meal preparations. However, it's also a place where potential hazards lurk, from sharp utensils to hot surfaces and boiling water. As parents, we must balance our little ones' curiosity and learning with ensuring their safety.
Nurturing a Safe Environment for Children
Here are some practical tips to help you create a safer kitchen environment for your children:
- Supervise: Always keep an eye on your kids when they are in the kitchen, especially if they're helping with meal preparation. Never leave them alone in the kitchen.
- Teach them about kitchen safety: Educate your kids about the potential hazards in the kitchen, like hot surfaces, sharp objects, and electrical appliances.
- Keep dangerous items out of reach: Ensure that sharp knives, cleaning products, and other potentially harmful items are stored well away from children's reach.
- Use childproof locks: Install childproof locks on drawers, cupboards, and appliances to prevent curious little hands from accessing dangerous items or areas.
- Set safety boundaries: Establish and enforce kitchen safety boundaries, like keeping a safe distance from the cooker and not touching the boiling water tap.
- Use stool with supervision: If children are helping with meal prep, make sure they're safely standing on a sturdy stool and not climbing on potentially unstable surfaces.
Remember, child safety in the kitchen is not just about setting rules and restrictions; it's about fostering an environment where they can learn and explore safely. By following these tips, you can encourage your children's culinary curiosity while ensuring their safety. After all, a safe kitchen is a happy kitchen!
Conclusion: The Key Takeaways for a Safer Kitchen
In conclusion, the key to a safer kitchen lies in knowledge, vigilance, and proper equipment use. By understanding the potential hazards associated with cooking appliances, such as boiling water taps, and by adhering to safety guidelines, you can significantly minimise the risk of accidents.
For children's safety, supervision, education, and creating a kid-friendly environment are essential. We've covered some of the fundamental aspects of kitchen safety, but knowledge is power, and there's always more to learn. To delve deeper into kitchen safety, check out the Health and Safety Executive's guide or the Food Standards Agency's food hygiene tips. Remember, a safe kitchen is the foundation of a happy home.
Welcome to our comprehensive guide to the fascinating world of water filtration! If you've ever taken a sip from your tap and wondered about the quality of water you're consuming, you're not alone. Many of us are turning our attention to how we can ensure our tap water is as healthy and clean as possible.
In this article, we'll be exploring five popular methods of filtering tap water at home, each with its own unique characteristics, benefits, and drawbacks. We'll discuss how each process works and weigh up its pros and cons to help you make an informed decision about which method will suit your particular situation. So, fill up your glass and join us on this hydrating journey!
Introduction to Water Filtering
Before we dive into the methods, it's worth mentioning that while filtering tap water at home isn't a necessity, many people prefer the taste and feel of filtered water. It can help improve the flavour of your favourite brew, and make drinking water a more pleasant experience. With a variety of options to choose from, let's start our journey into the ins and outs of home water filtration systems.
Is Filtering Tap Water Necessary?
In the UK, tap water is indeed safe to drink; it undergoes rigorous testing and treatment protocols to ensure it meets the high standards set by the Drinking Water Inspectorate. However, it's also important to note that the water quality can vary, largely due to geographical differences. In particular, those living in areas with 'hard' water, characterised by a higher concentration of minerals such as calcium and magnesium, may notice a distinct chemical or minerally taste in their tap water.
This not only impacts the taste when drinking it straight from the tap but can also subtly alter the taste of food and beverages prepared with it. Therefore, while not a necessity, using a water filter in these areas can lead to a noticeable improvement in the taste of tap water, contributing to better-tasting food and drink - who wouldn't want that?!
#1) Using a Built-In Water Filter
Built-in water filters are a popular option for many homes across the UK. These devices are integrated directly into your existing water supply system, providing a seamless transition from regular tap water to filtered water. There are several types of built-in filters, including reverse osmosis systems and boiling water taps that come with a filter attached to the tank.
Reverse Osmosis Systems
Reverse osmosis systems are one of the most sophisticated types of water filters. They work by forcing water molecules through a semi-permeable membrane, leaving behind impurities and contaminants, thereby providing clean, filtered water. This system is highly effective at removing a broad range of contaminants, including harmful substances like lead and arsenic.
Boiling Water Taps with Attached Filters
A boiling water tap with an attached filter is another innovative solution for filtering tap water. These specialised taps not only filter your tap water but also provide instant access to boiling water. The filter, usually attached to the tank, filters out common impurities such as chlorine and lead, improving the taste and smell of your tap water.
In the next sections, we'll delve into the pros and cons of these built-in filters to guide you in making an informed decision.
Pros of Built-In Water Filters:
- Comprehensive filtration: Built-in water filters, particularly reverse osmosis systems, are capable of removing a wide range of contaminants, ensuring you have access to clean, safe drinking water.
- Convenience: Once installed, these filters provide a seamless transition from regular tap water to filtered water, without the need for extra steps or equipment.
- Longevity: Built-in filters tend to have a longer lifespan than other types of filters, meaning you won't need to replace them as frequently.
- Improved taste: Both reverse osmosis systems and boiling water taps with filters significantly improve the taste and smell of your tap water, which can enhance your culinary and beverage experiences.
Cons of Built-In Water Filters:
- Initial cost: The initial cost of purchasing and installing a built-in water filter can be quite high, making it a significant investment.
- Maintenance: While these filters have longer lifespans, they do require regular maintenance and occasional filter replacement, which can add to their lifetime cost.
- Slow filtration process: Depending on the system, the filtration process can be slow, which might not be ideal if you need large amounts of filtered water quickly.
- Wastage: Reverse osmosis systems in particular can waste a significant amount of water in the filtration process. For every litre of filtered water produced, several litres of water can be wasted.
In conclusion, built-in water filters offer comprehensive filtration, convenience, and longevity. They can significantly improve the taste and smell of tap water, enhancing your culinary and drinking experiences. However, their high initial cost, maintenance needs, potentially slow filtration process, and significant water wastage (especially in the case of reverse osmosis systems) are important factors to consider.
For more insights and detailed information on boiling water taps, we recommend checking out our Ultimate Guide to Boiling Water Taps, where you can delve deeper into their features, installation process, and maintenance requirements.
#2) Commercial Water Filters
Commercial water filters, a familiar sight in UK homes, offices, and businesses, provide a straightforward approach to elevating the quality of your tap water. With their diverse range, including jug filters, under-sink filters, and refrigerator filters, these filters are engineered to strip water of various contaminants and impurities. Now, let's delve into the specifics of each type.
How Commercial Water Filters Work
Commercial water filters work by using a combination of physical and chemical filtration methods to remove impurities from your water.
Jug Filters
Jug filters, or pitcher filters, are among the most common and straightforward ways to filter tap water. They utilise activated carbon or sometimes ion-exchange resin to remove impurities from the water. Water is poured into the top of the jug, where it slowly seeps through the filter, leaving behind contaminants and flowing into the main compartment of the jug. The activated carbon within the filter traps pollutants, such as chlorine, improving both the taste and odour of the water.
Refrigerator Filters
Refrigerator filters are built into refrigerators equipped with water and ice dispensers. These filters work similarly to the systems above, using activated carbon to trap common impurities, like chlorine and lead. The result is cleaner and more refreshing water and ice directly from your fridge.
Under-Sink Filters
Under-sink filters, as the name suggests, are installed under your kitchen sink and directly connected to the cold water supply. They utilise a combination of activated carbon and other filtering materials to remove a wide range of contaminants from your tap water. As the water flows through the filter, impurities such as chlorine, heavy metals, and bacteria are trapped, leaving you with clean, filtered water dispensed straight from your standard kitchen tap.
Pros and Cons of Commercial Water Filters
Pros of Commercial Water Filters:
- User-Friendly: Commercial water filters are generally simple to use. Whether it's filling up a water jug or replacing a refrigerator filter, these systems are designed for user convenience.
- Affordability: Compared to built-in systems, commercial water filters are typically much more affordable. They offer a cost-effective solution for those seeking cleaner, tastier tap water.
- Variety of Options: With jug filters, refrigerator filters, and under-sink filters, there is a wide variety to choose from, allowing you to find a solution that best fits your needs.
- Improved Taste: Like built-in systems, commercial filters also remove impurities that negatively affect the taste and smell of tap water.
Cons of Commercial Water Filters:
- Frequent Filter Replacement: Commercial filters often require more frequent filter changes than built-in systems. This can add to the long-term cost and can also be inconvenient.
- Limited Filtration: Depending on the type, some commercial filters might not filter out as many contaminants as built-in systems. For example, standard jug filters might not remove certain heavy metals or bacteria.
- Slow Filtration: Jug filters, in particular, can take a while to filter a full pitcher of water.
- Space Requirements: For under-sink filters and some refrigerator filters, you'll need enough space to accommodate the system.
So, to sum things up, commercial water filters are like the friendly neighbourhood superhero of tap water, offering an easy-to-navigate and budget-friendly solution to make your tap water better. They've got a whole crew - from simple jug filters to the more advanced under-sink systems - there's a hero for every kind of water need you may have. But remember, every superhero has a kryptonite.
In this case, it's the possible need for frequent filter swapping, the somewhat limited power of some models to banish all water villains, a little bit of a slow pace in filtration, and a need for their own personal bat cave (read: storage space). So keep these in mind when you're picking your water-saving superhero.
#3) Boiling Water
Boiling water is an age-old method of treating water, and is still commonly used in households worldwide. This cost-effective and straightforward method doesn't require any specialised equipment, making it a popular choice for many. However, it's not without its limitations. Let's take a closer look at how boiling water can help improve its safety and taste, and weigh up the pros and cons.
What Does Boiling Water Do?
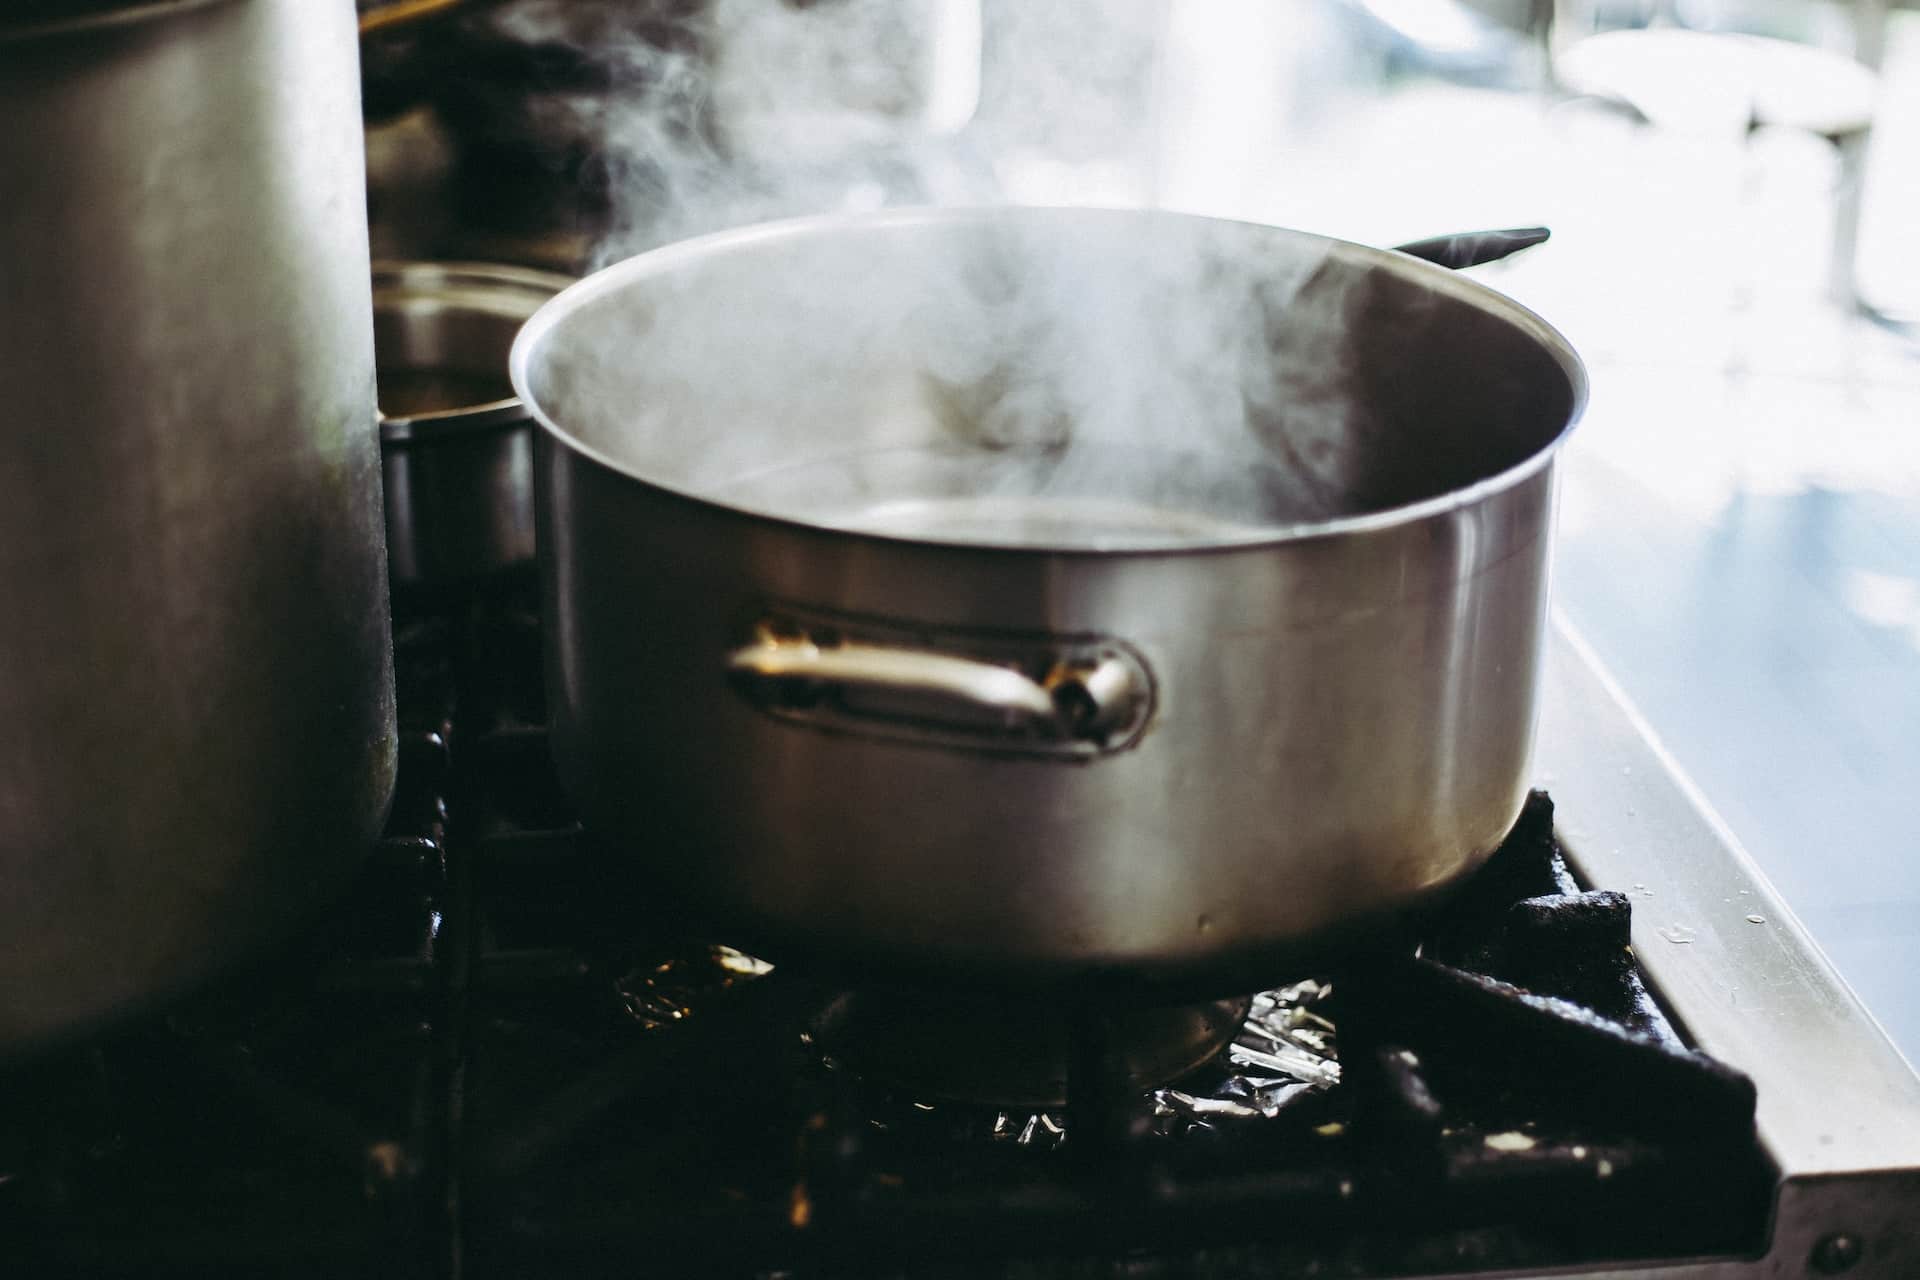
Boiling water is a physical method of purification that kills bacteria, viruses and parasites that could cause illness. This is achieved by heating the water to a high temperature, usually at or near boiling point, for a specified period of time. The heat destroys or inactivates harmful organisms, making the water safer to drink.
Despite its effectiveness against many types of pathogens, boiling does have some limitations. First and foremost, while it can kill bacteria and viruses, it does not remove chemical contaminants, heavy metals or solid impurities that might be present in the water e.g. chlorine.
What's more, boiling water can be energy-intensive, especially when done on a large scale or over a long period. It also requires access to a reliable heat source. Finally, the taste of boiled water is often considered flat and unappealing due to the loss of dissolved oxygen.
Pros of Boiling Water:
- Simplicity: Boiling water is a simple and accessible method that doesn't require any complex equipment or technical knowledge.
- Effectiveness: It is highly effective at killing many types of harmful bacteria, viruses, and parasites.
Cons of Boiling Water:
- Limited Purification: Boiling cannot remove chemical contaminants or solid impurities from water.
- Energy Use: It can be energy-intensive, particularly when it's necessary to boil water for extended periods.
- Taste: The taste of boiled water is often considered flat and less refreshing due to the loss of dissolved oxygen.
In a nutshell, boiling water is a bit like a reliable old friend - dependable, and straightforward but somewhat limited in capabilities. It's a tried-and-tested way to kill off most of the bad guys in your water, but it won't necessarily catch them all, especially if they're of the chemical variety. Plus, it can be a bit of an energy drain and might leave your water tasting a tad bland. But for a quick and simple solution, it has stood the test of time.
#4) Sand Purification Method
The sand purification method, also known as slow sand filtration, is a natural process that has been used for centuries to purify water. This old-school method employs a simple yet effective process to filter out impurities from water. It's a bit like having a mini water treatment plant right in your backyard! Without the need for chemicals or complex equipment, it's a sustainable, environmentally-friendly choice for those looking to reduce their carbon footprint.
How does Sand Purification Work?
The sand purification process utilises a bed of fine sand and sometimes layers of gravel, creating a natural filtration system. When water is poured into the sand filter, it slowly trickles down through the layers of sand and gravel. As it moves through the layers, impurities such as sediment, particles and some bacteria are trapped and retained in the sand, resulting in cleaner, safer water at the bottom.
This method also includes a biological layer known as the 'schmutzdecke' (a German word meaning dirty skin), which forms at the top layer of sand. The schmutzdecke hosts beneficial microorganisms that further aid in the purification process by digesting and trapping bacteria and other pathogens.
Although the sand filtration system is an effective, natural method for purifying water, it does have some limitations. It's not as quick or convenient as other modern filtration methods, and it may not remove all types of contaminants, especially chemicals and viruses. It also requires periodic maintenance to clean and replace the sand.
Pros of Sand Purification:
- Natural and Eco-friendly: It's a chemical-free, natural process that is kind to the environment.
- Affordability: Once set up, the ongoing costs are minimal as it only requires the replacement of sand occasionally.
Cons of Sand Purification:
- Limited Filtration: While it can handle sediment and some bacteria, it may not fully remove chemical contaminants and viruses.
- Maintenance: Requires regular maintenance to clean and replace the sand.
In essence, the sand purification method is the eco-warrior of water filtration methods. It’s a natural, low-cost option that is kind to the environment. But like all warriors, it has its strengths and weaknesses. While it can tackle sediment and some bacteria, it might struggle against chemical contaminants and viruses. Plus, it does need a bit of care and attention now and then for it to perform its best.
#5) UV Water Filtration
Ultraviolet (UV) water filtration is a modern, chemical-free method of purifying water. This technology uses UV light to kill or inactivate harmful microorganisms, ensuring that your water is safe and clean to drink. It's a bit like having a microscopic army of light warriors zapping away the bad guys in your water!
How Does UV Water Filtration Work?
UV water filtration works by exposing water to UV light, which is a powerful disinfectant. When water passes through a UV system, the light targets the DNA and RNA of microorganisms, inactivating them and preventing them from reproducing. This method effectively kills harmful bacteria, viruses, and parasites without adding chemicals or altering the taste and odour of the water.
However, UV filtration does have its limitations. Firstly, it does not remove dissolved solids, minerals, or chemicals from water. Additionally, the water must be clear for the UV light to effectively reach all the microorganisms, meaning that any sediment or turbidity can reduce its effectiveness. It also requires electricity to run, which could be a limitation in some situations.
Pros of UV Water Filtration:
- Effectiveness: UV filtration is highly effective at killing many types of harmful microorganisms.
- Chemical-free: It does not use any chemicals, making it a safe and natural method of purification.
- Taste: This method does not alter the taste or odour of the water.
Cons of UV Water Filtration:
- Limited Purification: UV filtration does not remove dissolved solids, minerals, or chemicals from water.
- Clarity Required: The effectiveness of UV filtration can be reduced if the water is not clear.
- Electricity Dependence: It requires electricity to work, which might not be available in all situations.
In summary, UV water filtration is like the high-tech superhero of water purification methods. It's fast, effective, and chemical-free, ensuring that your water is safe to drink without altering its natural taste. However, like any superhero, it does have its Achilles heel. It isn't able to remove dissolved solids or chemicals, and it requires both clear water and a reliable electricity source. Nevertheless, for a high-tech, chemical-free solution, it certainly shines a light on water purification!
Conclusion
In summary, the choice of water filtration method depends on several factors including the level of purification required, speed, cost, maintenance needs and eco-friendliness.
- Built-in filters are reliable and long-lasting but are expensive upfront.
- Boiling is a quick, low-cost method but may not remove all contaminants.
- Activated charcoal and sand purification are good for certain impurities and are eco-friendly, but may not be fully effective against all contaminants.
- Reverse osmosis offers a high level of purification but can be costlier and less eco-friendly.
- UV filtration is quick and very effective against microorganisms, but requires clear water and electricity, and does not remove chemical contaminants.
Choosing the Right Filtering Method for Your Needs
The process of choosing the right water filtration method ultimately comes down to your individual needs and circumstances. For those who are environmentally conscious, methods such as sand purification or activated charcoal may be appealing due to their eco-friendliness. If you live in an area with unstable electricity, UV filtration may not be the best choice, while those with a larger budget may opt for the reverse osmosis method due to its high efficiency.
It's important to consider factors like maintenance, cost, and efficiency, as well as the nature of contaminants in your local water supply when making your decision. Whatever method you choose, remember that the goal is to ensure that your tap water is clean, safe, and suitable for you and your family's daily needs.
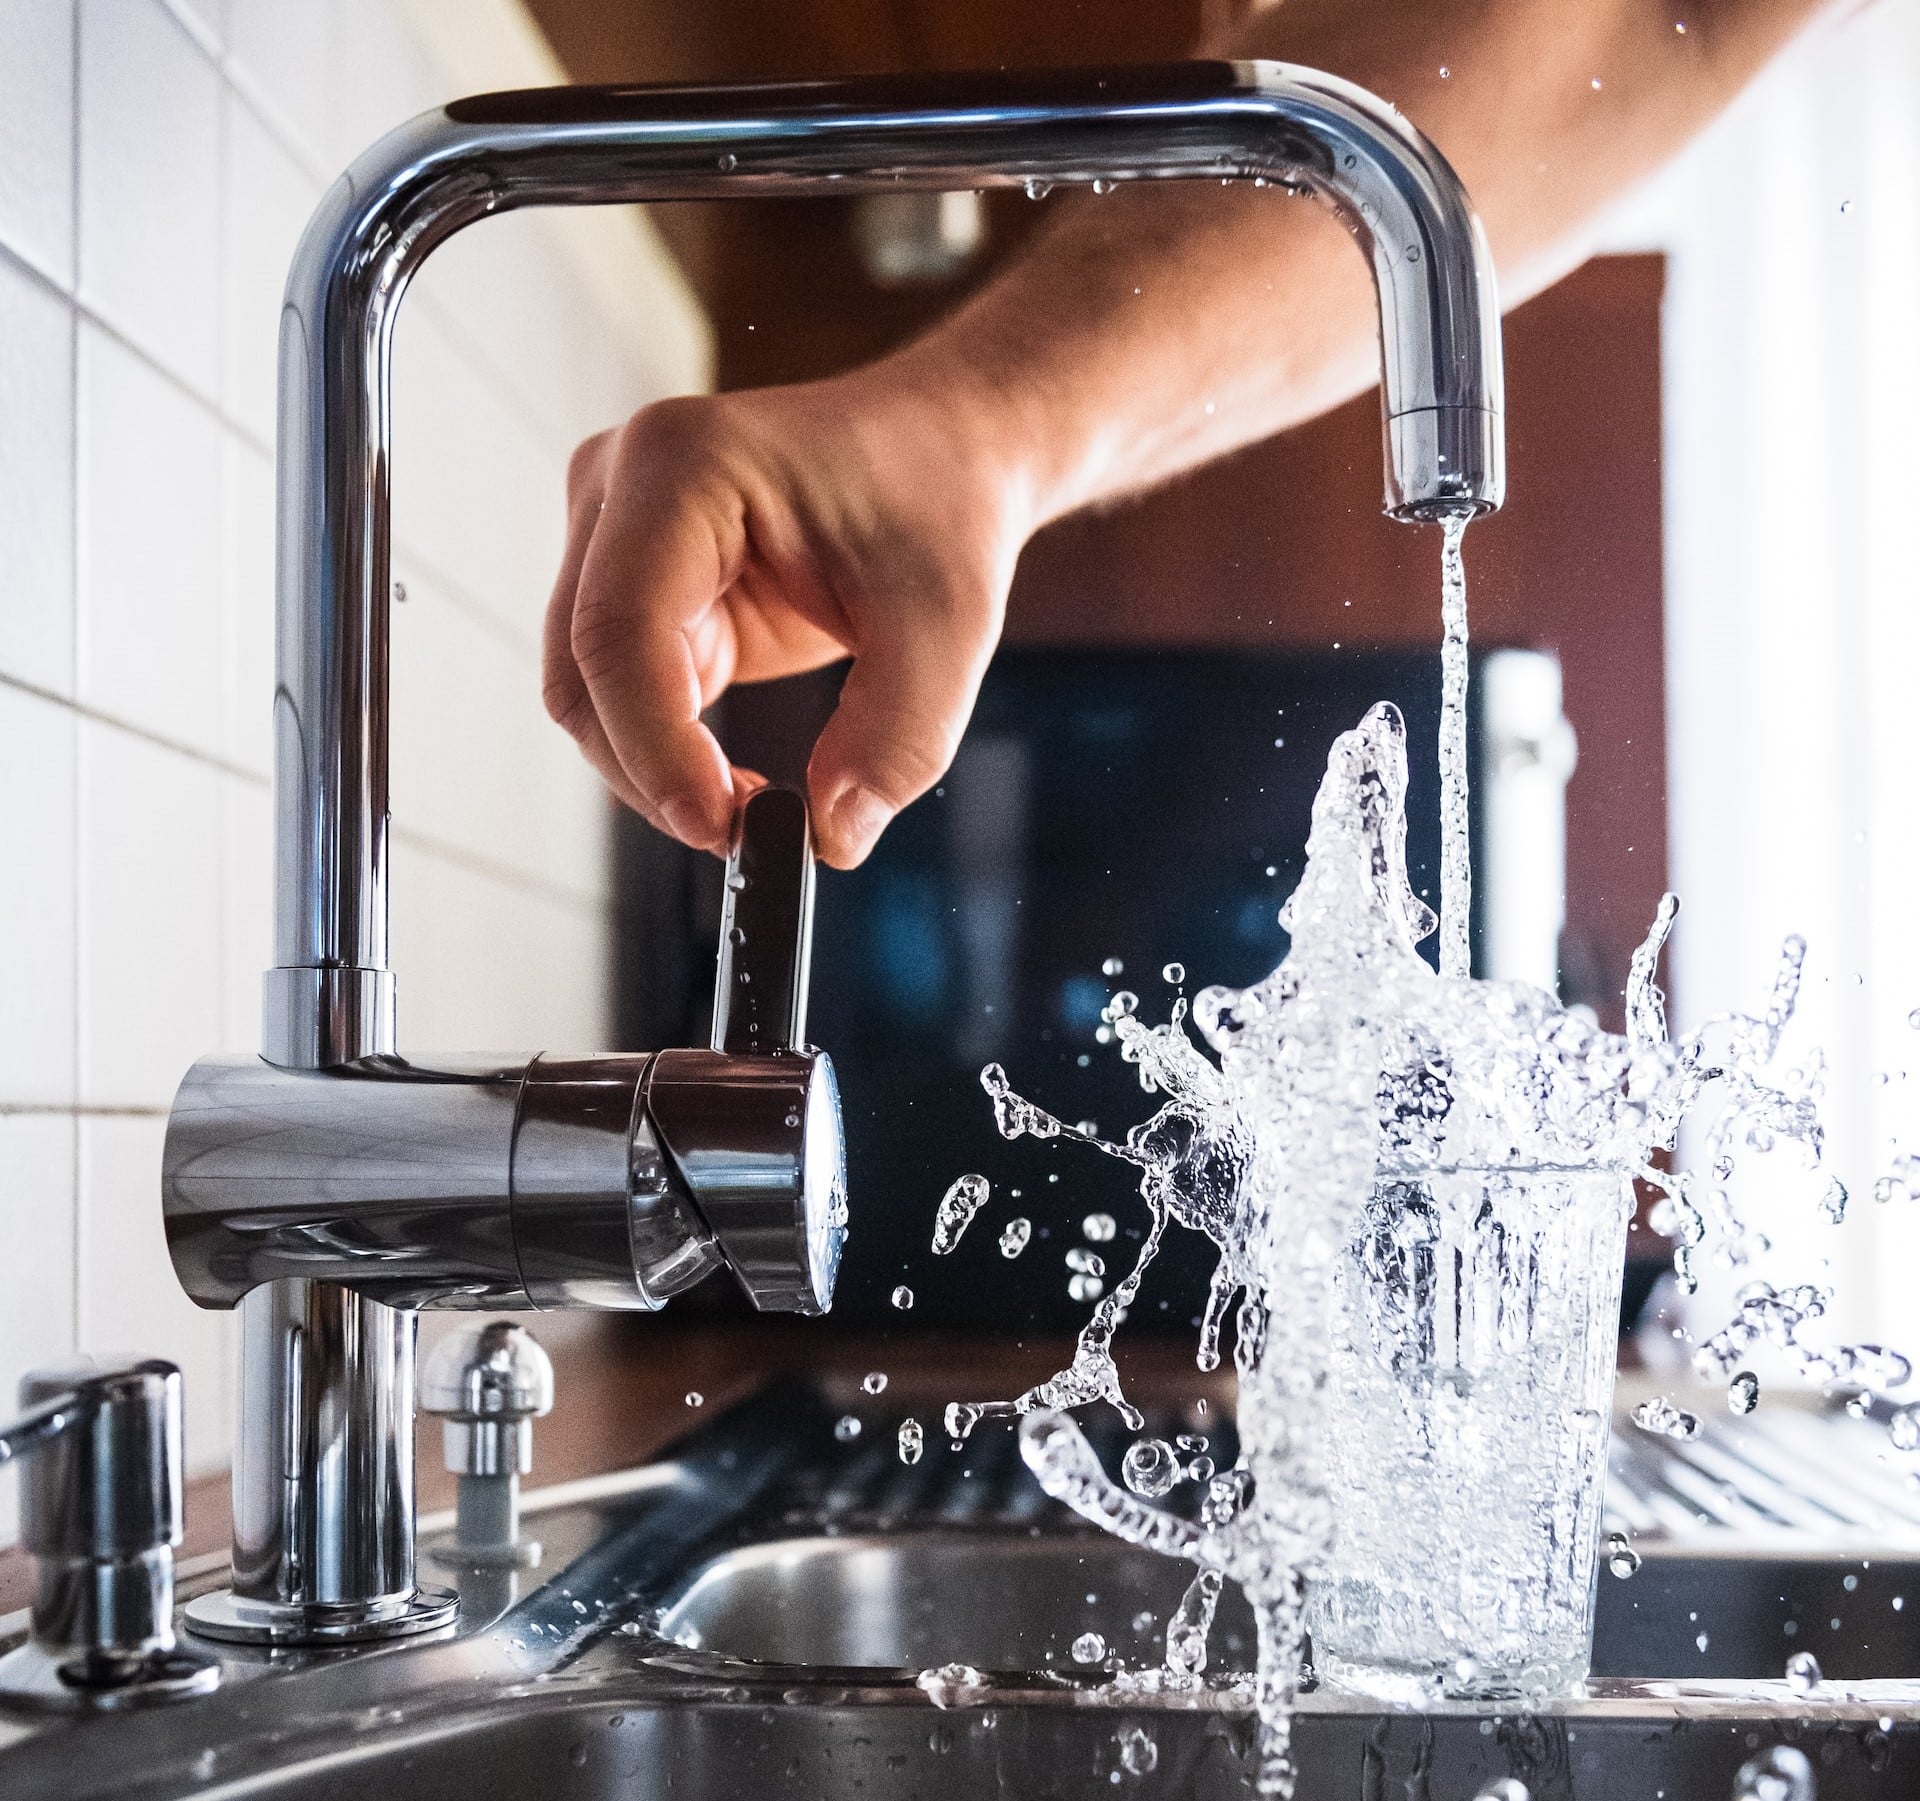
Are you tired of waiting for the kettle to boil? Do you daydream about instant cups of tea or coffee at the turn of a tap? If so, boiling water taps might just be your cup of tea - pun intended!
In this article, we’re going to take a deep dive into the world of boiling water taps - how do they provide boiling water in an instant, what makes them tick, and why might you consider installing one in your own kitchen? Trust us, by the end of this, you'll be as excited about boiling water taps as we are!
What Are Boiling Water Taps and How Do They Work?
A boiling water tap operates through a specialised system installed beneath your sink, connected to both the mains and your home's water supply. The heart of this system is a dedicated tank that not only heats the water but also maintains it at a precise temperature.
As a result, every time you activate the tap, you have immediate access to hot water, eliminating the wait time typically associated with traditional heating methods. This instant availability of boiling water is what sets these taps apart in modern kitchen designs.
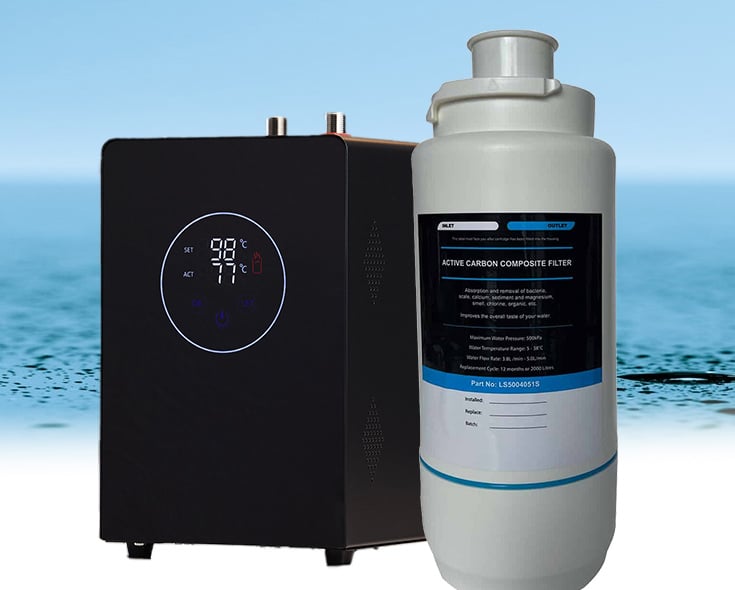
Components of a Boiling Water Tap
Let's delve into the key components that make a hot water tap function as it does:
- The Boiler Tank: This is the engine room of a boiling water tap system. It's typically a compact unit that fits neatly under your sink and heats the water to a near-boiling temperature. The boiler tank maintains the water at this temperature so that it's ready to go whenever you need it.
- The Filter: The filter plays a crucial role in ensuring the water you get from your tap is as clean and pure as possible. It removes any impurities and contaminants from the water before it reaches the boiler tank, providing you with a healthier and tastier hot drink.
- The Tap: The tap is the final point of contact between you and your hot water. Most boiling water taps are designed with safety in mind, featuring child-safe handles and insulated sides to prevent anyone from getting scalded accidentally. The tap typically has two separate flow controls – one for regular cold and hot water, and another for instant boiling water. 4-in-1 taps may have an additional control for chilled filtered water.
By combining these components, a boiling water tap provides a seamless and efficient way to access hot water instantly, all from the convenience of your kitchen sink.
The Installation Process
Installing a boiling water tap might seem like a daunting task, but with the right preparation and a step-by-step approach, it can be quite straightforward. Always remember to follow the manufacturer's instructions and consult a qualified professional if in doubt. Here are the general steps involved in the installation process:
- Choosing the Right Space: The first step in installing a boiling water tap is identifying the right spot in your kitchen. You'll need a spot near your sink and an accessible area beneath it to house the boiler tank and filter.
- Turn Off the Water Supply: Before starting with the installation, make sure to turn off the water supply to avoid any water damage. It's always a good idea to clear out the area under the sink to give yourself plenty of room to work.
- Install the Boiler Tank and Filter: Now, it's time to install the boiler tank and the filter inside the cabinet under your sink. Each model will have specific instructions, so ensure you follow these to the letter. Typically, you'll mount these securely to the side or the base of the cabinet.
- Connect the Water Supply: Once the tank and filter are in place, you’ll need to connect them to your water supply. This usually involves attaching a T-piece to your cold water pipe, which will split the water flow between the main tap and the boiler tank.
- Fit the Tap: With the tank and filter fitted, you can now install the new tap in your chosen position. You'll need to fix the tap to the sink or worktop and connect the tap to the boiling water system using the hoses supplied.
- Turn on the Water Supply: Once everything is connected and tightened, you can turn the water supply back on. Check for any leaks and make sure the tap is working properly.
- Power Up and Test: Finally, plug in the boiler tank and turn it on. It might take a short while before the system heats up. Once it has reached the correct temperature, test the tap to ensure you get a steady flow of boiling water.
For more detailed instructions, including demonstration videos, head to our installation page.
Maintenance and Energy Efficiency
Boiling water taps are designed with user-friendly maintenance in mind:
- Filter Changes: Regularly changing the filter, typically every 6 to 12 months as advised by the manufacturer, ensures your tap water remains clean and fresh. This also contributes to the longevity of the tap and boiler tank.
- Indicator Lights: Some models come equipped with an indicator light to signal when it's time for a filter change.
- Leak Checks: Conducting periodic checks for leaks, particularly after filter changes, can help prevent potential damages.
- Leave it On: It's best to leave the boiling water tap on overnight, only switching it off via the boiler tank when it will be left for 2 weeks or longer.
Read more about maintaining a boiling water tap here.
Are boiling water taps energy efficient?
In terms of energy efficiency, boiling water taps excel:
- Insulated Boiler Tank: The insulated boiler tank maintains water at near-boiling temperatures without excessive energy use, providing hot water on demand.
- Efficiency Over Traditional Methods: This is more energy-efficient than a standard kettle, which often heats more water than necessary, leading to wasted energy.
- Energy and Carbon Footprint Reduction: By only heating the amount of water you need, a boiling water tap can conserve energy and decrease your carbon footprint.
Final Thoughts
In a nutshell, boiling water taps are the triple threat of kitchen fixtures: they're convenient, stylish, and energy-efficient. And guess what? We happen to sell them right here at Hot Water Taps! For a deep dive into why these taps are revolutionising the British kitchen, check out our Ultimate Guide to Boiling Water Taps.
Did you ever stop to consider how much electricity your boiling water tap uses? Or how it stacks up against the common kettle? Well, buckle up, because you're about to embark on a journey into the nitty-gritty of boiling water taps.
We've packed this guide with everything you need to know—from how these modern gizmos work to their energy efficiency and comparisons with traditional kettles. Whether you're thinking about upgrading your kitchen fixtures or simply curious about the energy usage of these taps, we've got you covered. So, let's delve in, shall we?
Introduction to Boiling Water Taps
Boiling water taps, as their name suggests, deliver hot water on demand, removing the need for a kettle. They're a modern kitchen luxury, offering convenience and sleek design – but how do they fare on the energy efficiency front?
Energy consumption is a hot topic these days, and for good reason. We're all looking for ways to reduce our carbon footprint and save on those pesky energy bills. As such, understanding the energy usage of household appliances, like boiling water taps, is vital.
In fact, it's especially relevant for potential boiling water tap users to understand their energy usage before making the investment. After all, while these taps offer a great deal of convenience, they're only truly worth it if their running costs and environmental impact align with your expectations and lifestyle.
Understanding Boiling Water Taps
The working mechanism of boiling water taps is quite fascinating. Underneath the shiny tap you see on your kitchen worktop, there's a complex assembly designed to deliver hot water instantly. At the heart of this system is a heating unit, often tucked away underneath the sink. This unit, also known as a boiler or tank, is filled with water from your mains supply.
When you activate the tap, the water is rapidly heated to near boiling point by the unit's heating element. This process takes place almost instantaneously, which is why you can get hot water on demand. The water is then pushed up through the tap and voila - you have boiling water at your fingertips.
These taps come with various features that enhance their functionality and safety. For example, many models have child safety locks to prevent accidental activation and potential burns. Others may have an insulated spout to ensure the tap stays cool to the touch even when hot water is flowing.
Additionally, high-end models (all of our taps bar Avista) also offer temperature control, allowing you to adjust how hot the water gets. This is especially handy for making delicate teas that require a specific water temperature.
Understanding how these taps work is the first step in appreciating their efficiency and knowing how to calculate their energy usage. Now, let's move on to comparing their energy consumption with that of traditional kettles.
How Much Electricity Do Boiling Water Taps Use?
Now that we've got a grip on how boiling water taps operate, let's tackle the key question: how much electricity do they actually use? Well, to keep water at a piping hot temperature, these taps utilise approximately 10 watts of energy. Doesn't sound like much, does it? To put things into perspective, consider the humble kettle, which gobbles up a whopping 2 to 3 kilowatts every time you flick the switch.
Now, let's imagine you're a tea or coffee enthusiast who savours about six cups a day. If each kettle boil takes about five minutes, you'll be spending roughly half an hour each day just waiting for your water to boil. Sound familiar? Here's the kicker - this daily routine uses about 15 times more energy than an instant hot water tap would.
That's right, by replacing your kettle with an instant hot water tap, you could significantly reduce your energy consumption, even if you're someone who can resist a hot cuppa every hour! So, in terms of energy efficiency, the boiling water tap clearly comes out on top.
Measuring Your Boiling Water Tap's Electricity Consumption
While boiling water taps are generally more energy-efficient than traditional kettles, it's helpful to calculate your device's exact energy usage to ensure it aligns with your household's energy goals. So, how can you measure your boiling water tap's electricity consumption? Let's break it down into a simple step-by-step guide:
- Identify the tap's power rating: You can find this information in the user manual or on the label of the tap's heating unit. It's typically expressed in watts (W).
- Calculate the tap's hourly usage: The power rating gives the energy consumed per hour. For instance, if your tap's power rating is 10 watts, it uses 10Wh (watt-hour) of electricity every hour.
- Estimate daily usage: Multiply the hourly usage by the number of hours the tap is on each day. For a tap that's always on (24 hours), the calculation for our example would be: 10Wh x 24 = 240Wh.
- Convert to kilowatt-hours: Electricity companies bill in kilowatt-hours (kWh), so convert your figure from watt-hours to kilowatt-hours by dividing by 1,000. In our example: 240Wh ÷ 1,000 = 0.24 kWh per day.
- Estimate annual consumption: Multiply the daily consumption by the number of days in a year (365) to get the annual consumption. In our example: 0.24 kWh x 365 = 87.6 kWh per year.
- Calculate cost: Multiply the annual consumption by your energy rate (found on your electricity bill) to get the annual cost. If your rate is 15p per kWh, for example, the annual running cost would be: 87.6 kWh x £0.15 = £13.14
Remember, these steps provide a rough estimate. Actual electricity consumption may vary based on factors such as the tap model, usage habits, and the precise temperature of the hot water.
Should I Turn My Tap Off to Save Electricity?
Interestingly, while it might seem logical to turn off your boiling water tap to save energy when it's not in use, this isn't actually the most efficient approach. You see, turning the tap off means that every time you want hot water, the system has to heat up from cold. This requires significantly more energy than maintaining the water at a steady hot temperature.
Therefore, in general, it's better to leave your boiling water tap on, even when you're not using it. The one exception to this rule is if you're leaving your house for an extended period, say, two weeks or longer. In such cases, turning off your boiling water tap can help to save electricity and reduce your energy bills. So, unless you're packing for a holiday, it's best to let your boiling water tap do its thing and keep your water hot and ready for use.
Final Thoughts
In conclusion, boiling water taps are a fantastic, energy-efficient alternative to traditional kettles, using just a fraction of the electricity and saving you significant time and energy in your daily routine. With boiling water taps, you get convenience, efficiency, and a hot cuppa whenever you fancy, all at your fingertips.
Want to dive deeper into the world of boiling water taps? Check out our comprehensive Ultimate Guide to Boiling Water Taps for more information.
Boiling water taps have become a game changer in our daily lives, haven't they? From brewing a cuppa to speeding up your morning routine, these nifty devices bring convenience right to your fingertips.
In this blog post, we'll dive into the pros and cons of turning off your boiling water tap, helping you make the best decision for your home and lifestyle. So, let's get started!
Should You Turn Your Boiling Water Tap Off?
If you're wondering whether you should leave the boiler tank of your boiling water tap on overnight, you should know that it's more energy-efficient to keep it running, as it takes more power to reheat the water from a cool temperature than to simply maintain its warmth.
However, there are a couple of exceptions:
- If you're jetting off on holiday for more than a week or so
- If the room housing the tank is about to get seriously chilly (i.e. below freezing)
Besides the two exceptions above, there's really very little reason to switch your tap off. If safety is a concern, you can rest assured that our tanks constantly monitor water temperature and switch off in the case of a fault.

So, what exactly is a boiling water tap?
Imagine having instant boiling water at your fingertips – that's what a boiling water tap brings to your modern family home. No more waiting for the kettle to boil or a pan to heat up, these taps make blanching veggies, cooking pasta or noodles, and brewing tea and coffee a breeze.
These nifty gadgets are gaining popularity in home kitchens, thanks to their sleek design and cutting-edge technology. They heat up in a flash, with minimal noise or fuss. Plus, they come with safety features like childproof lock systems to prevent any accidental scalds from hot water. And let's not forget the temperature control settings that guarantee the perfect cuppa every time. What's not to love?
You can read more about our boiling water taps here.
Advantages of a boiling water tap
For all you home cooks out there, this clever gadget is an absolute game changer. Not only does it make whipping up hot drinks like coffee or tea a piece of cake, but it's also a lifesaver for meal prep that calls for boiling water (think soups, pasta, and more). In busy family homes, a boiling water tap saves precious minutes every day, whether you're rinsing veggies, boiling eggs, or cooking up some noodles.
And guess what? Some boiling water taps, like our 4-in-1 models, even come with a filtered cold water feature. That means you get crisp, cold drinking water on demand, too! How brilliant is that?

The cost of running a boiling water tap
You might be thinking, "Surely boiling water taps must be expensive to run?" Well, you're in for a pleasant surprise! They actually cost around 4-10p a day, or between £1-£4 a month. That's pretty much what you'd spend on boiling a kettle a few times daily, so it's unlikely to make a dent in your energy bills.
And let's not forget the savings on gas when you no longer need to heat pans of boiling water on the hob. With the boiler tank storing enough hot water for even the most demanding cooking needs, it's a win-win situation!
Health and safety concerns
Of course, safety is a top priority when it comes to boiling water taps. While they're designed with safety in mind, it's crucial that you use your tap responsibly, just like you would with a kettle. Hot water can cause nasty burns if mishandled, leading to skin injuries, infections, and scarring.
But don't worry – our boiling water taps come with a child-safe spring lock that also turns off the tap when you step away from the sink. This nifty feature ensures you won't have to fret about scalding accidents, giving you peace of mind while enjoying your hot water tap's benefits. The spout itself is also insulated to prevent its surface from becoming hot to the touch, and the tank monitors the system's temperature to prevent overheating.
How to Maintain a Boiling Water Tap
Boiling water taps are a dream come true when it comes to convenience, and the good news is they require minimal maintenance. However, like any appliance, they need some TLC to keep performing at their best over time. Here are a few tips to help you maintain your boiling water tap:
- Check connections: Regularly inspect the connections to ensure they're fully tightened.
- Replace filters: Swap out the filter every 6 months to prevent scale buildup, which can impede water flow.
- Clean the tap: Gently clean the tap with a mild detergent solution and buff it dry using a microfibre cloth. This ensures your tap stays looking great while maintaining hygiene.
- Avoid harsh cleaners: Steer clear of bleach or abrasive scrubbers, as these can damage your tap's finish.
Our boiling water taps are not only affordable and durable, but they also save you precious time every day. Want to learn more about how a boiling water tap works? Dive into the world of instant hot water and discover the advantages for yourself!
If you are thinking of remodelling your kitchen and looking for the perfect sink material to match the rest of your décor, you have come to the right place. With many different materials available today, deciding which suits your taste and budget cannot be easy.
We are here to make this decision easier by giving you a rundown on each material's pros and cons, including stainless steel, composite granite, solid surface, fireclay ceramic and cast iron sinks. So if you are ready to decide to add a new sink feature in your kitchen, read on!
Factors to Consider
There are various factors to consider when selecting the perfect kitchen sink. Different materials can provide different benefits; stainless steel is resistant to staining and cracking, while copper can help enhance bacteria-fighting properties. On the other hand, ceramic is incredibly durable and can cope with the high temperatures of a busy kitchen.
Other factors to consider are size, shape, space and even your budget. Depending on the size of your kitchen, you may want to opt for an under-mount sink rather than an inset sink as it provides more countertop space. On the other hand, if you are on a budget, it’s best to opt for the cheaper stainless steel or composite granite sinks.
The overall style of your kitchen should be considered, too; if you want a modern look, a glossy acrylic sink might fit in nicely with the decor, whilst a traditional space could aptly accommodate something like cast iron or stone. Regardless of your tastes, with careful selection, it is possible to find a kitchen sink that meets all of your needs.
Durability and Maintenance
Finding the perfect kitchen sink can be daunting, but the most critical factors are durability and maintenance. Regarding typical kitchen use, some materials stand up better than others; stainless steel is a popular choice for its robustness and resistance to wear and tear. Copper is also very durable and known for its antibacterial properties, plus it adds a distinctive look to your kitchen space. Porcelain is classic and usually easy to find. However, porcelain needs more repairs over time because of its less resilient material.
The best material for your kitchen sink ultimately depends on personal preference, but maintenance is also important. Cleaning and upkeep are the most important aspects of keeping a sink in good condition; stainless steel and porcelain, in particular, require regular cleaning to keep them looking their best. Composite granite sinks offer exceptional durability and low-maintenance cleaning.
Aesthetics and Style
When choosing the perfect material for your kitchen sink, aesthetics and style are just as important as practical matters. While porcelain, stainless steel and granite are all excellent choices and offer plenty of durabilities, the colours, shapes and textures available can make for a unique design statement or tie into the existing decor of your kitchen. If you are looking for something different, composite stone materials are gaining popularity due to their ability to mimic natural stone while offering stronger scratch and heat resistance.
For those with a more contemporary setup, acrylic sinks come in various colours and can withstand everyday wear and tear without becoming dull or discoloured. Whatever sink you choose, careful consideration of how it will fit in your kitchen’s design should be taken into account, along with its ability to meet your daily needs.
Eco-Friendliness
When choosing the perfect material for your kitchen sink, eco-friendliness should be an essential consideration. Not only will you want a reliable and durable material that is long-lasting and aesthetically pleasing, but also one that explores environmental issues and considers its effect on air, water, soil and waste disposal. By considering the environment when selecting the right material for your sink, you can offset some of the inherent energy use of materials during manufacture and in its entire life cycle, helping protect natural resources while also cutting costs in the long run.
Eco-friendly materials range from recycled stainless steel and porcelain to bamboo or plant-based composite sinks. All these materials offer an optimal balance between durability and reduced energy consumption over their lifecycle. You will have plenty to choose from if you keep eco-friendliness in mind when finding the perfect kitchen sink for your home and lifestyle!
Cost
When selecting the perfect material for your new kitchen sink, cost should be a factor in your decision. Depending on your chosen material, prices range wildly, from budget-friendly options like stainless steel and acrylic to luxury materials like copper or fireclay. While it may be tempting to jump at a bargain price, many times, this can lead to disappointment down the road when a cheaper material starts showing signs of wear and tear due to frequent use.
To ensure that you get the best value for your money, determine how often you will use the sink and how much wear it will accumulate over time before committing to any material. This way, you can rest assured that whatever material you choose is beautiful and can stand up against your kitchen’s demands successfully.
Stainless Steel
When deciding on the best material for a modern kitchen sink, stainless steel is an excellent choice.
Pros
Stainless steel is quickly becoming the go-to option for modern kitchen sinks. There are some definite pros to using this type of sink material. Stainless steel is straightforward to clean and maintain, as it resists corrosion and staining. It is extremely durable and stands up well against everyday wear and tear. Plus, stainless steel is highly affordable compared to other sink materials, making it an excellent choice for anyone on a budget who also wants a stylish kitchen sink.
Cons
Installing a stainless steel kitchen sink can be quite appealing due to its sleek, modern look, but in many cases, this material comes with more drawbacks than benefits. As a relatively soft metal, stainless steel will scratch and dent pretty easily and often shows water stains and smudges over time that are very difficult to remove. Keeping the sink free of bacteria and mould can also be problematic, as traditional cleaning products will damage the finish. Finally, when exposed to acidic food or harsh cleaners, stainless steel can rust. Using stainless steel for your kitchen sink requires careful maintenance to keep it looking beautiful and lasting long-term.
Cast Iron
You do not want to make a mistake when choosing the perfect material for your kitchen sink. That is why cast iron is such an ideal choice - not only is it incredibly durable, but it is also easy to clean and aesthetically pleasing.
Pros
Cast iron sinks require extra care and maintenance, but their rust and chip-resistant construction makes them worthwhile. They are resistant to most temperatures, too, which is why they are often used as one of the most popular materials for kitchen sinks. With proper care and maintenance, a cast iron sink can offer years of reliable use that can withstand wear and tear in your busy kitchen.
Cons
Although cast iron can create a beautiful feature in the kitchen, there are some definite drawbacks to consider when installing a cast iron sink. It is relatively heavy so it may require extra bracing support in your cabinets and countertops. These sinks are also more expensive than most alternatives and are hard to repair if any damage does occur. In addition, these materials need regular care and maintenance to prevent rusting and unsightly staining. Finally, finding a model that perfectly matches your style can be challenging since designs can be more limited compared to other materials.
Ceramic
When it comes to a kitchen sink, ceramic is often the ideal material.
Pros
With its white, glossy finish that resists bacteria growth and its hardy, chip-resistant surface, ceramic can last for years without showing signs of wear - making it an excellent option for those looking to make their kitchen more appealing while ensuring they have something that will stand up to everyday use. Additionally, ceramic is easy to clean and provides a timeless look that remains in style year after year.
Cons
Ceramic kitchen sinks can be quite noisy when dishes are placed in the sink or water is running - after all, ceramic does not absorb sound as some other materials do. Ceramics can also crack and chip easily if you are not careful with what utensils or dishware you place inside.
Granite Composite
If you are looking for durability and chic style in your kitchen sink material, consider granite composite.
Pros
The benefits of granite composite sinks are many. For one, they don’t absorb bacteria or odours, making them an ideal choice for those who live in busy homes. Granite composite also resists stains better than other materials, which makes clean-up easier and faster. This also makes them a good choice if you’re looking for a long-lasting quality sink. What's more, granite composite is almost indestructible and won't chip, dent or scratch over time.
Cons
Although granite composite looks sleek and modern, using it for a kitchen sink may not be the best option. Granite composite is incredibly heavy, which can cause a strain on your countertops or cabinetry over time if it’s not adequately secured. Additionally, granite composite sinks can be more expensive than other materials, and they need to be resealed regularly.
Copper
Since antiquity, copper has been used in kitchens and bathrooms, making it a classic material that is unlikely to fall out of style any time soon.
Pros
Copper sinks are naturally hygienic and bacteria-resistant, making them perfect for busy kitchens. Copper is also a soft material that won't chip or crack when dishes and utensils are placed in the sink. Plus, copper adds an elegant touch to any kitchen with its beautiful shiny finish that will patina over time for an eye-catching, vintage look.
Cons
Copper is a soft metal that easily scratches and discolours with general wear and tear. To counteract this, regular wax or mineral oil coatings must be applied to help maintain the patina finish and ultimately protect the copper from further damage. Moreover, copper is expensive compared to other sink materials like stainless steel, so you may want to weigh your options before investing in a copper sink.
Conclusion
When selecting a kitchen sink material, it’s essential to consider the pros and cons of each one. Granite composite can offer exceptional heat, stain and water resistance but is expensive and difficult to repair. Copper offers beauty and durability; however, it is soft and will require regular maintenance to keep it looking its best. Ultimately, your choice of sink material will depend on the style and budget of your kitchen project.
Our boiling water taps are the ideal upgrade for a new kitchen sink, saving you time at home every single day. Find out more about how a boiling water tap works.
Do you want a beautiful, modern new kitchen this year? It can be an exciting time to update your home and create a stunning space for everyone in the family to enjoy. But before you get started on ripping out cabinets and ordering new tiles, it's important to understand the cost of a new kitchen in 2023. What should you expect? We'll dive into all the details here so that you can make well-informed decisions when planning your budget.
What Is the Average Cost of a Kitchen Renovation in 2023?
According to industry estimates, the typical cost for a kitchen renovation is expected to be between £5,000 - £10,000. This amount can vary greatly depending on:
- The size and scope of the kitchen remodel
- The type of materials you choose
- Any labour or installation services you require
If you want to replace your appliances and worktops without going through a full kitchen remodel, then expect to spend around £2,500 - £5,800 for materials.
The good news is that there are plenty of options available for even those working with a modest budget. It's all about doing your research and finding quality materials so that you can be sure to get great value for your money.

Factors That Affect the Cost of a New Kitchen in 2023
When it comes to remodelling a kitchen, the price tag can quickly skyrocket depending on many different factors. The size of the room as well as the quality of materials and appliances can significantly influence how costly the project will be. An open-concept layout with custom cabinetry and top-of-the-line counters and appliances may run up expenses much faster than using pre-made units.
Working with contractors who specialise in kitchen renovations can help keep costs under control, but it's important to remember that doing thorough research beforehand is key to getting value out of any renovation project.
Breakdown of Costs for a New Kitchen in 2023
It can be helpful to understand the different costs associated with a new kitchen. As a general rule of thumb, expect to pay around:
- £2,500 - £5,000 for materials
- £3,000 - £7,500 for labour and installation services
- £1,500+ depending on the choice of kitchen appliances
- £2,000+ for bespoke kitchens
All in all, you should expect to spend between £7,000 - 17,100 for a complete kitchen renovation. You may pay more or less depending on the type and size of your project.
Financing options are usually available to help cover larger expenses such as major appliances and fixtures, making the cost of a new kitchen far more manageable. Whether you choose to go big or small, creating a plan and understanding the breakdown of costs will give you power when it comes time to renovate your kitchen.
What Is the ROI of a Kitchen Renovation in 2023?
The return on investment (ROI) of a kitchen renovation in 2023 will depend on the quality of the materials and labour used, as well as the scope of the project. The additional value a new kitchen can add to your property is between 5-15%, depending on the size of the kitchen and how extensive the renovation was.
While there are no guarantees that every investment will pay off in the future, investing in kitchen renovations can result in a higher sale price if and when you decide to sell your home.

How to Save Money on a Kitchen Renovation in 2023
A kitchen renovation doesn't have to break the bank! With a little creativity, there are plenty of ways of saving money while still getting the look and feel you want. For example, deciding to keep your existing cabinets and just paint sand, or re-stain them can help reduce costs significantly. Additionally, shopping around for low-cost yet high-quality materials and tools helps lower expenses without sacrificing total project quality.
Finally don't forget smaller touches like painting accent walls versus changing the entire colour scheme in the room or using refurbished appliances instead of brand-new ones. With all of these cost-saving tips, you can achieve a stunning dream kitchen without breaking the bank.
Trends in Kitchen Design for 2023
Kitchen design trends have come a long way in recent years. Homeowners are now finding more modern and efficient layouts that allow them to maximise the space in their kitchens, which is why trends have been shifting away from traditional designs.
Popular elements of modern kitchen design include open plans with plenty of natural light, more natural materials such as stone countertops and wood cabinetry, and sleek appliances that provide ease of use and convenience. Many homeowners also choose to integrate smart technology into their new kitchens, including cutting-edge refrigerators with screens that can be used to access recipes or monitor their contents. Additionally, environmentally conscious homeowners are emphasizing energy-efficient features like LED lighting and Smart home appliance control systems.
The range of options has made it easier than ever for people to create a kitchen that is not only aesthetically pleasing but also serves their lifestyle needs in terms of function and convenience.
Choosing the Right Contractor
When it comes time for a much-needed kitchen renovation, selecting the right contractor is essential. Finding someone who has expertise in the field and years of experience, as well as a keen eye for design and detail can help you achieve the perfect kitchen that fits your family's style and needs. Take time to review potential contractors' portfolios, as well as their references, to make sure that they have the capabilities to transform your kitchen into something truly special.
By understanding contractors' insurance status, you are protected from any liability issues that may arise from unforeseen circumstances during the process. It’s important to select a contractor who fully understands your expectations and will complete your project on time and within budget while still providing the highest level of quality craftsmanship.
Mistakes to Avoid When Fitting a New Kitchen
Fitting a new kitchen is a big undertaking, and it's important to make sure everything is done correctly. To ensure a successful renovation project, it's best to avoid common mistakes such as making hasty decisions about design, overlooking the need for adequate storage, neglecting ventilation requirements and failing to assess budget constraints.
Overlooking important details such as available space in work areas or ensuring there's enough cupboard and drawer organisation can cause serious issues further down the track. It's important to plan ahead and make sure that accessibility is also taken into account, considering all aspects of door widths, filter access and easy movement from bench top to sink.

Conclusion
Kitchens are a worthwhile investment if you do your research and put in the effort to create the ideal kitchen you have always wanted. We suggest considering a few factors – affordability, functionality, style, and longevity. With these in mind, when planning to upgrade your kitchen in 2023, you can expect to spend an average of ten pounds.
This can fluctuate depending on the size of your kitchen and the materials used. Ultimately, it's up to you to decide what budget range works best for your needs and lifestyle. Keep in mind that although it’s important to stick to a budget, your health and safety should also be at the forefront of your decisions.
Our boiling water taps are the ideal upgrade for a new kitchen, saving you time every single day. Find out more about how a boiling water tap works.
Are you a passionate tea drinker? Do you consume several cups of tea daily and believe it boosts your health when the opposite may be true? While research suggests that drinking moderate amounts of tea can positively benefit physical and mental well-being, too much of the beverage could increase your risk for adverse effects.
In this blog post, we'll explore key considerations to remember if you’re indulging in too many daily cups of tea. We’ll also look at healthier alternatives if needed. So read on—it's time to discover whether that cup of hot bliss is helping or harming you!
How Much Tea is ‘Too Much’?
Tea is a popular beverage cultivated and enjoyed for centuries, and many cultures worldwide enjoy their unique tea-drinking customs. Although there are many benefits to adding tea to our daily diets and lifestyles, health experts generally agree that we should stick to no more than 4 cups per day.
What Happens When You Drink Too Much Tea?
Drinking too much tea can have various negative effects on your health. The high levels of caffeine present in some teas can cause palpitations, nervousness, insomnia and irritability. In addition, overconsumption of tea can interfere with the absorption of essential vitamins and minerals such as iron and calcium because some constituents found in tea may decrease their bioavailability. People who drink vast amounts of tea regularly may suffer from dehydration due to its diuretic effect.
Furthermore, people sensitive to caffeine should be extra cautious when drinking tea as they may experience elevated heart rate, anxiety and tremors. It is important to remember that although evidence suggests an association between green tea consumption and lowered risk of certain types of diseases, regular overconsumption of highly caffeinated teas should be avoided.
Caffeine Content in Different Teas
Tea is a trendy beverage, and it comes in wide varieties with unique flavours and health benefits. You may be surprised to know that all types of tea contain some levels of caffeine; however, the amounts vary depending on the type of tea. Comparatively, many types of teas have a moderate level of caffeine when compared to coffee.
Here's a rough breakdown of caffeine content by tea type:
- Black tea: 40–60mg of caffeine per cup
- Green tea: 25–40mg of caffeine per cup
- Oolong tea: 12–55mg of caffeine per cup
- White tea: 6–60mg of caffeine per cup
- Herbal teas (including lemon balm, chamomile and hibiscus): 0–5mg of caffeine per cup
Regardless of what type you prefer, tea is a great way to stay hydrated and enjoy the rich flavours and nutritional benefits it has to offer. As with any beverage or food, moderation is key for healthy consumption.
Tea and Its Impact on Hydration
Tea is often enjoyable but can positively affect our health and hydration. Tea is an excellent source of antioxidants that can improve our cardiovascular health, reduce stress, and energise us. But tea does more than taste good; a normal amount (i.e. 2-3 cups a day) of tea can help prevent dehydration.

Caffeine has a mild diuretic effect, encouraging urination so that your body will replace fluids that otherwise would be lost due to activity or simply being outdoors where it may be hot and dry. Drinking other caffeinated beverages such as soda or coffee won't provide the same hydration replacement benefits since their sugar content acts to pull moisture from your body.
Does Tea Have Any Nutritional Value?
Tea, in general, is known for its calming and soothing properties. However, some types of tea are beneficial to our health as well. Herbal teas, made from steeping herbs, plants and spices in hot water, offer nutritional value that can help support overall wellness.
Whether it’s a herbal blend to ease insomnia or a green tea to boost our metabolism and immune system, these drinks provide antioxidants and vitamins that can contribute to our nutrition. Not only are herbal teas delicious, but they can also fill our bodies with essential minerals such as zinc, iron, magnesium and phosphorus. Drinking herbal tea is a great way to add nutrients to our diet without taking pills or supplements.
The Link Between Tea Consumption and Heart Health
Regular consumption of tea has been linked to lower blood pressure levels, reducing the risk for heart disease. Studies have shown that drinking 3-4 cups of green tea a day can help reduce the risk of stroke as well. Additionally, Polyphenols and catechins found in green and black teas are thought to improve cholesterol levels in both men and women, leading to improved heart health.
Some types of tea are also thought to reduce the risk of certain cancers due to their high antioxidant content. Although there is much more research needed before any definitive conclusions can be made, current evidence suggests that tea consumption may be beneficial in protecting our health.
Tea and Its Potential Role in Cancer Prevention
Tea is rich in antioxidants, natural compounds that can help fight off free radicals, which are molecules that damage cells and contribute to the development of cancer. Free radicals are produced by everyday activities such as smoking, exposure to UV light from the sun, and even simply breathing. Regularly consuming foods and beverages that contain antioxidants can help offset any negative effects caused by these activities - although not all teas are equal.

Green tea is exceptionally high in antioxidants thanks to its production process, which involves steaming the leaves instead of fermenting them like other teas (such as black or oolong). This process helps preserve many beneficial compounds in green tea leaves, making it a great choice for anyone looking for an antioxidant boost.
While numerous studies have been conducted on the potential role of tea in cancer prevention, most experts agree that more research must be done before any definitive conclusions can be made. However, some studies have shown promising results about certain types of cancers.
The Effect of Tea on Sleep
Tea is a popular beverage for many, especially in the afternoon. But did you know that it can also affect your sleep quality? Studies suggest drinking tea too close to bedtime may disrupt your body's sleep cycle. The presence of caffeine in tea not only keeps one from getting drowsy but limits the production of melatonin, a hormone associated with inducing sleep.
Moreover, it suppresses rapid eye movement (REM) sleep, adversely affecting overall health and well-being. Despite the potential negatives, tea does provide some benefits for better-quality sleep. Certain teas, like black and chamomile tea, are packed with antioxidant elements and have social benefits if consumed moderately during dinner or an hour before sleeping. This will help you relax as it promotes normal bodily functions while limiting caffeine intake so you can still fall asleep easily at night with minimal disruptions.
The Impact of Tea on Anxiety and Stress
Studies have shown that regular tea drinking can help reduce stress and anxiety. The calming effects of tea are largely due to its active ingredients, such as l-theanine, which has been found to increase alpha wave activity in the brain, resulting in relaxation. Tea also has low levels of caffeine, which, unlike coffee, does not cause overstimulation and can provide a more relaxed energy boost compared to other beverages.
Furthermore, like many activities involving intentionality and thoughtfulness, drinking tea can be an act of self-care. Taking the time to steep a cup of tea and savour its flavour can bring peace in moments of distress or calm down any rising feelings of anxiousness. All these benefits make it no surprise why tea is one of the oldest drinks known to man, with its calming effects still strong today.
Tea Consumption During Pregnancy
Drinking moderate amounts of tea during pregnancy is an enjoyable way for expectant mothers to get their daily caffeine fix. But does this mean it's safe to drink tea during your pregnancy? While there are no clear-cut guidelines around drinking tea during pregnancy, studies have suggested that moderate consumption of herbal and green teas can offer various benefits. Considering the antioxidant activity in green and herbal teas and their natural diuretic effects, they provide medicinal value, making them ideal beverages while pregnant.
Despite small amounts being generally safe, health experts recommend pregnant women don't consume more than 300mg of caffeine a day. Women sensitive to caffeine may want to limit their caffeine intake to 100mg per day.
Alternatives to Tea for Improved Health
With social media 'experts' often touting the many benefits of tea, many of us increasingly feel the need to drink different teas for improved health. While tea remains popular for its wide variety of flavours and health benefits, plenty of other alternatives are available. Alternatives range from herbal infusions like tulsi and rooibos to exotic blends like yerba mate and kombucha.
Each of these drinks has its distinct flavour and offers a range of health benefits that can help support overall well-being. With so many different teas available, it cannot be easy to know which one is right for you, but by learning about their unique benefits and properties, you can find a tea that suits your taste buds while also helping you stay healthy.
The History of Tea and Its Popularity
The Origin Story of Tea
Tea is believed to have originated in China, where it was consumed as far back as 2737 BC. It wasn’t until the 16th century that tea came to Europe when Portuguese traders brought it back from their travels in China. However, it wasn’t until the 17th century that tea became more popular in Britain. This was thanks mainly to Catherine of Braganza, the queen consort of England's King Charles II, who introduced tea drinking at court during her reign. From then on, tea became increasingly popular among British citizens, and by 1750, it had become Britain’s favourite drink and a regular part of everyday life for many citizens.
The Emergence of Afternoon Tea
By 1820, afternoon tea had become an established ritual in Britain. The practice was initially started by Anna Maria Stanhope (the Duchess of Bedford), who would often feel hungry around four o'clock in the afternoon before dinner time. She started asking for light snacks and small sandwiches to be served with her cup of tea at five o'clock to tide her over until supper time. Her friends soon followed suit, and this custom quickly caught on with other members of high society. Eventually, afternoon teas became so popular that even working-class households began having them during holidays or special occasions such as birthdays or weddings.
https://unsplash.com/photos/RKDP3D-6G5E
alt text: a white ceramic mug with tea inside
The Modern-Day Appeal of Tea
Today, there are few drinks more ingrained into British culture than tea –– whether enjoyed with breakfast or after dinner with dessert. Whether you prefer black or green teas, herbal teas, or flavoured teas –– like Earl Grey –– there is a taste that suits any palette in the modern supermarket. Tea gives the modern human a moment to think, to enjoy, and to be.
Overview of the Types of Tea
With its origins dating back thousands of years, tea has come to encompass a variety of unique flavours and types. From herbal teas to yellow tea, there’s an abundance of options for all drinkers. Most types should be brewed and served at different temperatures, according to the leaves used in the tea. Here’s a breakdown of the main types of tea and their brewing temperatures:
- Black tea: 95–100°C
- Green tea: 70–80°C
- White tea: 65–85°C
- Oolong tea: 80–90°C

Conclusion: Is Tea Consumption Harmful or Beneficial?
In conclusion, drinking tea can be both beneficial and harmful. Moderate herbal or green tea consumption is considered safe during pregnancy and can offer various health benefits. However, it’s important to remember that consuming too much caffeine from any source may adversely affect some people.
Our boiling water taps can make up to 50 cups of tea an hour, perfect for the tea-loving British family. Find out more about how a boiling water tap works.
Learn the difference between your boiling water tap's filters and find out how to replace yours in just a few simple steps.
Your Filters
Every boiling water tap in our range is supplied with an anti-scale/carbon filter (WF100). This is designed to trap impurities and minerals from your mains feed and protect your tap’s components from limescale and other mineral deposits.
Whether you have more than one filter will depend on whether you have a 3-in-1 or 4-in-1 tap, though replacing the filter works in the same way for both:
- 3-in-1 taps deliver filtered boiling water using the WF100 anti-scale filter
- 4-in-1 taps deliver filtered boiling water and filtered cold water using the WF100 anti-scale filter and the WF200 anti-bacterial filter
The anti-scale filter (provided with both systems) preserves the performance of your 3-in-1 or 4-in-1 tap by preventing corrosion caused by limescale. The anti-bacterial filter (provided with only 4-in-1 systems) removes contaminants from your cold water feed.
How to Change the Filter
Both the WF100 anti-scale (which comes with all tap systems) and WF200 anti-bacterial filter (which only comes with 4-in-1 tap systems) are replaced in the same way.
- Turn off the isolation valve
- Switch the boiling water tank off at the power source
- Unscrew the filter cartridge with a 1/4 turn and twist the housing to remove the carbon filter from the inside. There may be a bit of water left in there so it’s best done over the sink!
- Take the new carbon filter out of its packaging and slide it into the housing with the hole facing upwards
- Screw the cartridge back into place with a 1/4 turn, making sure it’s completely locked into place
- Turn on the isolation valve, followed by the boiling water tank
- Test the tap and check for any leakages. If there is a leakage, check and tighten the connection
- Voila! Your filter should be back up and removing impurities instantly
Replacing the filter at regular intervals (at least every six months) will prolong the lifespan of the boiler tank and system.
Tip: The anti-scale filter is grey while the anti-bacterial filter is blue.
Watch the video below for a demonstration:
FAQs
How Regularly Should You Change Your Filter?
It's recommended that you change your filter every 6 months, although those living in a hard water area may need to replace it more regularly. If you notice a decrease in boiling water pressure or taste any impurities in the filtered water then it could be time to replace your filter before the recommended timeframe.
How much will it cost?
Our filters are just £29.95 - other brands may cost more. We also offer a subscription service where you will be sent a filter every 6 months for just £24.95.
Why Change Your Tap's Filter?
Keeping your tap’s filter clean and free from any impurities is essential for protecting the tap and its components from limescale and other mineral deposits. By changing your filter as part of regular maintenance you can ensure that you enjoy crystal-clear, purified boiling water on tap whenever you need it.
Forgetting to replace your boiling water tap’s filter may also void its warranty.
Is Filtered Water Better for You?
Although UK tap water is safe to drink, there's no denying that filtered water tastes better. By removing chemicals and minerals, the water becomes 'pure' and both looks and tastes great. If you're a fan of filtered water, you'll love our 4-in-1 taps. Platinum and Quantum both offer filtered cold water at the standard mains temperature, while Quantum Chilled offers it down to an ice-cold 4 degrees.
For more information and to buy a filter replacement for your boiling water tap, click here. Alternatively, get in touch with our team to find out more.
Grey kitchens have grown in popularity over recent years and show no signs of going out of style anytime soon. From warm, greige palettes to deep charcoal tones, grey kitchen designs bring a timeless cool that makes these spaces perfect for all tastes.
Whether creating an ultra-modern look or embracing vintage charm and patina, this in-depth guide will help you understand the trends and considerations for grey kitchen design so you can craft your dream space right up through 2023!
The Basics of Grey Kitchens
Grey kitchens have become increasingly popular over the past few years due to their timelessness and versatility. If you are thinking about jumping on the grey kitchen bandwagon, there are some basic things that you need to consider. The first thing is the grey shade; cool greys pair well with modern, contemporary spaces, while warmer greys lend a cosier, classic feel.
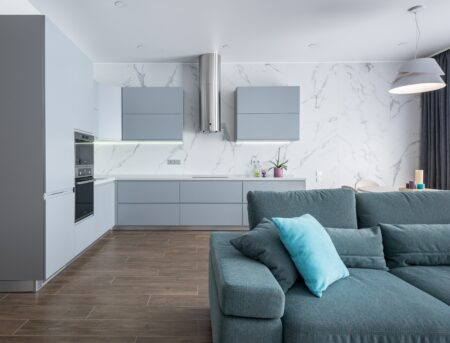
Another thing to consider is how much grey you want; one-coloured cabinets in one hue may be subtle and sophisticated, while two-tone kitchens offer more contrast and visual interest. Be sure to pick a good grey paint or tiles that won't fade over time, as maintaining your colour will be key to achieving a stylish outcome. Lastly, don’t forget the finishing accents - adding small pops of colour or patterned wallpaper can elevate your kitchen design even further.
What Makes a Grey Kitchen Timeless?
A grey kitchen is a classic way to bring a balanced and timeless taste to your home. Grey can be soothing but also add an atmosphere of sophistication. The neutral tones provide a great opportunity for creativity in your kitchen; adding graceful touches of other colours, such as bright splashes of pastels, will warm up the environment and create life in what could otherwise be a minimalist room.
The shape can also change the look of any kitchen, so consider adding interesting or unexpected elements to your space, like glass walls for ethereal vibes or open shelving for contemporary and chic charm. Creating a functional living space with this neutral and calm colour provides a comfortable yet stylish area that will last time.
New Trends and Ideas for 2023
The start of the new year, 2023, has changed kitchen trends and ideas. The biggest trend growing in popularity is storage solutions that use otherwise wasted space. For example, corner drawers and hidden compartments are popping up in kitchens nationwide. This helps keep worktops and shelves organised while providing plenty of functionality.
Another trend this year is the utilisation of more natural materials like wood and stone for worktops rather than opting for plain, monochromatic surfaces. Adding these textures to your kitchen brings a unique, elegant feel without sacrificing an ounce of style.
Top Tips for Designing a Grey Kitchen
If you're ready to upgrade your kitchen and give it a fresh look, consider designing with grey. Grey is versatile, timeless, and classic, allowing homeowners to create modern yet inviting spaces. Start by choosing the right shades of grey or even introducing contrasting colours. Be creative with your tile choice, whether opting for interesting patterns or modern monochromes. Selecting the right appliances will help keep your grey kitchen looking stylish - think sleek stainless steel and black finishes.
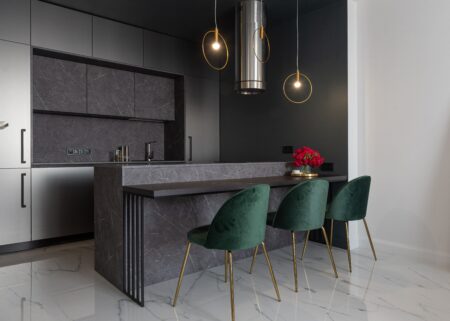
With an appropriate lighting plan, you can make your grey kitchen come alive - ensure that all task areas are illuminated brightly enough for comfort and efficiency. Finally, accessorize using subtle tones to add layers of texture and pops of visual interest!
Popular Types of Grey Kitchens
Grey kitchens have become increasingly popular due to their timeless aesthetic and ability to fit many tastes. You can choose from a few different grey kitchen styles, including contemporary, countryside chic and industrial-style kitchens. For a modern take on this classic shade, opt for a contemporary kitchen featuring sleek surfaces, neutral tones and understated accents.
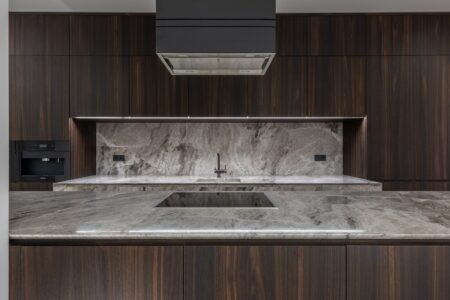
If you'd rather go for something more earthy and traditional, consider a countryside style: natural materials like exposed brick, wooden worktops, and muted colours like greys and blues create a cosy atmosphere. Last but not least is the industrial-style kitchen which combines vintage decor elements with metal surfaces, open shelving and concrete walls for an urban look.
How to Decorate Your Grey Kitchen
If you want to create more warmth and energy in your grey kitchen, there are a few clever ways. First, add pops of colour through fresh plants and colourful decorations. Consider brightening up dark grey walls with fun prints and art pieces – these can easily be switched out as often as you'd like for a fresh new look each time.
Another idea is to spice up your flooring by adding an area rug or other textured material that adds boldness and style. For example, an intricately designed Persian rug will bring texture and great visual contrast against the otherwise slate-coloured walls or floors. Last, don't underestimate the power of lighting – natural light in particular! Bigger kitchen windows or French doors can help enliven the space.
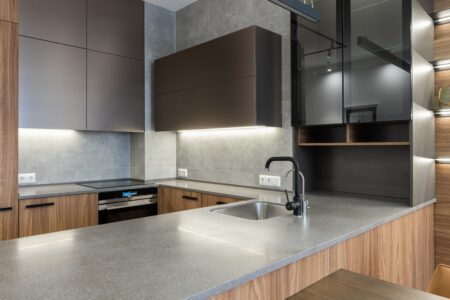
Working Colour Into Your Grey Kitchen
Working colour into your grey kitchen is a great way to give the space a unique personality while creating a soothing atmosphere. Whether you choose bold, vibrant colours or subtle shades, introducing even a few elements of colour will make a big difference in visually livening up your kitchen.
You can start by simply painting your lower cabinets in a cloudy blue and introducing bright pop of colour through accessories like multi-coloured striped towels and placemats, vases, or decorative plants. Even if it's just one wall featuring art prints in different hues, injecting just a little bit of colour will help to take your grey kitchen from dull to delightful.
Maximising the Impact of Your Grey Kitchen
Grey is the perfect kitchen colour for a timeless, classic, warm aesthetic. Different metal finishes can bring a sense of contrast and interest to the overall scheme to maximise the impact of your grey kitchen. Variations in brushed, aged, burnished or matte brass, copper or chrome will not only help create different aesthetics but also provide different levels of drama or softness suitable for different communal spaces.
For example, embracing matte bronze tones with contemporary cabinetry is ideal for creating an intimate atmosphere. Utilising different metal finishes to create an interesting combination of textures will help you create an unforgettable grey kitchen look.
Best Materials for a Luxury Grey Kitchen Makeover
When it comes to luxury kitchens, grey is an elegant and timeless colour that can bring sophistication and class to any home. Various materials are available for luxury kitchen makeovers in shades of grey, from natural wood cabinets to sleek marble countertops. Steel appliances offer a contemporary look that pairs well with light and dark shades of grey.

For additional luxury features, choose black quartz for the backsplash or luxury veined granite countertops. Brushing metal hardware to your doors and drawers will combine everything for a luxury look. With the right combination of materials, you can refresh your luxury grey kitchen.
Easy Ways to Refresh your Grey Kitchen
If you've lived with the same grey kitchen for much longer than you'd care to admit, it may be time to make a few refreshes. Bringing in new decor can help reinvigorate your space without replacing any major appliances or fixtures. Consider changing your window treatments for something bright and colourful, or hang some simple greenery on the walls. Adding a unique backsplash or painting the cabinets can also make a difference.
Another easy idea is to accessorize; swap out drab textiles like dish towels and oven mitts for something bold and fresh, or introduce new metals or finishes. With a few simple changes, your grey kitchen will be ready for a total style revival!
Making it Modern: Combining Textures in Grey Kitchens
Modern kitchens are a great way to create a sense of modern style and sophistication. With the addition of different textures in a grey kitchen, you can easily make it modern and chic. Many textures, such as marble countertops, glass tiles for the backsplash, luxuriously textured tile around the stove, and unique patterned wallpaper on the walls, can modernise your kitchen space.
You can combine elements from these various materials to create an eye-catching modern look in your kitchen. With a thoughtful combination of textures, modern grey kitchens can become the trendiest and most fashionable place to cook delicious meals.
Conclusion
Grey kitchens have become a versatile way to bring style into any home. Whether you prefer them modern, with glossy surfaces, or classic and more subdued, they are sure to highlight the personality of your kitchen refreshingly. Grey kitchens offer plenty of texture possibilities, making them look sophisticated and providing timeless charm.
They can set a pleasant atmosphere by calibrating the shade accordingly without being too bold or distractive. Therefore, if there was ever an answer as to whether grey kitchens are here to stay in 2023 – it is a resounding yes!
Our boiling water taps come in a huge range of luxury finishes - perfect for a grey kitchen - from gold to matt black. Find out more about how a boiling water tap works.
If you're serious about food safety in your kitchen, following good hygiene practices is necessary. As is true with any area in the home, bacteria can easily build up and cause illnesses if left unchecked. If you're regularly cooking in your kitchen, dangerous pathogens such as E.coli, Salmonella and Listeria can quickly spread via food, utensils or surfaces if they aren't properly managed.
The Benefits of a Clean Kitchen
Having a clean kitchen is not only beneficial when it comes to preparing meals, but it also helps contribute to a healthier home. When gross kitchen habits such as leaving food out overnight or letting food go mouldy in the fridge are avoided, it helps to reduce the introduction and development of germs.
These germs can cause food poisoning, which can lead to unpleasant and sometimes serious illnesses. Ultimately, following good kitchen hygiene practices is the only way to ensure that your food is safe to eat and that the environment in your kitchen remains healthy for you and your family.
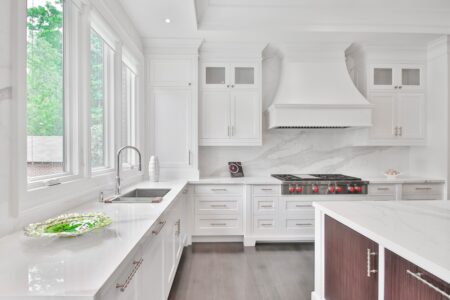
Rule #1: Keep Kitchen Surfaces Clean and Sanitised
Keeping your kitchen surfaces clean and sanitised is important to ensure your home's health. While a weekly wipe-down and polishing with a damp cloth are still necessary, they may not tackle all of the bad bacteria that can accumulate over time. A great way to keep on top of this is to use a household cleaner with disinfectant properties daily as part of your regular cleaning routine.
This can eliminate certain dangerous bacteria from surfaces, such as worktops and the kitchen splashback, without scrubbing with more abrasive products, which can damage surfaces. As well as protecting your and your family's health, sanitising the kitchen will help keep food fresh, saving money in the long run.
Rule #2: Separate Raw and Cooked Foods
Cooking meals at home can be healthier for your family than eating out, but there's more to healthy meal prep than just using fresh ingredients. Keeping raw and cooked foods separate is essential in avoiding food-borne illnesses that can lead to serious health issues. When shopping, put raw items in one bag and ready-to-eat items in another. When storing food, ensure enough space between the two food categories. This will prevent cross-contamination through contact or drips from raw items contaminating cooked ones.
Labelling stored items can also help keep track of what has been cooked and what is still raw. Following these simple habits at home will provide an extra level of safety when it comes to preparing quality meals for your family!
Rule #3: Disinfect Sponges and Towels Regularly
The cleanliness of your home is essential for a healthier lifestyle. That's why it's important to disinfect sponges and towels regularly. Sponge cleaning should occur daily due to the bacteria they absorb while cleaning dishes and surfaces in your kitchen. For even greater sanitation, microwave them damp for a couple of minutes at high heat. It's also just as important to frequently change out used dishrags and clothes, but regardless of how often you switch them out, it is wise to sanitise the used ones properly before laundering.
Bleach and white vinegar work well as a natural alternative if you prefer not to use chemical cleaners on your towels or dish rags; soak the items in either solution for up to 30 minutes and then wash thoroughly before letting them air dry. Regular hygiene practices like these can help make your house a much safer, healthier place for everyone there.
Rule #4: Store Food Properly
Keeping your food stored properly is an important part of a healthy diet. Storing fruits and vegetables in the refrigerator can help slow mould growth and preserve vitamins. Keeping dry goods like grains and beans sealed tightly in airtight containers can prevent contamination from outside sources.
Not only does proper food storage benefit your general health, but it can also save you money as fruits and vegetables that are kept fresh for longer periods don't have to be replaced as often. Properly stored food also cuts down on waste, reducing your impact on the environment. Investing in the right types of containers, bags, and wrapping materials is key to establishing healthier habits at home.
Rule #5: Clean Up Spills Immediately
Keeping your home clean is important to creating a safe and healthier space for your family. One way to do this is to ensure that spills are cleaned up immediately. This will help prevent bacteria, mould, and dust mites from growing around the house, which could lead to health issues if left unchecked. Taking the time to clean up spills immediately will help keep the air in your house fresher and more enjoyable for everyone.
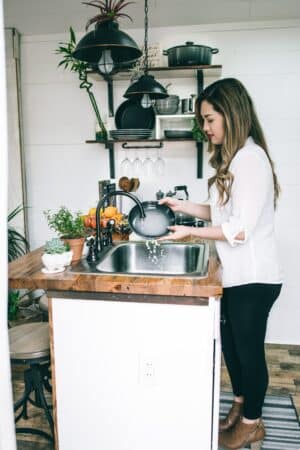
Rule #6: Avoid Cross-Contamination of Foods from Different Sources
To prevent cross-contamination of food in the home, separating raw and cooked foods and storing them properly is important. Raw meats should be stored on the lowest shelves of the fridge to avoid possible dripping and contamination of other foods, while cooked or prepared foods should be stored on higher shelves. It is also a good idea to use two cutting boards, one for raw meats and the other for everything else. This will minimise exposure to infectious agents such as bacteria.
Tip: You can sanitise a chopping board more thoroughly by running it underneath a boiling water tap.
Additionally, ready-to-eat items should be stored at least six inches above uncooked products in a kitchen cabinet. These steps will help you create a safer environment and protect your family from illness or foodborne illnesses caused by contaminated food sources.
Rule #7: Wash Hands Before and After Preparing Food
Preparing food is essential to maintaining a healthy household, and one of the best ways to ensure that our pantries and kitchens remain clean is to wash our hands before and after cooking. The thought of preparing meals from food that dirty hands have touched can be unappealing, especially with all the germs that can spread through the food. Wash your hands for at least twenty seconds with warm water and soap before prepping any ingredients. This step ensures that no bacteria will be transferred during preparation.
After you finish working with the food, you must rewash your hands before handling other items. Doing so will help prevent cross-contamination and lessen the chances of passing the illness on to family members or anyone who might eat the meal you just prepared. Washing hands regularly prevents kitchen messiness and keeps everyone around us healthy.
Rule #8: Ensure Adequate Ventilation in the Kitchen Area
Ensuring proper ventilation in the kitchen area is essential to promoting a healthier home. Good kitchen ventilation helps reduce indoor air pollution by removing smoke, cooking odours, and other airborne contaminants. Not only does this improve indoor air quality, but it also helps to extend the life of various kitchen appliances like ovens, microwaves, and refrigerators. These machines can be damaged over time due to long exposure to certain pollutants found in the home.
To ensure adequate kitchen ventilation, homeowners should consider inspecting existing exhaust fans or installing new ones if necessary. Additionally, they may want to invest in a range hood with high-quality filters that can effectively remove dust particles from the air in addition to smoke and other odours. Homeowners can keep their kitchens safe and healthy for years by taking these simple steps.
Conclusion
Keeping a clean and hygienic kitchen is essential for health and safety. Following the eight hygiene rules in this article will help homeowners maintain healthy kitchens and keep their families safe from harm. From ensuring that raw food is stored separately to investing in proper ventilation, following these simple steps can ensure you have a safe, germ-free space to prepare meals.
Lastly, remember that a clean kitchen is the best way to protect yourself and your family from foodborne illnesses and other dangerous contaminants.
Our boiling water taps are ideal for sanitising and cleaning. Boiling water is the ultimate hygienic measure, killing bacteria and germs without having to use harsh chemicals.
The kitchen is the heart of any home. It's where families go to catch up at the end of each day, friends gather to celebrate and where we each head to when we're feeling hungry. You might think your kitchen is spotless, but what about everyone else's?
The Survey
We surveyed 1,000 Brits about their kitchen personal hygiene habits and were shocked by what we discovered. From drinking out of the milk carton to eating food off the floor, it's safe to say that Britain has some pretty gross personal hygiene habits in the kitchen. Here were our top findings:
- 36% admitted to drinking milk straight out of the carton, even when it's being shared with other people
- 8% told us that they find mouldy food in the fridge 'a few times a week'
- 64% admitted to eating food off the kitchen floor, with 8% telling us that they would extend the '5-second rule' to 30 seconds or longer
- 33% replace their dish sponge only once or twice a month
- 55% sometimes don't wash their hands before they cook a meal
- 13% clean their kitchen sink less than once a month
- 6% sanitise their kitchen worktops once a month or less - 4% never sanitise their worktops
- 63% admit to chopping food directly on their worktop - 8% do this every day
- 9% never clean the inside of their microwave - 7% only do this once every few months
- 8% are 'unlikely' or 'very unlikely' to clean a chopping board after cutting meat, before chopping other foods like fruit and vegetables
When it comes to following food safety and food hygiene rules though, it's clear that many Brits are falling behind. Let's take a deeper dive into each of our findings and share the facts when it comes to kitchen hygiene.
Sharing is caring: 36% of Brits drink milk straight out of the carton
We questioned our survey participants if they ever drank straight from the communal milk carton while living at home, despite it being shared with others. A surprising 36% of Brits admitted to drinking milk straight out of the carton at least 'sometimes' - 6% said they do this every day!
Less than half (43%) told us that they never drink straight out of the carton, which means you might want to think twice if you're a guest at somebody else's home. And it may come as little surprise that men were 10% more likely to drink milk straight out of the carton than women.
Is drinking milk out of the carton unhygienic?
In a study from Clemson University, researchers found eight times the number of bacteria in a carton of milk that had been drunk from directly. This extra bacteria won't kill you, but it does mean your milk is likely to go off sooner - meaning extra trips to the grocery store when your milk fails the sniff test. It's also just a bit gross, don't you think?
30-second rule? 64% of Brits would eat food they'd dropped on the kitchen floor
Over half of the Brits surveyed told us that they would pick up and eat food they dropped on the kitchen floor. The largest group (46%) would wait up to 5 seconds before handling food again, while a small but significant 5% would wait up to a minute or longer before they picked up and ate food dropped on the floor.
Just over a third (36%) told us that they wouldn't eat any food they'd dropped on the floor. For us, I think it would depend on what we'd dropped - a lollipop covered in pet hair feels more offensive than an untouched chip!

How hygienic is the 5-second rule?
When you drop food, the bacteria slowly makes its way onto it; the sooner it's picked up, the fewer bacteria there are on it, right? Wrong. A study found that 99% of the bacteria on your floor is transferred almost immediately to your food, and another discovered that the transfer starts in less than one second. Eurgh. Although this is unlikely to do your body much harm, it is an undeniably gross thought. Maybe we'll toss that runaway chip, after all.
Squeaky clean: 33% of Brits replace their dish sponge only once or twice a month
Dishes are a seemingly inevitable part of human existence. You eat, you clean, you eat, you clean... you get the picture. Whether you hate doing dishes or secretly enjoy the quiet time you get at the kitchen sink, the fruits of your labour are the piles of sparkling-clean dishes, ready to be tidied away for 5 minutes before being yanked back out when it's time for dinner.
But just how clean are your dishes? We asked Brits how often they replaced their dish sponge and a third (33%) told us that they do so only once or twice a month - the most popular answer we were given. Just over a quarter (28%) told us their sponge is replaced once a week, while a tiny 5% replace their sponge more than twice a week.
How often should you replace your dish sponge?
It's no secret that dish sponges are extremely germy, harbouring bacteria, fungus, algae and even viruses. That's why experts recommend replacing your dish sponge at least once a week. Over half of our respondents (52%) replace their dish sponge less than once a week, which means their dishes could be harbours of all sorts of unwanted nasties. Silicone sponges or scrubbing brushes are a better alternative to traditional sponges, as they aren't porous enough to create an environment in which bacteria can grow.
Top tip: throw your sponge into the microwave for 30 seconds to quickly sanitise it
55% of Brits sometimes don't wash their hands before they cook a meal
There's nothing like a homecooked meal to lift the spirits. Before you've even picked up the knife, the first step is to wash your hands, right? Surprisingly, only 45% of Brits told us that they wash their hands before they cook food every time.
That means over half (55%) will sometimes skip the sink before they begin cooking or preparing food themselves. 20% will wash their hands 'sometimes', while 7% will 'rarely' wash their hands and 2% will 'never' wash their hands.

Is washing your hands necessary before cooking?
If you're wondering whether washing your hands is really necessary when handling raw food before cooking, the answer is a resounding yes. By washing your hands, you reduce the risk of spreading bacteria from handling raw meat to other foods or surfaces. So if you've been known to skip the sink before getting stuck into some serious chopping and stirring, it's probably time to change your ways.
Sud it: 13% of Brits clean their kitchen sink less than once a month
It's time to face the music - or, in this case, grimy kitchen sinks. You'd think cleaning would be on top of Brits' to-do list, but we were surprised to hear that 13% of Brits told us they clean their sink less than once a month. Another 11% said they do it every other week, while 23% clean their sink every week. It's not all doom and gloom though - 21% clean their sink more than once a week and 25% told us they scrub it down on the daily.
How gross are our kitchen sinks?
Whether you clean your sink once a week or every other month, it's likely to be pretty gross. In fact, some studies have concluded that there's more E. coli in a kitchen sink than in a toilet after it's been flushed. The kitchen sink harbours many types of bacteria - some of which can cause food poisoning -, which means cleaning your sink regularly is essential for reducing the risk of getting sick from contaminated food.
Cleaning your kitchen sink
What if you're part of the 13% who clean your kitchen sink less than once a month?
- First, we'd recommend putting on some gloves before you get to cleaning - it's going to require some elbow grease.
- Then, buy a disinfectant; this could be bleach-based or a natural cleaner like vinegar. For lighter cleans, a drop of washing-up liquid is often all that is needed.
- Use a soft scourer to lather the bottom, and sides of your kitchen sink, making sure to remove any grime that's built up.
- Finally, dry the sink with a clean cloth or paper towel to prevent further bacteria growth and let it air dry further for at least 15 minutes.
- To clean the plughole, use a specialist solution like Mr. Muscle, using a pipe cleaner if necessary to dislodge food or debris that might be lurking below.
Mouldy food: 30% of Brits find mouldy food in their fridge at least a few times a month
It seems it's a common sight to open the fridge and find mould lurking on that piece of cheese you'd forgotten about. 30% of Brits told us they find mouldy food in their fridge at least a few times a month, while 8% said it happens multiple times a week. If this sounds like your fridge, it might be time to give it an overhaul.
How bad is mould in your fridge?
Mould can cause food to rot and smell bad, but it can also be dangerous if you eat it. Inhaling spores from mouldy foods may trigger asthma attacks or exacerbate the symptoms of hay fever. If you spot mould on food in your fridge, throw it away immediately.
How to prevent mouldy food
The best way to prevent mouldy food from spoiling your fridge is to store foods in airtight containers and regularly check for mouldy patches. You should also wipe away excess moisture from the back of the fridge regularly and make sure everything gets eaten before its use-by date. You should also store meat on the bottom shelf to prevent cross-contamination with other items in your fridge.
Dirty worktops: 18% of Brits clean their worktops less than once a week
It's clear that we're slacking when it comes to cleaning our kitchen worktops. 8% of Brits told us they clean their worktops every other week, 6% clean their worktops once a month or less, while 4% even told us that they never clean them. Reassuringly, 82% of respondents wash their worktops at least once a week, with the largest group (42%) cleaning their worktops every day - phew!
Should you clean your kitchen worktop every day?
Yes! Your kitchen worktop is where you prepare food, which means it should be sanitised every day (or almost every day). In fact, a study by NSF found that coliform bacteria (that's the group that includes E. coli) was found on 32% of the worktops it swabbed in 22 homes, which means irregular cleaning could lead to you and your family becoming ill.
The more regularly you clean it, the easier it becomes to clean, as you won't be dealing with a build-up of grease, grime and crumbs every time. Simply use a disinfectant designed for the kitchen, wipe your worktops with a kitchen towel or a clean cloth and then let it air dry. This is especially important for the worktop around your sink, where pesky bacteria can hide and spread.
Chopping board be gone: 8% of Brits chop food on their kitchen worktop every day
With what we now know about the presence of E. coli on kitchen worktops, it's a little concerning that 8% of Brits surveyed cut food directly on their worktop 'every day'. A further 5% commit this hygiene crime 'almost every day', while 20% told us they only 'sometimes' partake in this act. Fortunately, 37% of people 'never' chop food on their worktops, instead using the appropriately named chopping board for their food prep tasks.
Which worktops are the dirtiest?
Any material that is porous is far more likely to harbour nasty bacteria like Salmonella, E. coli and Listeria, which can cause food poisoning and other ailments. These materials include wood and some types of natural stone, if not sealed completely. Whichever worktop material your kitchen has, cutting directly onto its surface won't just cause visible damage, it can also lead to poorly stomachs and days off school or work.
Going in circles: 9% of Brits never clean their microwaves
Microwaves are one of the modern home's most convenient kitchen gadgets - but what lurks behind the microwave door? I'm sure we've all witnessed an explosive bowl of soup or splattered leftovers, but how many of us actually clean up after ourselves? Well, our study revealed that less than a quarter of us (24%) thoroughly clean our microwave once a week, while over a fifth (21%) do so once every few months.
Shockingly, nearly one in ten of us (9%) never clean our microwaves, which begs the question: how clean are they?
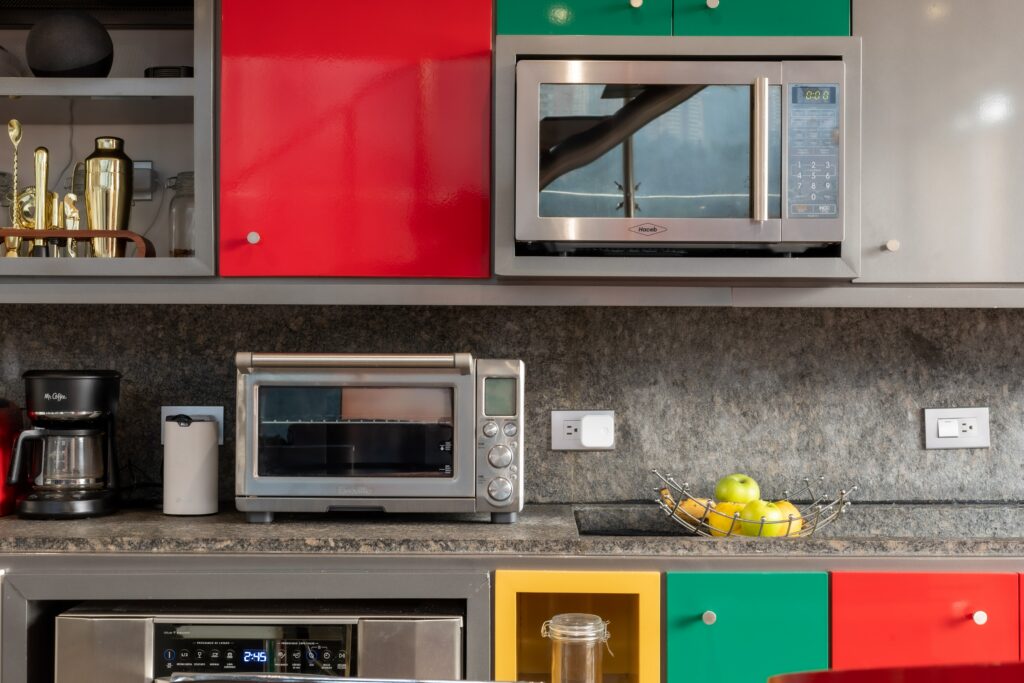
How regularly should you clean your microwave?
It's a known fact that microwaves don't sanitise themselves, only killing bacteria in food when heated to a certain temperature. That means it's all the more important that you clean yours on a regular basis. Generally, once a week is sufficient for most homes, with quick wipes in-between if something is spilt inside.
A thorough clean should include a disinfectant spray/wipes, and the removable glass plate should be hand washed or put through the dishwasher (double-check it's dishwasher-safe first, though!). Remember to unplug the appliance before using it, and ensure all disinfectant is mopped up and the interior has dried before you use it again.
On the chopping block: 14% of Brits are unlikely to clean their chopping board after cutting meat
When it comes to kitchen hygiene, some things aren't negotiable. Raw meat contains many of the food-borne bacteria that can cause food poisoning, which means preparing it in a hygienic way can make the difference between a great meal and a trip to the toilet. Surprisingly, less than half (49%) of respondents told us that they 'always' clean their chopping board after cutting meat, before then using it for other foods like fruits, vegetables and seafood.
Perhaps even more shocking is that 8% told us they were either 'unlikely' or 'very unlikely' to clean their chopping board after cutting meat. What's more, 6% of Brits surveyed admitted they would 'never' sanitise their chopping board after preparing meat on it.
The truth about raw meat on chopping boards
As we already know, some raw foods and meat can contain bacteria that, if ingested, can cause illness. Here are some tips for preparing raw meat at home:
- Always thoroughly clean, sanitise and dry your chopping board after preparing raw meat on it
- Don't use the same chopping board for raw and cooked food without sanitising the surface first
- Prepare meat on a non-porous surface that can be easily cleaned, such as acrylic or hard rubber
- Use a separate chopping board for vegetables, fruit and ready-to-eat foods
- Replace chopping boards that are cracked, chipped or damaged, as bacteria can get into these gaps and multiply
- Air dry your chopping board and use a clean towel to wipe the remaining moisture away before storing it
Personal hygiene tips for the kitchen
The best way to practice good kitchen hygiene is by following these rules:
- Regularly cleaning surfaces - particularly countertops, cutting boards and cooking utensils
- Carefully handling raw food and washing your hands between preparation tasks to avoid potential food poisoning
- Washing your hands before and after food preparation
- Keeping perishable food in a sealed container in the fridge
- Replacing dishcloths and sponges frequently
- Cooking food to the appropriate temperatures
By following these food safety practices every day at home, you can prevent harmful bacteria and avoid cross-contamination - keeping you and your family safe.
Where do we come in?
Hot Water Taps are one of the UK's leading suppliers of boiling water taps. Our taps instantly dispense boiling water, which makes cleaning and sanitising your kitchen quicker and more convenient than ever. Boiling water can kill many of the pathogens associated with poor kitchen hygiene, which makes it ideal for tasks like cleaning chopping boards, rinsing pans and mopping.
In conclusion
There you have it: Britain's kitchen hygiene habits are out on full display. Are you surprised by our findings? We certainly were!
At Hot Water Taps, we make it our mission to provide convenient solutions for better kitchen hygiene - check out our range of boiling water taps, and see how you can keep your kitchen clean and germ-free!
Methodology
We surveyed 1,000 British residents in February 2023. Respondents were over the age of 18 and lived in England, Wales, Scotland and Northern Ireland. To read the survey results in full, please email harley@tavisonpartners.com.
Who doesn't want to feel like a calm sea of tranquillity is washing over them when they enter their kitchen? You know what I'm talking about—that feeling you get from being in an organised space free from clutter. But how do you make this dream a reality in your own home?
This post will uncover the strategies for creating and maintaining a decluttered kitchen: 14 foolproof hacks that will help restore order and bring more serenity into your living space! Read on to find out exactly how you can make it happen.
Why Decluttering Will Improve Your Life
Organise Your Space for Efficiency
The most obvious benefit of decluttering your kitchen is that it will create more space and allow you to use the area more efficiently. You'll be able to store items in designated areas, making them easier to find when needed. This also makes cleaning up after meals easier as everything can be quickly tidied away without having to move around clutter. A well-organised kitchen lets you easily see what ingredients you need when planning meals, which helps prevent food waste and save money.
Reduce Stress Levels
When surrounded by clutter, it has been proven that stress levels increase significantly. By removing all the excess items from your kitchen that are no longer needed or used, you'll reduce stress and have a much calmer environment in which to work. Having an organised kitchen also means that tasks such as cooking or washing dishes become quicker and more enjoyable activities rather than stressful ones.
Gain More Time
When everything is organised correctly in the kitchen, it helps save time each day, both during meal preparation and clean up afterwards. Once you've removed all the unnecessary items from the room, you'll find more time on your hands to spend on activities such as cooking new recipes or spending quality time with family and friends over dinner. Plus, since everything is stored away neatly in its own place, finding the things you need will be much faster.
14 Ways to Declutter a Kitchen
1. Declutter Your Kitchen Cabinets
A kitchen can be cluttered, and kitchen cupboards are often full of items that don't get used very much. It's important to declutter these kitchen cabinets to reduce kitchen stress and maximise storage. Taking the time to sort through kitchen cupboards and discard out-of-date or obsolete items can make your kitchen feel neater and more organised.

Once the unwanted items are cleared away, consider where you could benefit from some additional storage containers or baskets to manage better kitchen supplies like utensils, pots, pans, and food items. Making an effort to tidy up kitchen cabinets will lead to a more comfortable kitchen space that is easier to navigate.
2. Create More Storage with Wall Shelves
Wall shelves offer nearly unlimited storage potential for homeowners looking to declutter their kitchens. Strategically placed shelves allow the user to use previously unused space, adding function and style alike. Not only can wall shelves make a busy kitchen more efficient by allowing for easier access and more visibility when selecting items, but they can also draw the eye upward to create a sense of spaciousness and grandeur in the room.
Whether it's cookbooks, utensils, spices or other kitchen items that need storage solutions, these shelves are an attractive addition that solves numerous organizing issues while making the kitchen look even more stylish than before.
3. Maximise Pantry Space with Organisers
Utilising organiser items can be a great solution when trying to free up space in your kitchen pantry. From trays and baskets to pullout shelves and even wall mounts, the right organisers can help you make the most out of your pantry.
With careful organisation, it's possible to squeeze every inch of available space, so nothing is left forgotten in the back corners — making sure you never run out of staples like flour or sugar again! By organising your different types of ingredients, snacks and any other foodstuffs, you can also find items more easily when you're ready to cook and prepare meals.
Additionally, it's much easier to keep things neat as everything has its own designated spot for its place. A few simple organiser additions can make all the difference in reducing clutter and maximising storage possibilities in your pantry.
4. Utilise Under-Cabinet Baskets
The kitchen can be a daunting task to keep organised and tidy, but with the addition of under-cabinet baskets, decluttering your kitchen has never been easier. These baskets are a great way to store items that generally clutter counter space, like food storage containers and lids or small appliances. Not only can they keep these items out of sight and easily accessed when needed, but they also create additional storage in one's kitchen.
Installing under-cabinet baskets is simple; with pre-installed brackets in most kitchens today, adding them is as easy as removing the old shelving and sliding one's desired basket into place. With just a few steps and minimal equipment necessary for installation, adding a few extra baskets in one's kitchen can make big changes to their available storage space.
5. Hang a Pegboard for Open Shelving
Having an organised kitchen can be a game changer, and with open shelving, you can create roomy and modern storage solutions. Installing a pegboard is one of the easiest ways to give your kitchen a sense of sophistication. They come in various shapes and sizes, making them easy to use in any kitchen. Organising your cooking and baking utensils onto the pegboard allows you to see what you need to do the job.

When those items are no longer needed for their current tasks, put them back in their respective places without digging through drawers or cabinets. A pegboard is versatile enough to be used for spices or herbs. Hang a pegboard and keep your countertops clutter-free while taking advantage of all that kitchen space!
6. Use Multi-Purpose Furniture and Appliances
Adding multi-purpose furniture and appliances to a kitchen is a great way to help keep it clutter free and organised. With the invention of convertible kitchen islands, drawers that create hidden storage space, and shelf organisers that expand shelves, investing in multi-purpose products can be an effective way to simplify your work area.
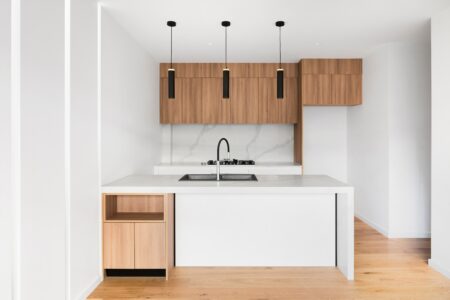
Not only do they provide storage solutions, such as cutting boards stacking neatly on top of pans, but they also help utilise available space in the kitchen while minimising what has to be put away. There are so many clever items out there – from foldable knives and cutting boards to stools that double as storage bins – that it's easy for anyone to find the perfect fit for their unique kitchen needs.
7. Strategically Place Spice Racks & Containers
An organised kitchen is essential for many households, and one of the keys to success is strategically placing spice racks and containers. When appropriately deployed, spice racks help to organise ingredients that would otherwise get lost in a cluttered box or cellar. Spice containers ensure all your favourite flavours are within easy reach.
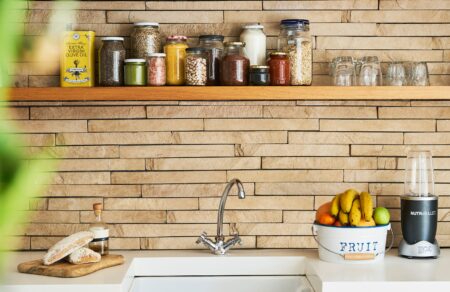
Additionally, they bring a sense of cohesion to the kitchen between countertop shelves, cabinets, and drawers since their placement can be customised in any order. Utilising spice racks and containers is an effective way to maintain an uncluttered cooking space while still having easy access to all of your spices so you can whip up delicious meals with minimal effort.
8. Make Room for Lids and Cutting Boards
Kitchen organisation can be a huge challenge, especially when dealing with limited space. An easy and effective way to reduce clutter in the kitchen is to make room for lids and cutting boards. This involves setting aside specific storage spaces for these two items, which will help the kitchen look uncluttered and neat. Lids can be easily stored away by hanging off hooks of various sizes or laying them in shallow drawers.
Similarly, cutting boards can be hung from notches on inside cupboard walls or placed in drawers where they won't take up too much space. Devoting enough space to store pieces like lids and cutting boards can help make the kitchen instantly organised and welcoming for time spent cooking or baking with family or friends.
9. Invest In Collapsible & Stackable Containers
Decluttering a kitchen doesn't have to be a mundane and challenging task. Investing in collapsible and stackable containers is an easy way to reduce your kitchen's clutter while keeping all of your items organised. Collapsible containers are ideal for storing food, like breakfast cereals, baking ingredients, snacks, etc., because they can easily be folded away when not needed.
Similarly, stackable containers mean that you can maximise your available shelf space by piling them one on top of the other. Not only will this help you tidy up, it also frees up space to store other things like dishes or pans. Investing in these practical storage solutions is not just great for decluttering but also very cost-effective and adds a touch of flair to any kitchen!
10. Repurpose Your Jars, Cans, and Egg Cartons
Have you noticed your kitchen countertops overflow with containers of varying sizes and shapes? Everyone loves to hold onto their jars, cans, and egg cartons because they could come in handy someday. Instead of letting them linger on your kitchen counters, taking up valuable space, why not turn them into something useful? Repurposing these pieces can help declutter a kitchen while giving items they already have a new lease on life.
With some paint, ribbons, and other materials that can easily be found at local craft stores, these containers can be easily transformed into decorative storage options. For example, jars can even become vases for flowers or succulents. Cans can become planters for herbs, and egg cartons can be beautified as jewellery holders! Repurposing is a fun and inexpensive way to keep the kitchen organised without the need for additional items cluttering the space.
11. Reorganise Tupperware Drawers
Rearranging Tupperware drawers is a simple and practical solution to reducing kitchen chaos. It takes minimal effort and provides maximum impact, helping to make meal times easier and less stressful. Start by emptying the drawer and taking inventory of containers by size and design. Reorganise them neatly into sections so that they are easy to locate; larger items at the back and smaller items at the front if possible. This will promote efficiency in food preparation as all the right Tupperware is on hand right away instead of digging through a mountain of mismatched lids!
And be sure to put like-with-like sets together for convenience when cooking or to store leftovers in the future. Reorganising Tupperware will help keep your kitchen looking neat and tidy, making it more inviting and providing room to store new gadgets.
12. Swap Your Kettle for a Boiling Water Tap
Even the most organised of us can find their kitchen counter cluttered, with toasters, blenders and electric kettles all taking up space. But there is an easy solution: install a boiling water tap! This one addition can free up a lot of worktop space, giving the area a more spacious feel.
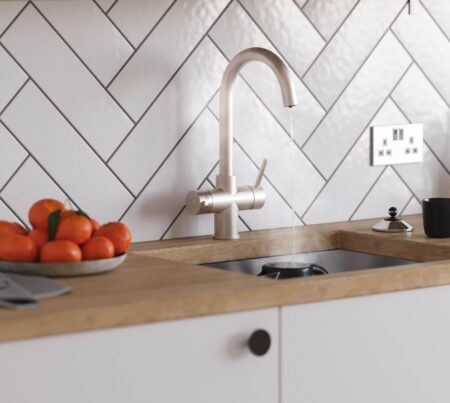
Not only that – you'll also have instant hot water on hand whenever you need it. No need to worry about pesky cords either; boiling water taps look tidy because it's only the in-cupboard boiler tank that requires electricity.
13. Clear Out Unused Appliances
The kitchen is often the busiest room in the home and a good place to start when decluttering your living space. One way to accomplish this is to take a look at any unused appliances that may be taking up space. If a blender or food processor hasn't been used in over a year, it may be time to part ways with it. Not only will this free up cupboard space for items you use regularly, but it also provides the environmental benefits of avoiding the unnecessary use of electricity or other energy sources.

Donating these lightly used items can also help those in need! Investing some time into clearing out the kitchen can make a big difference in how organised and clutter-free your home feels daily.
14. Move Utensils to a Pullout Drawer
If a kitchen feels cluttered and disorganised, one of the most innovative ways to quickly and effectively alleviate the problem is to take advantage of the space in drawers and cabinets by installing a pullout drawer for utensils. Unlike traditional cabinet storage, where utensils are stored in a jumbled mess, a pullout drawer maximises efficiency and organisation. Instead of rummaging around looking for the right utensil, everything will be easily found in its designated spot.
In addition to providing more convenient access to frequently used items, a pullout drawer will also help you better manage the overall look of your kitchen by adding an aesthetic that matches its specific décor while reducing countertop clutter.
What is the Marie Kondo Method?
The KonMari method was created by Marie Kondo and involves a systematic approach to tidying up your house. The essence of it is to keep only those items that "spark joy" for you - everything else must be discarded or donated. This means that it's not just about throwing stuff out - it's about taking time to think about how each item makes you feel; if an item no longer brings you joy or happiness, then it should be removed from your life.
KonMari encourages people to tidy up their belongings in one go rather than doing a little bit here and there over time. She believes this approach helps people stay focused on the task at hand while also giving them an idea of what they need in their life in the future. Additionally, she believes tidying up quickly motivates people since they can see results immediately.
The Five Steps of the KonMari Method
KonMari outlines five steps for effectively organising your home according to her method: sorting, discarding, organising, cleaning and thanking. These steps are designed to help people create an organised, tidy environment where they can live happily and productively.
he first step involves going through all your possessions and deciding which ones "spark joy" for you; if something doesn't, then it should be discarded or donated (step two). Step three involves taking all these joyful items and finding places for them; this will help create order in your home (step four). Finally, step five involves thanking each item for its service before moving on with life (this part is optional but highly recommended!).
Conclusion
Now that you know some of the best ways to clear out your kitchen and declutter your life, what’s stopping you from getting started? Pick one small task from this list and commit to doing it today. Don’t let living in a cluttered space hold you back from enjoying your home to the fullest. A tidy kitchen is just around the corner!
Our boiling water taps remove the need for an outdated countertop kettle, giving you oodles of space and unrivalled convenience at home. Find out more about how a boiling water tap works.
With the increasing popularity of coffee and its ability to provide a daily pick-me-up, many are now looking for ways to make the perfect cup. From selecting the finest beans to finding just the right brewing method, there is an art to creating that perfect cup of joe. In this blog post, we're going to look at how you can create your own delicious brew from bean to mug with ease - no barista or fancy equipment needed!

Choosing the Right Bean
Making a cup of coffee can be an intimidating experience for the novice and a calming ritual for the enthusiast. Choosing the right bean is one of the most important components of creating a cup of great coffee. Different beans have diverse aromas, flavours, and caffeine levels that can have an effect on the overall taste of your brew. To determine which blend will suit your palate best, consider all aspects including acidity level, sweetness, body, intensity and aroma.
Choose from dark or light roasts depending on your preference and keep in mind that origin is important too – different regions or countries yield distinctive coffee qualities. Trust your taste buds and remember that only experimentation will help you find the perfect blend to enjoy in your home.
Types of Coffee Beans
From light to dark roasts, from acidic to less acidic blends, and from smoky to fruity notes - there truly is a coffee bean for everyone! Each type of bean offers up a unique profile of flavours and aromas, making them ideal for use in espresso machines, French presses and more. So whether you're an adventurous coffee-lover or just looking for something classic, dive in and explore the diverse world of coffee beans.

Caption: Map Courtesy of Torch Coffee
Roasting Levels of Coffee Beans
The beauty of fresh-roasted coffee beans is something to behold! Depending on how those freshly roasted beans are handled, the end product can vary drastically. Different roast levels bring out different flavour profiles in coffee. It’s important to note that light roasts have more of the original bean characteristics, whereas darker roast levels have more of a roasted taste that masks some of the original elements.
Light roasts provide bright, acidic flavours and will have a softer texture when a ground for brewing. On the other hand, dark roasts tend to produce a bolder, smoky profile with lower acidity and a hard grind for espresso machines. If you’re looking for something different each time or just want to try something new – take advantage of all the different roast levels available!
Buying Quality Coffee Beans
Coffee has become an essential part of everyday life, so it's important to make sure that you're getting quality beans when shopping. Buying the right beans can heighten the flavour and aroma of your coffee, providing a much better experience each time you brew some. It's worth researching the different regions where different beans are harvested and understanding how those flavours are reflected in your cup.

When looking for quality coffee beans, be sure to ask local roasters questions about their source, roast, and storage methods to ensure you're getting the freshest product available. Ultimately, taking the time to purchase high-quality coffee beans will pay off with each incredible cup.
Grinding the Beans
Grinding the coffee beans is an essential part of making a delicious cup of coffee. Coffee beans don't provide the same flavour and aromas until they are ground, exposing more surface area for flavour extraction. Therefore, it is vital to select the correct setting on a grinder for perfectly extracting all the flavours from the beans.
Coarse settings are better for brewing methods such as French press and cold brew, while medium or fine settings are suitable for espresso machines or drippers. Additionally, pre-ground coffees may have lost their flavour over time because of oxidation, proving why grinding your own coffee beans could make all the difference in a cup of joe.
The Benefits of Freshly Ground Coffee Beans
Nothing tastes better than a cup of joe made with freshly-ground coffee beans! For those seeking the freshest cup of coffee possible, grinding up the beans yourself prior to brewing provides a depth of flavour and freshness unrivalled by pre-ground coffees. Furthermore, you can tailor your grind size to suit whatever style of coffee you're making whether it be espresso, French Press, or Moka Pot. The aroma itself when grinding is enough to perk you up!
Freshness is a key factor in determining the taste profile of your final brew; freshly ground beans will always provide superior flavour and complexity over pre-ground options. If you are serious about great-tasting coffee, freshness matters and freshly ground beats pre-ground without fail.
Selecting the Right Grind for Your Brewing Method
The grind size that you select for your coffee is incredibly important, as it affects the flavour and strength of your cup. If the grind is too coarse, espresso or espresso-based drinks can taste weak and acidic, while fining the grind too much can cause over-extraction and make your cup bitter. It's best to pick a grind size that specifically works with your brewing method— espresso requires a finer grind than the French press does.
It's important to remember that whatever espresso machine you have will also influence what type of espresso drink you make and accordingly what kind of grind size needs to be used. Choosing the right grind for your espresso or French press lets you customize a cup of coffee so that it meets your personal preferences through various aromas, flavours, and body characteristics.
Brewing Basics
Brewing a cup of coffee may seem daunting for the novice espresso enthusiast, but it doesn't need to be. The basics of espresso brewing come down to grinding the right beans, using the proper equipment, and understanding brewing times and temperatures.
To start, espresso machines are best used when directly making espresso or espresso-based drinks like lattes or cappuccinos. For other types of coffee brews like french press or pour-over, hand-operated coffee grinders and manual techniques, such as pouring water slowly over ground beans in filter tampers, are preferable.
Above all else, it's important to use freshly roasted coffee beans and create your own blend of flavours--a perfect espresso experience is subjective so creativity can help you customize your coffee according to personal tastes.
Different Brewing Methods
Brewing coffee is an art form, and there are many different methods for making a great cup. One widely popular method is espresso which uses a machine to force hot steamed water through finely grounded espresso beans. Another favourite among coffee connoisseurs is the French press method. This is done by immersing the grounds in boiling water, letting it steep, and then pressing a plunger down which separates the liquid coffee from the solid grounds.
Both espresso-based drinks and those made with french presses provide unique flavours that highly depend on the type of bean used. Whether espresso or French press, each brewing method offers a wonderful flavour experience depending on what you’re looking for.
What Temperature Should Coffee Be Brewed At?
Coffee lovers have been debating the ideal temperature for brewing espresso and french press coffee for years. Generally, espresso should be brewed between 90°C and 95°C while french press should be brewed a bit cooler at around 195-200F Celsius. Keeping espresso within its optimal range will help extract the perfect espresso shot with crema, a robust body, and great intensity of flavour. Brewing french press at a lower temperature helps extract more subtle flavours for those who prefer a mellower cup of coffee.
Although the debate rages on about the ideal temperature to brew espresso and french press, it's important to keep in mind that the ideal temperature varies from person to person based on individual taste preferences.
How Long Should Coffee Be Brewed For?
When it comes to brewing the perfect cup of coffee, the answer to how long coffee should be brewed can vary depending on the type of espresso-based or manual brew you’re using. For espresso, a shot typically needs just 25 to 30 seconds for all the flavour and desired crema to come out, while French press coffee should be steeped for around four minutes in order to extract maximum flavour.

However, once you understand your desired outcome and preferred espresso-style roast, it's possible to sharpen this timeline even further. Ultimately, experimentation is key in order to find that ideal balance between the amount of time and resulting textures and taste characteristics -- an enjoyable process in itself!
How to Taste and Improve Your Coffee
There are few things better than a deliciously brewed espresso or french press coffee. For the perfect cup of espresso, you'll want to start with fresh, finely ground espresso beans. You should also make sure your espresso maker is set to the ideal temperature for espresso brewing; anything lower than 200°F will result in a weak espresso with little crema.
To guarantee the optimal flavour from your French press, use course-ground beans and steep them for 4 minutes before pushing down the plunger. When done correctly, you can expect to enjoy a complex and flavorful cup of coffee with an intense body and rich aromas.
Troubleshooting Common Taste Issues
Taste issues are a common problem when it comes to drinking coffee, from bitter flavours to overly acidic tastes or even burnt bitter undertones. If you're finding yourself unhappy with the taste of your coffee, there are some tips you can use to try and diagnose the issue and make changes that will help get you back on track for an enjoyable cup every time!
Conclusion
Now that you know the perfect technique for brewing a cup of coffee, go forth and enjoy your caffeinated creations! Keep in mind all of the factors we discussed - from the type of bean to the grind size to the water temperature - and experiment with different combinations to find what you like best. With a little bit of practice (and maybe some trial and error), you'll be an expert barista in no time.Our boiling water taps are the ideal way to get your daily caffeine fix, removing the need for an outdated kettle and saving you bags of time. Find out more about how a boiling water tap works
Welcome to the world of modern convenience, where boiling water taps are all the rage among homeowners seeking instant access to unlimited hot water. However, there's a burning question on everyone's mind: Are these taps truly safe compared to time-tested methods like kettles and microwaves?
Fear not, for we're here to clear up any confusion surrounding their safety and functionality. So, grab a cuppa and join us as we unravel the truth behind these game-changing taps, helping you make an informed decision. Let's get started, shall we?
What is a Boiling Water Tap?
Boiling water taps - often referred to as "instant hot water taps" - are the most efficient way to access boiling water in the kitchen. Manufactured by a number of brands (including ourselves!), these systems use a mains-powered boiler tank that holds a constant supply of piping hot water, which can be drawn from the tap whenever it's needed - helping you wave goodbye to the days of waiting around for your kettle or stovetop pan to come to the boil.
Most of these taps have adjustable temperature settings and a range of other technologies to provide the most convenient tap humanity has ever known (no, we're not kidding!). Not only do these types of taps save on time, but they can also be an eco-friendly choice since drawing from a boiler tank instead of overfilling a kettle each time is generally more energy efficient. You can read more about how a boiling water tap works here.
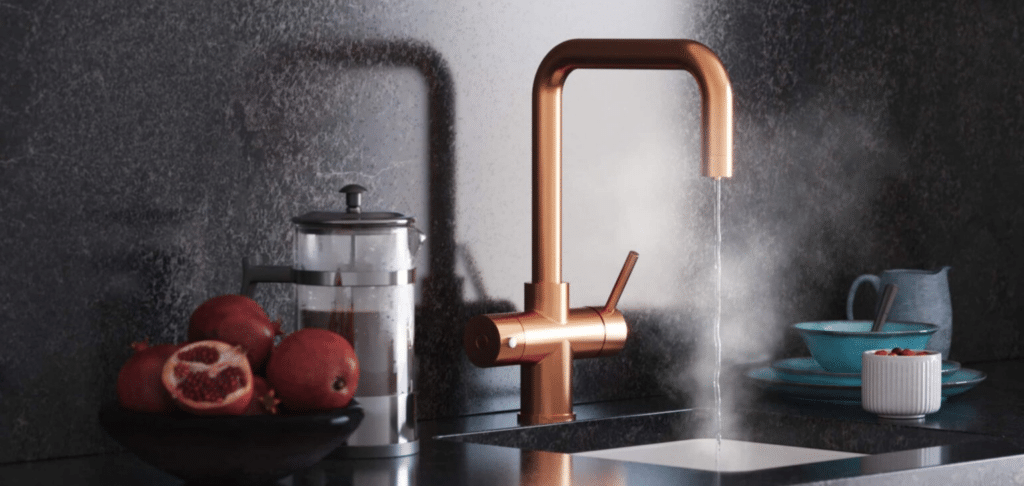
Are Boiling Water Taps Safe?
Boiling water taps are incredibly safe for homeowners, their children, the elderly and pets. From design through to construction, every effort is made to ensure that the risks posed by boiling water are limited. In our taps, this includes:
- A spring-loaded handle that turns the boiling water off if you step away from the sink
- A child-safety spring lock that requires an adult to access
- An insulated tap to prevent surface burns
- An advanced boiler that monitors and reacts to temperature
If you have any safety concerns, we highly recommend you get in touch so you can find out whether one of these taps is right for your home.
What if I have children?
As boiling water taps gain popularity among homeowners, it's natural to wonder about their safety, especially if you have little ones running around. Thankfully, these taps come with a host of safety features designed to keep your children protected from the potential hazards of hot water.
For starters, many models have an automatic shut-off feature that turns the tap off if the push-down handle isn't activated. Additionally, a spring-loaded mechanism ensures that kids can't turn on the tap without adult supervision. And lastly, thanks to an insulated system, the tap itself won't become scorching hot, even when dispensing boiling water.
Boiling Taps vs Kettles
Boiling Taps
These modern marvels bring convenience right to your kitchen, offering instant boiling water with just a twist of the handle – no more waiting around for kettles to boil. As we discussed above, boiling taps come with added safety features like child locks, reducing the risk of accidental scalding.
Moreover, they're generally easier to clean than kettles, as there are no tricky spouts or cords to deal with. However, boiling taps do have their drawbacks – they're pricier than kettles and require additional installation work.
Kettles
Kettles have been around for centuries and have been used in kitchens worldwide because they are simple and inexpensive compared to most other methods of boiling water quickly. They are easy to use and clean – simply empty out any remaining water after each use and give it a rinse with warm soapy water every now and then – meaning that anyone can use them without having any special knowledge or skills required for installation or maintenance.
The downside of using a kettle is that it takes far longer than a boiling tap because you have to wait for it to heat up before pouring out boiling water from it – this could take anywhere from 2 to 5 minutes, depending on how much water you put inside.
Some people also find kettles annoying due to their noise level when heating up; this isn't always an issue but could be off-putting if you're living in close quarters with someone else who finds it loud or disruptive.
What's more, kettles can be dangerous to handle - and can be turned on and moved by young children. This means they're susceptible to being dropped, causing burns or damage to your floor or feet.
The Benefits of Boiling Water Taps
We stand firm in our belief that a boiling tap is the best appliance when it comes to improving the way your kitchen works. Don't believe us? Here are ten great benefits:
- Safety: Equipped with child locks, automatic shut-off features, insulated parts and advanced monitoring systems, boiling water taps prioritise safety to prevent accidental burns and scalding.
- Instant access: Say goodbye to waiting for kettles to boil – boiling water taps provide immediate access to hot water whenever you need it.
- Energy efficiency: With their on-demand functionality, boiling water taps only heat the water you need, reducing energy consumption compared to traditional kettles.
- Space-saving: Eliminate the need for a separate kettle, freeing up precious counter space in your kitchen.
- Ease of cleaning: With no awkward spouts or cords to deal with, boiling water taps are easier to clean and maintain than their kettle counterparts.
- Modern aesthetics: Boiling water taps offer a sleek and stylish addition to your kitchen, boosting its overall design and appeal. With 6 finishes to choose from, you're spoilt for choice.
- Improved taste: By providing filtered water, boiling water taps can improve the taste of your hot drinks, as impurities are removed before heating. Our 4-in-1 taps also come with a filtered cold water function, supplying purified cold water in addition to boiling, hot and cold water. Sapphire and Quantum both offer filtered cold water at the standard mains temperature, while Quantum Chilled, Sapphire Chilled and Platinum Plus offer it down to an ice-cold 4 degrees.
- Multi-functional: Many boiling water taps also provide cold and filtered water, making them versatile additions to your kitchen setup.
- Reduced limescale buildup: Filtered water from boiling water taps leads to less limescale accumulation, prolonging the life of your appliances and keeping your kitchen cleaner.
- Convenience: Simplify your daily routine with easy access to boiling water for cooking, brewing tea, making coffee, and much more – all at the turn of a tap.
Conclusion
After reading this post, you should have a better understanding of whether or not boiling water taps are safe. While they may be more expensive than your bog-standard kettle, the plethora of benefits they can provide to the modern home make them more than worth the investment (in our unbiased opinion!).
If you're looking for a way to improve your kitchen, boiling water taps are a great option to consider. Our boiling water taps come with built-in safety features designed to protect you and your family. Find out more about how a boiling water tap works.
Water is an essential part of our daily lives. We rely on it for everything from drinking and cooking to cleaning and personal hygiene. But how often do we stop to think about the journey our water takes before it reaches our taps?
This article takes a deep dive into the UK's tap water. We'll explore where it comes from, how it's treated, and why it might sometimes look or taste different. Let's jump right in.
What's in UK tap water?
UK tap water contains a variety of minerals and chemicals that are used for maintaining its safety, taste, and health benefits. The most common minerals found in tap water are calcium and magnesium, which contribute to its hardness and offer health benefits such as bone strength. Sodium is also present in small volumes to maintain the body’s fluid balance. The water may also contain trace amounts of iron, manganese, and lead, originating from the soil or old pipes.
Chemically, chlorine is added to the water as a disinfectant to kill bacteria and other microorganisms. Fluorides, which can occur naturally, are also added intentionally in some areas of the UK to help improve dental health. Nitrates and nitrites might be present from agricultural run-off, but their levels are strictly regulated to ensure safety.
Each chemical or mineral intentionally added serves a specific purpose, either to enhance the health benefits of the water or to ensure its safety by eliminating harmful bacteria or pathogens. Despite the presence of minerals and chemicals, the water from your tap is safe to drink thanks to rigorous testing and regulations, unless, on the rare occasion, your authority tells you otherwise (as happened in Devon recently).

Tap water facts
1. Almost all of the tap water in the UK uses chemical disinfection
In the UK, tap water is treated with a chemical disinfectant to ensure it is safe and ready for public consumption. This process involves purposely adding chemicals such as chlorine or phosphoric acid to kill harmful bacteria and other pathogens, reduce the levels of harmful metals like lead and filter chemicals like pesticides. Environmental health bodies (including the Drinking Water Inspectorate) regularly test tap water to confirm that it is safe for drinking.
Chemical disinfection is also used abroad. However, countries may use different techniques according to their geography and environment. For example, Germany and Italy use ozone or chlorine dioxide as their primary disinfectant. At the end of the day, chemical disinfection can make tap water safe and healthy, and that shouldn't be taken for granted. In 2019, 1 in 3 people globally did not have access to safe drinking water.
2. Limescale is common in tap water from areas with hard water
Living in an area with hard water can be a headache for many UK residents (check if you're one of them here). One of the most frustrating manifestations of hard water is limescale – mineral deposits that are left behind when hard water evaporates. Limescale is easily recognisable, often appearing as white or yellowish crusty patches on bathroom fixtures, dishwashers, and other appliances that come into contact with tap water.
While limescale itself isn't a health hazard, it can cause corrosion of your household appliances and make them harder to clean over time. To minimise the buildup of limescale and protect your appliances from damage caused by its formation, invest in a good quality filter for your taps and periodically descale your appliances using citric acid (lemon) or vinegar. We've written an article on tap maintenance that includes a discussion about limescale - you can read that here.
3. Scotland was found to have the best-tasting tap water in the UK
The folks in Scotland have the bragging rights for having the best tap water in the UK (and the world!). That's right - the tap water of each country has been tested and it turns out Scottish tap water comes out on top. Scottish Water, the supplier of most of the tap water across Scotland, is strict about its water standards, drawing from a wide variety of reservoirs and rivers to supply the good Scottish people.

4. Only 1% of homes don't receive a public supply of tap water
In 2019, the UK government reported that, in England, 99% of homes have access to safe tap water. The remaining 1% live in hard-to-reach places, and use private water supplies such as a well, spring or borehole on private land to access water. Thankfully, this figure is low compared to the global average and has been shrinking ever since the industrial revolution.
5. 99.97% of tap water samples pass the UK's quality standards
Drinking water in the UK is among the safest in the world, according to the Drinking Water Inspectorate. Their latest figures on public water supplies show that 99.97% of samples complied with the high standards set by the UK government, making it one of only six nations in the world with the maximum score possible in the 2022 Environmental Performance Index.
With these standards being regularly monitored and updated - we can enjoy access to some of Europe's cleanest drinking sources in both rural and urban parts of Britain.
6. The average annual water bill for a UK home is £448
The cost of water bills in the UK can shock some, especially as the average annual charge of £448 is higher than in many other countries in Western Europe. Such a price tag covers essential services like water supply and wastewater, as well as other amenities like maintaining the country's extensive network of sewers.
7. Calcium, magnesium, sodium and sulphate are all found in tap water
Tap water in the United Kingdom might not be something people think of when they talk about essential compounds, minerals and elements. Still, in reality, tap water contains some essential substances. Calcium, magnesium, sodium and sulphate are all regularly found in tap water in the UK (although in varying levels from supplier to supplier) – each of these elements plays an important role in human health.
Tap water FAQs
Read answers to common questions about the water from your tap.
Where does tap water come from?
Tap water is an essential part of day-to-day living, used for drinking, cooking, cleaning, and more. But where does it come from? Tap water originates from a variety of sources. Most large towns and cities have dedicated water supply systems that draw from nearby rivers, lakes, or groundwater sources. This kind of collection is then treated at facilities to ensure its safety and purity before it is distributed throughout the town or city.
In the UK, water companies are responsible for making sure that the water is safe and fit for purpose. Every year, these companies must produce an Annual Water Quality Report where they detail where the water has come from and what it contains. These reports are available publicly and can help you understand where your tap water comes from.
Is tap water safe to drink in the UK?
Yes, tap water in the United Kingdom is safe to drink. The UK's water supply is among the safest worldwide, with strict regulations in place to maintain its quality. The water is routinely tested and regulated to ensure it is fit for human consumption. Some might notice a faint smell of chlorine, which is used in small, safe amounts to disinfect the water.
Despite regional differences in hardness, particularly in the southern part of the UK, these variations do not affect the water's safety. So, unless notified otherwise by your water provider, you can drink UK tap water with confidence.

Is tap water bad for you?
No, tap water in the UK is not bad for you. The water here undergoes rigorous, regular testing and treatment processes that ensure it is fit for consumption. It's treated with safe levels of chlorine for disinfection, and any trace amounts of metals or bacteria are typically minuscule and not harmful. Furthermore, tap water contains essential minerals like calcium, magnesium, sodium, and sulphate, which are beneficial for health. Therefore, you can drink UK tap water without any concerns, unless advised otherwise by your water provider.
The government recommends you drink 6-8 glasses of water per day - so drink up!
How does tap water reach your home?
Tap water in the United Kingdom reaches your home through a complex system of pipes and treatment facilities. The journey begins with the collection of water from various sources such as rivers, reservoirs, or underground wells across the UK. This water is then transported to water treatment plants where it undergoes rigorous purification and disinfection processes to ensure it's safe for consumption.
Once treated, the water is then distributed to households through an extensive network of water mains. Depending on the geographical layout and elevation, this water is either pumped or flows naturally due to gravity towards homes and businesses. Upon reaching your property, the water travels through a service pipe, typically ¾ inches or larger, which leads into your home and eventually to your tap.
While the exact process can vary based on local infrastructure and water source, every step is carefully monitored and regulated by the Drinking Water Inspectorate in the UK to ensure that the water reaching your tap is clean and safe to drink.
Why is my tap water cloudy?
Seeing cloudy water coming out of your tap can be a bit alarming. If you're wondering why this is happening, the answer could be due to changes in the piping system or some type of sediment buildup. Too much air may have recently been released from the pipes and, when combined with the pressure of flowing water, creates tiny bubbles. Or it could mean that some minerals have been dissolved in the water during its flow, creating a milky appearance.
The best way to find out if it's just air bubbles is to sit a glass of cloudy water down and wait a minute. If the water clears, it is just air. If it's still murky, you should contact your local water supplier to inform them.
Is tap water good for you?
Yes, drinking tap water is good for you and contributes to good health. Staying adequately hydrated keeps your body functioning in many ways, including:
- Digestion
- Maintaining healthy skin
- Lubricating the joints
- Regulating body temperature
- Circulating nutrients throughout the body
- Excreting waste
- Facilitating nutrient absorption
What's more, staying hydrated can improve concentration, energy levels, and even mood.
Conclusion
Tap water is a precious resource that plays an important role in all of our lives. From collecting to treating the water to transporting it to our homes, much effort is made to keep the UK's tap water clean, safe and healthy. However, if you want an upgrade from tap water, our Quantum 4-in-1 and Platinum 4-in-1 taps both come with an advanced filter designed to remove lingering impurities and unwanted minerals from tap water, giving you crystal-clear, chilled, filtered water straight from your tap.
Plus, enjoy instant boiling water at the turn of a handle. Find out more about how a boiling water tap works.
Brewing the perfect cup of tea is no easy task. The temperature at which you brew your tea can make a huge difference in how it tastes, and while getting it right requires some trial and error, having a few tea brewing guidelines to start with can help extract maximum flavour out of your hot drink.
In this blog post, we’ll explore the ideal brewing temperature for different types of tea, so that you can create perfectly balanced drinks every time. From delicate blooming teas to robust pu-erh teas, here are all the tips and tricks you need to know about brewing at just the right temp.
The Perfect Temperature for Different Teas
Let’s dive straight in. For a quick reference, our tea temperature chart below provides the ideal brew temperatures and times for the most popular teas.
| Tea | Temperature (Celsius) | Time | With milk? |
|---|---|---|---|
| Green Tea | 75-80°C | 1-3 minutes | Without |
| Black Tea | 95-98°C | 2-4 minutes | with/without |
| English Breakfast Tea | 95-98°C | 2-4 minutes | With |
| Oolong Tea | 82-96°C | 3-4 minutes | Without |
| White Tea | 74-80°C | 1-3 minutes | Without |
| Chai Tea | 98°C | 5 minutes | With |
| Earl Grey Tea | 98°C | 3 minutes | with/without |
| Pu'erh Tea | 85-98°C | 3 minutes | With |
| Jasmine Tea | 85°C | 2 minutes | Without |
| Herbal Tea | 95-98°C | 5 minutes | Without |
| Rooibos Tea | 95-98°C | 2-3 minutes | with/without |
How does temperature affect the tea you brew?
Ah, tea. We all know the warmth and comfort that comes with sipping a hot cup of your favourite brew. But have you ever stopped to think about what exactly is happening when you add hot water to your tea? Water temperature can play a major role in how successful your cup of tea turns out, so if you’re looking to get the very best flavour from every cup, it might be worth taking a closer look at why temperature matters for brewing the perfect cuppa...
Brewing tea at too high of a temperature can lead to a bitter, astringent taste, while brewing it at too low of a temperature can result in a weak cup of tea with no flavour. The ideal brewing temperatures for different types of tea vary based on their origin and type, and, as you can see from the table above, it's easy to get it wrong if you apply a one-size-fits-all approach.
Green tea
Green tea has long been a global staple due to its health benefits and gentle taste. It’s made from the leaves of the Camellia sinensis plant, a native of East Asia that has spread throughout the world in hot, humid climates. The leaves are withered, steamed, rolled and dried depending on how they will be processed later. When brewed, green tea has a light yellow-green colour and a slightly grassy or vegetal flavour that can be balanced with a teaspoon of honey or sugar.
Different types of green teas, such as matcha, sencha, and bancha, require specific brewing temperatures, although it is generally recommended to use water between 75-80°C and steep for 2 to 4 minutes to preserve the delicate nature of green teas.
Brewing green tea is pretty straightforward if you put in some effort. If you're using a standard kettle (without temperature control), you can simply let it boil and then wait a few minutes before you pour. Alternatively, you could adjust the settings on your boiling water tap or temperature-controlled kettle for more accuracy. Many tea connoisseurs recommend you use filtered water to preserve the flavour - fortunately our taps come with filters to remove impurities to make this easier.

Black tea
Black tea is the most popular type of tea in many parts of the world, and it's made from the same Camellia sinensis plant as green tea. However, it's processed differently; The leaves undergo a more extensive oxidation process which gives black tea its characteristic dark colour and robust flavour. Black tea (used in blends like Earl Grey, English Breakfast and Assam) tends to be stronger than green, white, herbal and oolong teas, so is it usually enjoyed with a dash of milk and/or sugar to balance the flavour.
Brewing black tea is quite straightforward. Heat your water to 95-98°C, and let it steep for 2-4 minutes depending on how strong you like it. This will give you a cup of bold, full-bodied tea that's sure to satisfy even the most ardent tea drinkers. Plus you can rest assured that the notion of 'too much tea' only applies if you're drinking over 5 cups a day, and even then the impact on health is negligible for most people - so sip away and enjoy.
Breakfast tea
Breakfast tea is a classic, robust blend of black teas from various estates and has been a staple of the British home and workplace since the days of the British Empire. It typically draws on teas from India, Sri Lanka, Kenya and China. It's best known for its strong, bold flavour and dark colour, designed to invigorate and energise in the morning, traditionally served with milk and sugar.
This tea is best brewed with near-boiling water, around 98°C. If you're using a standard kettle, bring it to a boil and then wait a minute before pouring so that it's had time to cool down for a moment.
Milk or sugar first?
The age-old debate of whether to add milk or sugar first to your tea has been a topic of conversation among tea aficionados for centuries. The truth is, it largely comes down to personal preference. Traditionalists often argue that adding milk first can prevent the boiling water from cracking the delicate china cups, although these days our cupware is more than capable of handling high temperatures. Adding milk first also allows the milk to be gently warmed by the tea, creating a smoother blend.
On the other hand, those who prefer adding sugar first say it allows the sugar to dissolve more evenly before the milk is added, which may be beneficial for achieving a perfectly sweet balance. Ultimately, neither method is right or wrong—it’s all about how you best enjoy your cup of tea.
Oolong tea
Oolong tea is a traditional Chinese tea that sits somewhere between green and black tea. Oolong tea also falls between green and black tea in terms of temperature and steeping duration, with a recommended water temperature between 82 and 96°C and a steeping time of 3-4 minutes. Because of this wide range, it's best to check the instructions provided (hopefully) by the specific brand you are buying from.
Like most other teas, it is made from the buds and leaves of Camellia sinensis and can range from light and floral to a dark and roasted taste that’s rich and complex in flavour. The way oolong is produced has a lot to do with the flavour profile as well. Oolong undergoes a partial fermentation process which helps bring out its many layers of taste, and is fermented for longer than green tea but not as long as black tea.
White tea
White tea is one of the most gentle yet flavourful varieties of tea. Green and white teas, known for their delicate leaves, require careful brewing to avoid bitterness and yield more flavour. White tea is made from the unopened buds and young leaves of Camellia sinensis and undergoes minimal processing compared to other teas. This means that white tea boasts higher levels of antioxidants and a wide range of other health benefits.
For brewing, you need to use hot but not boiling water to ensure maximum flavour and aroma retention - around 74-80°C is the ideal temperature range. Use a generous amount of white tea leaves per cup (2g -3g) and steep for 1-3 minutes until the desired strength has been reached. If the taste is too light for your liking, don’t increase steeping time as this can lead to bitterness; instead, simply add more tea leaves when making your next cup.
Chai tea
Chai tea is a spiced, full-flavoured black tea that originated in the Indian subcontinent. Chai usually contains ginger, cardamom, cloves, cinnamon and sometimes even star anise or fennel and is typically brewed in milk. To make a cup of chai tea, it is best to start with a high-quality blend containing a variety of spices - or follow a recipe online to make your own. To brew chai, add one heaped teaspoon of the blend per cup into a mug and add hot water; for a stronger cup, use more tea. Let the tea steep for 3-5 minutes before adding milk or cream and any additional sweeteners. Alternatively, prepare it on a stove/hob by adding the spices or blend to milk and allowing it to gradually heat up before straining.
Earl Grey
Earl Grey is a black tea that has citrus overtones thanks to its infusion with bergamot rind oil, creating a unique flavour that pairs well with afternoon tea. To brew Earl Grey, use one teaspoon of loose-leaf tea or one teabag per cup and pour 98°C water over it. Allow it to steep for 3-5 minutes, depending on your preferred strength, before straining the leaves or removing the bag. Some people also enjoy adding a squeeze of lemon to enhance the citrus notes in Earl Grey.
Pu'erh tea
Pu'erh tea, often referred to as "black tea" in parts of the Far East, originates from the Yunnan province in China. Named after the market town where it was first developed, Pu'erh tea undergoes a unique post-fermentation process. After the tea leaves are dried and rolled, they are subjected to microbial fermentation, which leads to a deepening of colour and a transformation in flavour. This process allows Pu'erh teas to age like fine wines, with some leaves maintaining their freshness for up to fifty years.
Pu'erh tea can be found in both loose-leaf form and compressed bricks, and it can be made from either green or black tea leaves. The tea is made from a larger leaf strain of Camellia sinensis known as Dayeh. These leaves are harvested from ancient trees, some of which are between 500 and 1000 years old, primarily grown in temperate regions.
When brewing Pu'erh tea, it is often steeped in a Yixing teapot or a gaiwan tea bowl and prepared gongfu style. High-quality Pu'erh leaves are rinsed quickly with hot water to 'awaken' them before being steeped at 85-98°C for 1-2 minutes initially and longer for subsequent infusions. This method means you can enjoy multiple steepings, each unveiling new layers of flavour.
Jasmine tea
Jasmine tea combines the fragrant aroma of common Jasmine flowers (Jasminum officinale) with the smooth flavour of green tea leaves. Traditionally, Jasmine tea is brewed using two steps: first, jasmine flowers are placed in a teapot with dry green tea leaves, allowing their scent to infuse into the leaves for several hours. 85°C water is poured over the leaves and it's then left to steep for 2-3 minutes, infusing them with a delicate floral flavour. However, if you want to skip to the good part you can pick up ready-made Jasmine teabags from the shop, just make sure you avoid any artificial flavourings.
Herbal tea
A 'herbal' tea is any tea that is made by infusing herbs, spices, fruits or other plant materials with hot water. These teas generally do not contain any leaves from the Camellia sinensis plant and so are technically not tea but are actually 'tisanes' or herbal infusions.
There are countless varieties of herbal tea available, each with its own unique health benefits and flavour profiles. Some popular examples include chamomile, peppermint, ginger, lemongrass, and rooibos. Herbal teas can be enjoyed hot or cold and brewing instructions will vary based on the specific ingredients used - it might be wise to check the instructions on the packet. Generally, though, most of these teas can be steeped in 98°C water for 5 minutes before being strained.

Rooibos tea
Rooibos tea, also known as red bush tea, is an herbal beverage made from the shrub Aspalathus linearis that is popular in South Africa. It has a light, earthy and sweet flavour with no caffeine and it's high in antioxidants. To make a cup of Rooibos tea, use one teaspoon of loose-leaf tea or a teabag per cup and steep in 98°C water for 2-3 minutes. Some people also enjoy adding milk, honey or lemon to enhance the flavour.
How to avoid bitter tea
To avoid bitter tea, it's essential to follow a few key guidelines during the brewing process. First and foremost, pay close attention to the water temperature; using boiling water can scorch delicate leaves, particularly with green and white teas, resulting in a bitter taste. Aim to use water that is within the recommended temperature range for each tea type.
Secondly, be mindful of the steeping time. Over-steeping tea leaves can extract tannins, which contribute to a bitter flavour. Follow the suggested steeping times carefully and adjust them based on your taste preference. Make sure to use an appropriate amount of tea leaves, as using too few can cause over-extraction, and too many can lead to an overly strong brew. Finally, quality matters; always opt for high-quality tea leaves from reputable sources to ensure the best possible flavour without bitterness.
Conclusion
In conclusion, knowing the optimal temperature for tea brewing is essential for unlocking the flavorful and aromatic potential of your tea. Using the correct temperature for different types of tea is key to extracting the most flavour and avoiding any unwanted bitterness, especially for delicate green and white teas. While some proponents suggest steeping times should be reduced with hotter water, there is a balance to be had between ensuring you get a hot, yet enjoyable brew.
Ultimately, it’s all down to personal preference. That said, keeping in mind the number of factors at play here, it’s always good practice to start with lower temperatures between 80-95°C. Then experiment to find the perfect temperature through trial and error. With this method, it shouldn’t take long to discover how best to produce your own perfectly brewed cup of tea.
Did you know you can change the temperature of our boiling water taps at the push of a button? Our touch-screen boiler allows you to set your tap to between 75 and 98°C. Find out more about how a boiling water tap works.
Kitchens get a lot of use, and with all the activity, it's no wonder that they can quickly become a mess. A deep clean is necessary to tackle all the built-up dirt and grime, but it can be daunting to know where to start. This comprehensive checklist will help you make sure your kitchen is sparkling from top to bottom!
Cleaning appliances:
Refrigerator

Deep cleaning a refrigerator can be a time-consuming process, but the results are worth it! Begin by unplugging the refrigerator, and removing all items from the shelves. Depending on what type of spill or mess you’re trying to clean up, use warm soap and water or household cleaners to address any tough stains. For more general cleaning, a simple solution of vinegar and water is an effective way to remove residue and keep your fridge smelling fresh.
Be sure to thoroughly rinse all surfaces with warm water before replacing any food items in the fridge. To get into tight crevices, use Q-tips or a soft toothbrush to help reach those hard-to-clean areas. Lastly, don’t forget to restock purified water for filtering purposes if you have access to such a device! A deep clean makes for healthy meals and safe storage of food in the kitchen over time - so take the time to make it happen!
Microwave
Deep cleaning a kitchen microwave doesn't have to be a daunting task. All it takes is some simple ingredients, a sponge, and a bit of elbow grease! To begin, mix two tablespoons of bicarbonate of soda and two tablespoons of white vinegar with one cup of hot water. Dip the sponge into the mixture and use it to scrub any sticky residue off the walls. Be sure not to leave any streak marks!
Once done, wipe down the interior with a damp cloth to remove any remaining dirt. Lastly, if your microwave has an odour, add a slice of lemon or lime and two cups of water into the cavity. Run it on full power for six minutes to be rid of bad smells altogether! Cleaning your microwave can now be as easy as pie – no more mess or stress!
Oven

Deep cleaning an oven can be a daunting task, especially when you consider all the time and effort involved. Fortunately, it's not as difficult as it seems! Start by taking out any racks and cleaning them separately with warm soapy water. Next, vacuum the inside of your oven to remove any loose particles or crumbs that might be lingering inside. You can then begin to deep clean by applying some baking soda to the bottom of your oven and mixing it with warm water until it creates a paste-like consistency. Apply this paste liberally over the entire inside and let it sit for up to an hour before scrubbing away with a notable bristle brush.
Afterwards, use a soapy cloth to completely remove the paste from the surfaces and give your kitchen oven one last wipe down before putting it in the racks and turning on your oven for about 30 minutes at 200 degrees Fahrenheit. This should finish off your deep cleaning with no further effort necessary!
Stovetop
Deep cleaning of your stovetop is an important part of kitchen maintenance. Often, food spills and kitchen grease can easily become stuck to the surface of your stovetop over time, making it difficult to keep clean. Fortunately, with the right steps and materials, you can restore your kitchen stovetop to a sparkling state in next to no time.
Start by taking off all grates and burner plates from the oven and use a damp cloth or sponge with dish soap to wipe away any residue or food spills. Next, sprinkle baking soda over the burners before using a mixture of water and white vinegar to create a paste that will help remove more stubborn marks. Leave it on for several minutes before wiping it off with a clean cloth. As a finishing touch, consider spraying on some all-purpose kitchen cleaners for additional shine.
Toaster & kettle
Cleaning kitchen appliances, such as a toaster and kettle can be an intimidating task given the small crevices and hard-to-reach places. However, with some time, elbow grease, and basic supplies like baking soda and vinegar, it doesn't have to be nerve-wracking! Begin by unplugging both appliances and wiping down their exterior surfaces with a damp cloth or rag. Next, tackle the interior of the toaster: remove the removable parts (crumb tray inside for example) to get at all the hidden areas. Place it in your sink and sprinkle on some baking soda followed by a splash of white vinegar. Allow this solution to sit for two minutes before rinsing it off.
Finally, take out the kettle from its base, fill it up with equal parts vinegar and water, boil it, and then let it sit for 30 minutes. Once that is done take an old toothbrush or scrub brush to knock off any remaining build-up. Then rinse thoroughly with clean water before replacing its base. With these steps, you can get your kitchen appliances squeaky clean again!
Washing machine

Keeping kitchen appliances clean is an important part of kitchen maintenance, and the washing machine is no exception. Deep cleaning a washing machine is an easy task that helps maintain your laundry appliance and ensure it runs smoothly. To start, remove all of the items from inside and around the machine. Check the lint trap for buildup, and vacuum the nozzle using an attachment if needed. Place something underneath your washing machine to prevent water damage when cleaning.
In a bucket, combine hot water with an appropriate non-toxic cleaner, then use a sponge or cloth to gently scrub down all of the exterior surfaces of your washing machine, paying special attention to any stubborn dirt spots. Then pour clean water over the front panel and open up the detergent drawer to properly rinse it out.
Finally, dry off all surfaces with a soft cloth or towel. Deep cleaning your washing machine will keep it hygienic and help it generate quality results by removing any built-up residue or gunk that could deteriorate performance in the long run.
Dishwasher

Deep cleaning a dishwasher is an often overlooked kitchen chore that should be part of any regular kitchen cleaning routine. Cleaning a dishwasher can be quite tricky, as most of us never think to look inside the unit itself. Many people forget about deep cleaning their dishwashers until it's too late and the buildup of debris has caused a foul odour or clogs. That is why it is important to deep clean your dishwasher once every three months - even if you run it regularly!
To deep clean a dishwasher, start by using warm water and mild detergent to wipe down the interior parts. For tougher dirt and gunk, use a mixture of vinegar and baking soda to scrub off any discolourations or residues that might have built up over time. After scrubbing, leave the door open for thirty minutes and allow air circulation from outside to help remove any remaining dirt.
Lastly, run through an empty wash cycle with standard detergent to finish off the cleaning process. With regular maintenance like this, you can make sure your dishwasher stays in optimal condition for years to come!
Cleaning surfaces:
Worktops
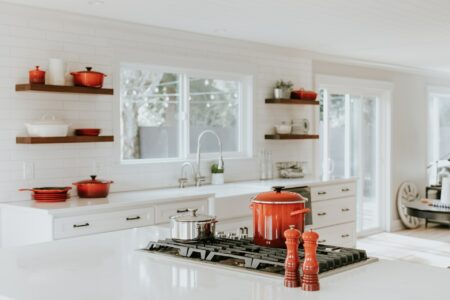
Deep cleaning of your kitchen worktop is essential as it prevents bacteria and germs from lingering on surfaces, leaving your space sparkling clean. The best way to deep clean kitchen worktops is to start with some warm water and a mild soap or detergent. Gently scrub the surface with a soft brush following the grain of the material before wiping it off with a damp cloth. You can use all-purpose spray cleaners for removing stubborn greasy stains, but make sure you rinse afterwards as the remaining chemicals could impact the worktop's finish.
For tougher marks, baking soda can be sprinkled on and then scrubbed off for an extra cleaning boost. Finally, finish off with a streak-free cloth and a residue-free solution to add lustre and shine and leave you feeling satisfied with a perfectly spotless kitchen worktop!
Kitchen cupboards

Kitchen cupboards are used frequently and can easily collect dirt, grime, and germs that can lead to illness or allergy flare-ups. Deep cleaning of these cupboards can help ensure a healthier kitchen environment. To deep clean kitchen cupboards, first, remove all items from the cupboards and put them in another location. Next, wipe the shelves with a warm damp cloth or sponge, adding an all-purpose cleaner if needed. If there are any tough stains or areas of build-up, use a scrubbing brush with a more concentrated cleaner to tackle them.
After wiping down the shelves, use a toothbrush to get into the hard-to-reach crevices of handles, knobs and other hardware. Once all surfaces have been cleaned thoroughly, dry everything off with a towel then vacuum out any remaining dirt in the cupboard using an attachment nozzle.
Finally, return all the items to their designated cupboard space - making sure you dispose of any expired food - for a sparkling and hygienic kitchen!
Splashback

Deep cleaning of the kitchen splashback is an essential household activity as it will significantly improve the look and feel of the kitchen. It also has health and safety benefits, as a deep clean will help to prevent bacteria and grime from building up on surfaces and potentially causing harm.
To deep clean your kitchen splashback you first need to remove extra items such as cups and crockery and clear away any loose dirt or dust. Then apply a cleaning solution specifically designed for kitchen surfaces, one that cuts through grease without damaging the surface itself, before scrubbing with a sponge or soft brush to ensure all dirt is removed. To finish, rinse off with warm water and then dry with a soft cloth or paper towel. Following these simple steps will ensure your splashback is looking as good as new!
Windows
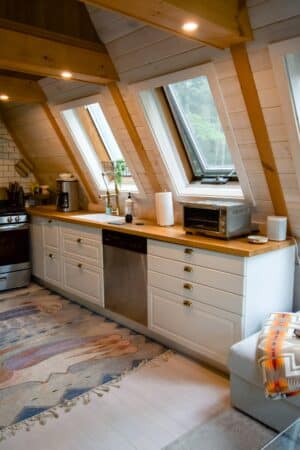
Deep cleaning kitchen windows can be a time-consuming yet necessary task, as it helps keep all windows looking spotless. There are several easy steps that anyone can follow to get the job done effectively.
Firstly, gather your cleaning materials – a bucket of warm water mixed with a mild detergent, a non-abrasive sponge and window spray. Spray the window and wipe down with the sponge lightly if dirt or grease has built up over time. Rinse off with clean water, before drying completely with a cloth or lint-free paper towel. Finally, use glass cleaner sprayed onto newspaper to give an extra shine and sparkle to your sparklingly clean kitchen windows. Taking these steps will ensure that your windows remain clean for longer and look great at the same time!
Cleaning your kitchen sink & tap
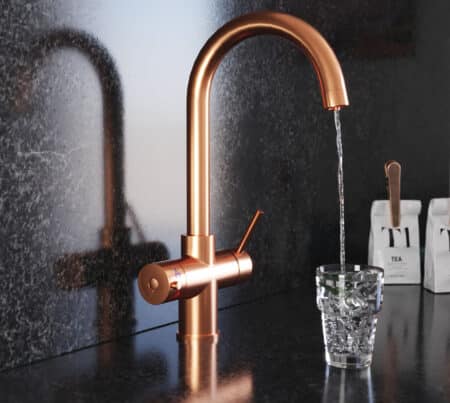
Deep cleaning your kitchen sink and tap is an important part of hygiene at home. The best way to do it is by using a combination of warm water and lemon juice; the acidic nature of the lemon will help kill bacteria and leave your sink looking crisp and clean. It’s also important to scrub away any debris or residue that is stuck to the sink or tap, especially around the edges of the bowl or spout.
When finished, you should rinse off both surfaces with cold water and make sure that all chemicals are washed away properly. To prevent future build-up, you can also add a thin layer of vegetable oil on everything you finish cleaning as this helps repel dirt from sticking in the first place. With these easy steps, you’ll have a sparkling clean kitchen sink and kitchen tap in no time.
Mistakes to avoid when deep cleaning your kitchen

Don't forget to empty your fridge and freezer
This may seem like a no-brainer, but you'd be surprised how many people forget to do this simple step. Emptying your fridge and freezer will not only make it easier to clean, but it will also help you get rid of any food that's past its expiration date. So before you start scrubbing away, be sure to clear out your fridge and freezer. You'll be glad you did!
Don't use harsh chemicals on your countertops
Your countertops are one of the most important surfaces in your kitchen, so you'll want to be extra careful when cleaning them. Harsh chemicals can damage the finish on your countertops, so it's best to stick with gentle, non-abrasive cleaners. If you're not sure what kind of cleaner to use, ask a professional for advice.
Don't neglect your small appliances
Your coffee maker, blender, and toaster oven may not seem like they need to be cleaned very often, but over time they can accumulate dust and grime. To keep them in tip-top shape, be sure to give them a good cleaning at least once a month. And don't forget about those hard-to-reach places! Use a toothbrush or cotton swab to get at those pesky nooks and crannies.
FAQs
How often should you deep clean your kitchen?
Keeping your kitchen clean and tidy is essential for a healthy home and lifestyle. Deep cleaning of the kitchen is an important part of maintaining this cleanliness. How often you deep clean your kitchen will vary depending on many factors, such as the size of your family, the amount of time spent in the kitchen and how much food is cooked at home.
Ideally, you should aim to do a thorough deep clean every four to six weeks. This allows dirt, dust and grime to be eliminated before it builds up too much and affects the level of hygiene in the room. If your family enjoys cooking large meals or has frequent visitors over for dinner, increasing this deep clean frequency may be necessary. Take time to properly assess what fits best for your lifestyle – after all, having a clean kitchen means peace of mind!
Where should you start when you deep clean a kitchen?
Starting a deep clean of a kitchen can be intimidating, especially if you want to make sure everything is sparkling clean. The best place to start is usually with the floors and cupboards, as they are the two areas that tend to accumulate the most dirt and dust. Sweep or mop the floor, paying close attention to corners and hard-to-reach places, then move on to wiping down all surfaces in your kitchen - this includes any cabinets or shelves that may have accumulated food particles or grime.
Don't forget about small appliances too; give them a thorough cleaning and make sure their filters are changed too. After this, you just need to organize your belongings and put away items such as spices, dishes and utensils into designated cupboards or drawers. With this foundation laid down, you can start work on anything else in your kitchen – from polishing countertops to scrubbing walls and windows.
Conclusion
Kitchen deep cleaning can be daunting, but it's worth the effort. Follow our comprehensive kitchen deep clean checklist to make the process a little less overwhelming and more manageable. Tackle one task at a time and before you know it, your kitchen will be sparkling clean! Have you ever done a full kitchen deep clean? If so, what tips would you add to this list?
Upgrade your kitchen sink with a boiling water tap. Find out more about how a boiling water tap works here.
The kitchen sink is one of the most-used areas of the home, so it's no surprise that sometimes drains get clogged. If you've tried using a plunger but your sink still isn't draining properly, don't worry - there are plenty of other methods you can try. In this blog post, we'll outline five easy ways to clear a stubborn kitchen sink drain. Keep reading to learn more!
Why has my kitchen sink become clogged?
One of the most common causes of a clogged kitchen sink is food waste. When you wash dishes or prepare food, bits of grease, fat, and food particles can end up going down the drain. Over time, these particles can build up and cause a blockage. To prevent this from happening, make sure to scrape food scraps into the bin before washing dishes. You should also avoid pouring cooking oil or grease down the drain.
Another common cause of clogged kitchen sinks is hair. Every time you wash your hands, tiny strands of hair fall into the sink and accumulate over time. These strands can form a tangled mass that blocks the drain. To prevent hair from clogging your sink, invest in a drain screen or hair catcher. These devices will catch hair before it has a chance to go down the drain and cause problems.
Lastly, soap scum can also contribute to a clogged sink. Soap scum is a film that builds up on soap bars over time. This film can break off into small pieces and travel down the drain, where it will eventually harden and form a blockage. The best way to prevent soap scum from causing problems is to clean your soap dispensers regularly.
How to unblock a kitchen sink drain using:
1) Boiling water
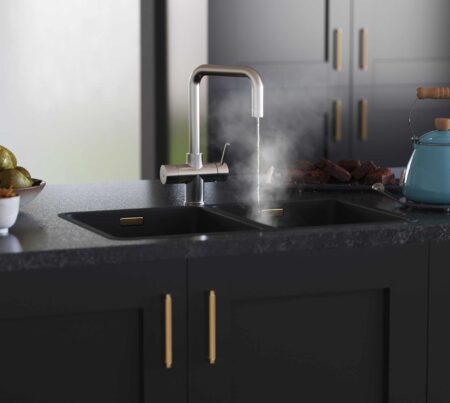
Unblocking a kitchen sink drain can be a hassle and require time-consuming and expensive chemicals, but boiling water is an easy solution anyone can use. All it takes is boiling tap water and the right process to sort out blocked pipes. Boiling water contains properties that can dissolve or break down clogged debris, letting the sink drain freely again.
Boiling water should be used with caution since it is hot and could burn if handled carelessly. As a rule of thumb, make sure to pour boiling water slowly into the affected area of the kitchen sink, allowing it to sit in the pipes so it can do its job before flushing the system with cold water for additional help. Doing this will help unblock your kitchen sink drain quickly and efficiently. A boiling water tap with a pull-out hose makes this even easier, as you can guide the boiling water directly into the drain to help break down debris more effectively.
We recommend checking the material of your pipes to ensure boiling water won't damage them.
2) Baking soda & vinegar
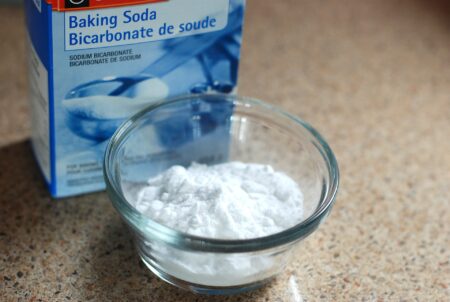
Unclogging a kitchen sink drain can be an annoying but easy task with the right tools at your disposal. Using baking soda and vinegar reduces the risk of damaging your pipes or using any harsh chemicals that could harm you or your family.
To unclog your kitchen sink, start by pouring a cup of baking soda down the drain followed by one cup of vinegar and immediately place a stopper in the sink to allow the mixture two or three minutes to sit and dissolve some of the blockages. After two or three minutes plus, it's time to pour one litre of boiling water into the sink for a few seconds before removing the plug. Doing this procedure should help dislodge most clogs in kitchen sinks and leave them clear.
3) A plunger
Unclogging a kitchen sink drain is a common challenge that many people face. The most effective way to do it is to use a plunger. To begin, fill the kitchen sink with several inches of hot water and then place the plunger over the drain in such a position to ensure that it has good suction. Pump vigorously several times and then quickly remove the plunger from the drain. This should create an airtight seal which could help push any clogged material out of the pipe. If it fails on the first try, repeat up to 10 or 12 times until the clog dislodges.
4) Chemical pipe uncloggers
Unclogging a kitchen sink drain may seem like a daunting task, but with the right tools and some elbow grease, it can be done easily and effectively. Chemical pipe uncloggers are an excellent option for those looking to tackle their clogged sink issue quickly.
All you need to do is pour the chemical solution down into the drain, allow it to sit for about half an hour and then flush out the clogged material with hot water. It's important to remember that this method doesn't always work, as stubborn build-ups of grease or large objects may still require manual removal from your plumbing system. Nevertheless, this simple procedure is often enough to clear up most kitchen sink clogs without any hassle.
5) A plumber’s snake
A plumber's snake, or drain auger, is one of the most effective methods for removing debris from a sink drain. To use this tool, begin by loosening the lock nut on the snake and positioning the tip of the cable into the stopped-up pipe. Put enough tension on the cable by turning it counterclockwise. Once you feel the obstruction, give an extra push and turn until it breaks up. Then continue to rotate and fish in and out until all of the material is removed from your sink drain.
After that, feed in some water while running through the snake repeatedly to make sure that your drain is completely clear. Finally, reassemble your parts as they were before; you should now have an unclogged kitchen sink!
How to stop your drain from becoming clogged
Preventing a clogged drain can save you time, money, and a whole lot of frustration. The most important step in avoiding a clogged drain is to be mindful of what goes down the sink. Kitchen drains are especially prone to becoming clogged due to food particles that can stick to the pipes. These bits and pieces build up over time and result in slow draining or even a complete blockage.
To prevent this from happening, never pour oil or grease down your kitchen drain as it will coat the pipes and eventually solidify. Also, scrape plates into the garbage before rinsing dishes off in the sink - this stops all food debris from going down the drain.
Finally, every few months use boiling water or homemade solutions such as vinegar and baking soda to clean out your kitchen sinks! Taking these simple steps can help ensure that your drains remain unclogged for years to come.
Conclusion
All of these methods are easy and can be completed in about an hour. If your kitchen sink is still draining slowly after trying these methods, it’s time to call a professional. Thanks for reading our blog post on how to clear a stubborn kitchen sink drain!
Upgrade your kitchen sink with a boiling water tap. Find out more about how a boiling water tap works here.